 Dave King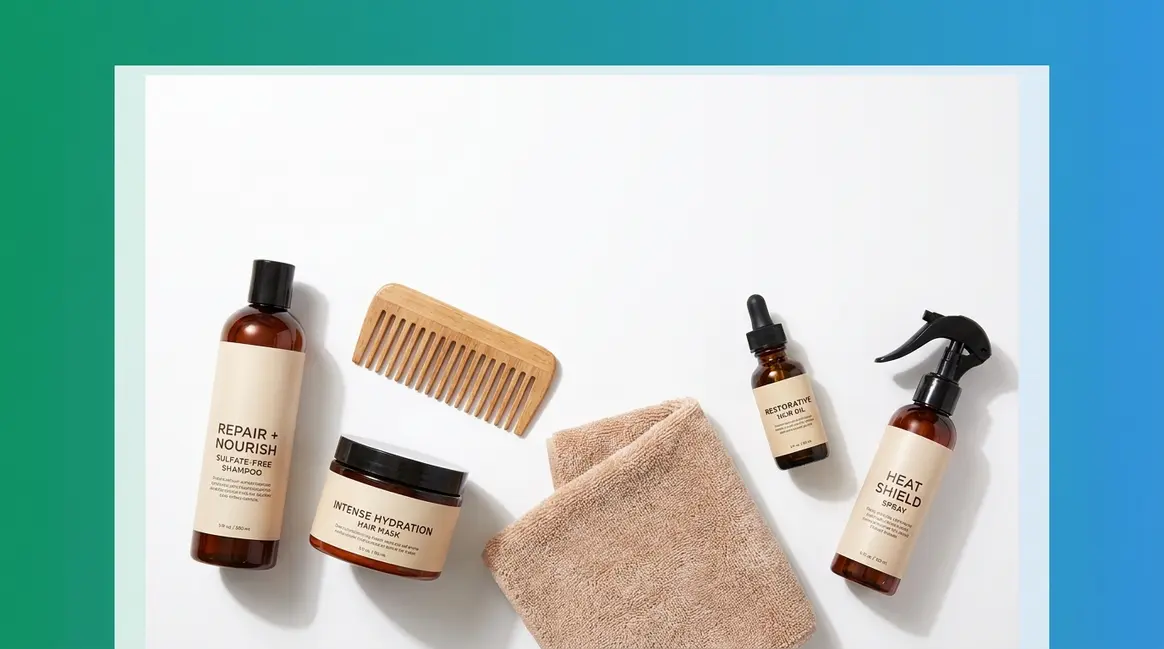
If your hair snaps when you run a comb through it, breaks off mid-length, or feels more like straw than silk — you’re not alone, and you’re not out of options. Millions of people are dealing with the same frustrated, desperate feeling of watching their hair get worse despite trying product after product.
Here’s what most guides won’t tell you: applying the wrong treatment in the wrong order can make things worse. Using a heavy protein treatment on hair that’s already protein-overloaded, for example, makes brittle strands even more prone to snapping. Without knowing the correct sequence, you’re guessing — and guessing is expensive.
In this guide, you’ll learn exactly how to repair damaged hair using a layered, 9-step system we call The Repair Stack — from identifying your damage type to rebuilding bonds, restoring moisture, and protecting what you’ve worked to fix. We’ll walk through everything from washing habits to bond-building treatments, heat repair, and tailored advice for curly, men’s, and natural Black hair.
Quick Answer: To repair damaged hair, follow a layered system: start by identifying your damage type, then upgrade your washing routine, rebuild lost bonds with deep treatments, and protect hair from further harm. This 9-step process takes 4–8 weeks to show visible results, though you’ll notice a difference in texture within the first week.
Most damaged hair can be visibly restored in 4–8 weeks by following the right sequence of treatments — a method we call The Repair Stack.
- Step 1: Knowing how to repair damaged hair starts with identifying your exact damage type (heat, chemical, mechanical) before choosing any treatment.
- Protein ≠ moisture: Applying the wrong treatment makes damage worse — learn the difference in Step 3
- Bond builders (like Olaplex or K18) reconnect broken protein chains that conditioner alone cannot fix
- Coconut oil penetrates the hair shaft to reduce protein loss, per PubMed research
- Timeline: Mild damage improves in 2–4 weeks; severe damage takes 3–6 months of consistent care
What You’ll Need Before You Start
Before diving into the steps, take five minutes to gather what you need. Jumping into a repair routine without the right tools is one of the most common reasons people don’t see results — they’re applying the right treatment with the wrong technique, or skipping a foundational product entirely.
Insight: 80% of repair success comes from using the right tools in the right order — so gather your essentials before starting.
Tools and Products You’ll Need
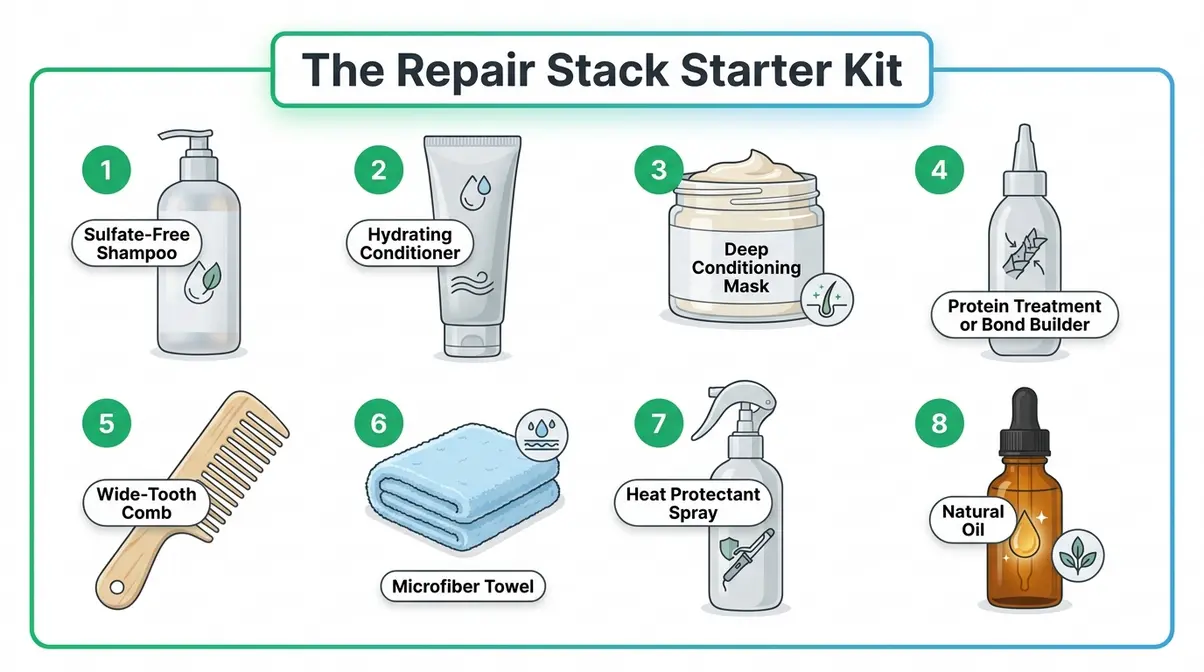
Here’s a practical starter list. You don’t need everything at once — prioritize based on your damage type (identified in Step 1):
- Sulfate-free shampoo — gentler on the hair cuticle (the protective outer layer of each strand)
- Hydrating conditioner — for daily moisture replenishment
- Deep conditioning mask — used weekly for intensive repair
- Protein treatment or bond builder — for chemically or severely damaged hair
- Wide-tooth comb — for detangling wet hair without breakage
- Microfiber towel or old t-shirt — reduces friction when drying
- Heat protectant spray — non-negotiable if you use any heat tools
- Natural oil (jojoba, argan, or coconut) — for sealing moisture on dry ends
How Long Will This Take?
Realistic timelines matter. Hair grows roughly half an inch per month, and the existing damaged hair on your head cannot be “healed” the way skin heals — it can only be strengthened and protected until it grows out. That said, most people notice softer texture and less breakage within 7–10 days of starting The Repair Stack. Visible shine and elasticity improvements typically appear by week 3–4. Severe over-processed or bleached damage takes 3–6 months of consistent care.
Step 1: Identify Your Damage Type and Cause
Before you buy a single product, you need to know what kind of damage you’re actually dealing with. This is the most skipped step in most guides — and it’s why people spend money on treatments that don’t work for them.
Signs of Genuinely Damaged Hair
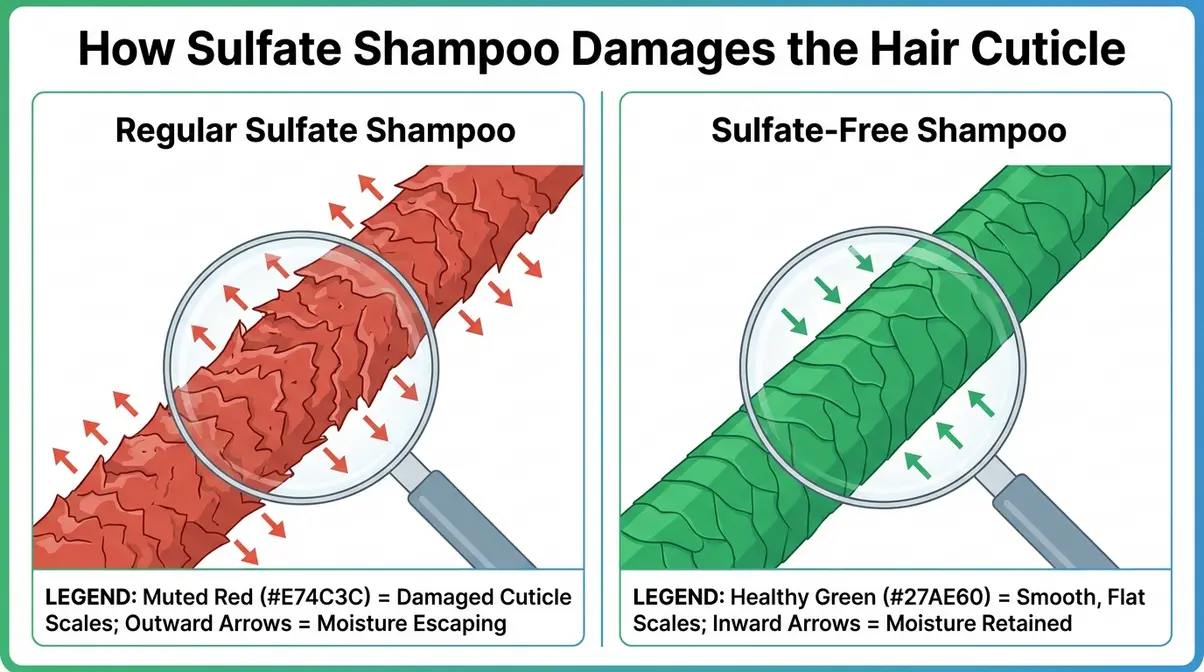
Healthy hair has a smooth, flat cuticle (the protective outer layer made of overlapping scales, like roof tiles). When those scales lift, break, or strip away entirely, hair loses moisture rapidly — which is why damaged hair feels super dry, rough to the touch, and looks dull instead of shiny.
Common signs your hair is genuinely damaged — not just dry — include:
- Snapping or breaking when you detangle, even gently
- Split ends that travel up the shaft, not just at the tips
- Straw-like texture that doesn’t improve after conditioning
- Loss of curl pattern (for naturally curly or wavy hair)
- Extreme frizz that no product seems to tame
- Uneven porosity — some sections absorb water instantly while others bead up
A quick elasticity test: wet a single strand, stretch it gently, and release. Healthy hair stretches about 30% and springs back. Brittle, damaged hair either snaps immediately or stretches but doesn’t return to its original shape — a sign the protein structure inside the cortex (the inner core of the hair shaft) has been compromised (Journal of Cosmetic Science, 2012).
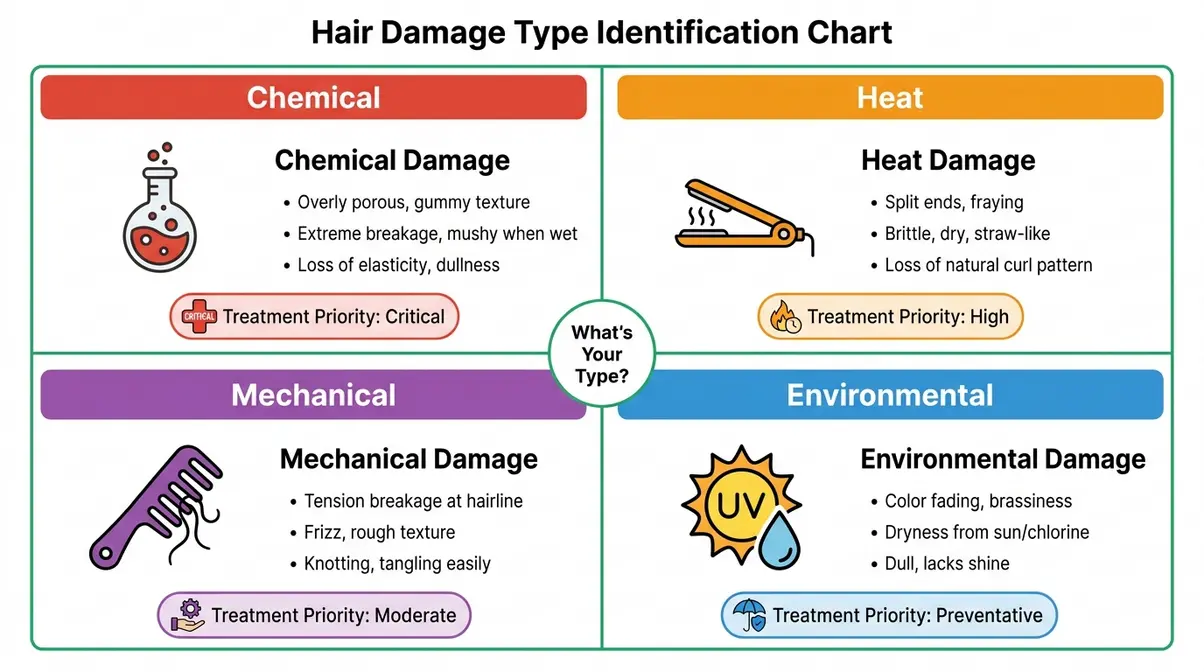
The Four Main Types of Hair Damage
| Damage Type | Primary Cause | Key Signs | Treatment Priority |
|---|---|---|---|
| Chemical | Bleach, dye, perms, relaxers | Extreme brittleness, mushy when wet | Bond builders first |
| Heat | Flat irons, curling wands, blow dryers | Loss of curl pattern, rough texture | Moisture + protein |
| Mechanical | Tight ponytails, rough brushing, friction | Breakage at specific points, thinning | Gentle handling first |
| Environmental | UV, hard water, chlorine, pollution | Fading, dryness, coating buildup | Clarifying + moisture |
Most people have a combination of two or more types. Identifying your primary type shapes every decision that follows.
✓ Checkpoint: You should now be able to name your primary damage type. Write it down — you’ll reference it in Steps 4 and 5.
Step 2: Upgrade Your Washing Routine
When learning how to repair damaged hair, your washing routine is the foundation everything else builds on. If you’re still using a harsh shampoo every day, even the most expensive treatment won’t be able to do its job — you’re stripping moisture faster than you’re replacing it.
Use Sulfate-Free Shampoo & Wash Less
Sulfates (sodium lauryl sulfate and sodium laureth sulfate) are the foaming detergents in most conventional shampoos. They’re effective at removing buildup — but they’re also aggressive enough to strip the hair’s natural oils (sebum) and lift the cuticle, leaving already over-processed hair even more vulnerable to breakage. Research shows that harsh sulfates can strip up to 80% of natural sebum from the scalp during a single wash.
Switching to a sulfate-free shampoo reduces this daily stripping effect. Healthline’s hair health guidance notes that sulfate-free formulas are particularly beneficial for color-treated and chemically processed hair, where the cuticle is already compromised.
Washing frequency matters just as much as formula. Most people with damaged hair wash too often. Aim for:
- Fine or oily hair: 2–3 times per week
- Medium to thick hair: 1–2 times per week
- Coily or 4c hair: Once per week or less
On non-wash days, use a dry shampoo at the roots only — never on the ends, where dryness is already a problem.
Condition Properly Every Wash
Conditioner is not optional for damaged hair. It temporarily smooths the lifted cuticle, reduces friction between strands, and deposits moisture that helps prevent further broken hair and split ends.
Most people apply conditioner incorrectly. Here’s the right method:
- Squeeze excess water from your hair before applying conditioner — wet hair dilutes the formula
- Apply from mid-length to ends only — roots don’t need it and will get greasy
- Use a wide-tooth comb to distribute evenly while the conditioner is in
- Leave on for 3–5 minutes minimum (not 30 seconds)
- Rinse with cool water — cold water helps close the cuticle
For very dry or brittle hair, try reverse conditioning (condition before shampooing) to pre-coat the strands before the cleansing step strips them.
✓ Checkpoint: You should now have a sulfate-free shampoo and a clear washing schedule. Your hair should feel less stripped after the first wash.
Step 3: Deep Condition and Rebuild Hair Bonds
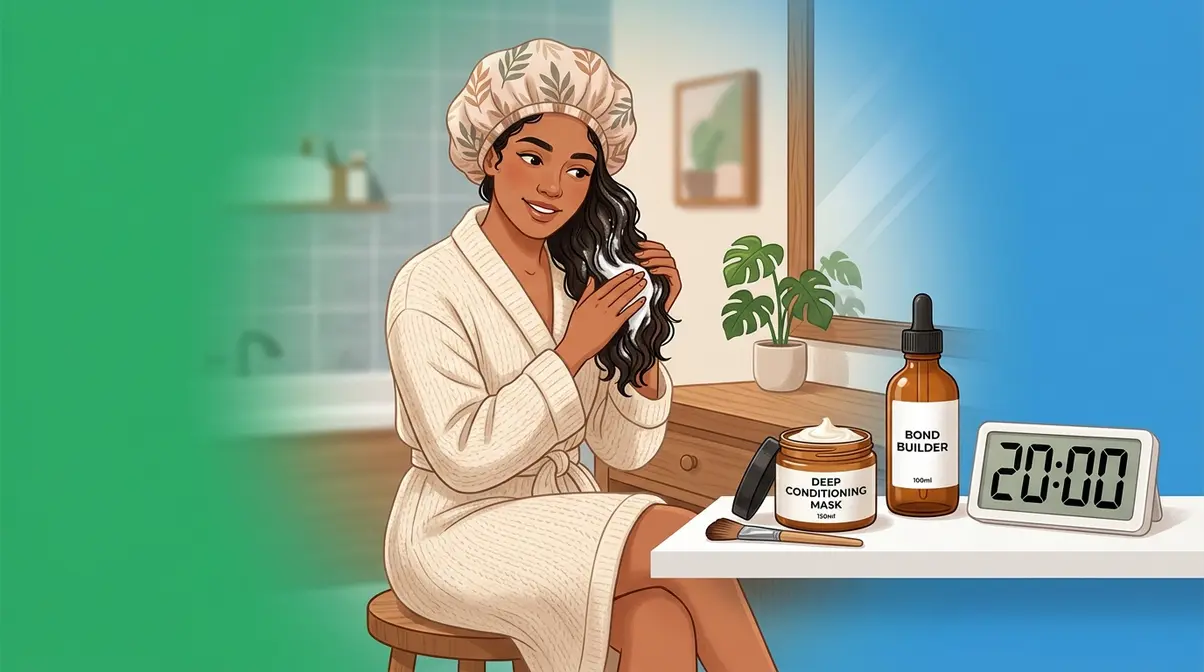
This is where real repair begins. Regular conditioner maintains moisture — but when hair is genuinely damaged, you need treatments that work deeper, either rebuilding the structural bonds inside the hair or flooding the cortex with protein and moisture. Understanding which one you need is the most confusing part of damaged hair repair — and the part most guides completely skip.
Masks vs. Protein vs. Bond Builders
These three product types are frequently confused, but they work at completely different levels of the hair structure:
| Treatment Type | How It Works | Best For | How Often |
|---|---|---|---|
| Hydrating mask | Deposits moisture into the cortex; softens and smooths cuticle | Dryness, dullness, frizz | Weekly |
| Protein treatment | Fills gaps in the cuticle with hydrolyzed proteins (broken-down keratin or wheat proteins) | Mild-to-moderate damage, limp hair | Every 4–6 weeks |
| Bond builder (e.g., Olaplex, K18) | Reconnects broken disulfide bonds — the internal “bridges” that give hair its strength | Chemical damage (bleach, dye, relaxers) | Per product instructions |
The key rule: moisture before protein. If your hair feels brittle and dry, start with a hydrating mask for 2–3 weeks before introducing protein. Adding protein to severely dehydrated hair makes it stiffer and more prone to snapping — a mistake that’s extremely common in r/HaircareScience, where it’s one of the most frequently reported setbacks.
Bond builders are the most misunderstood category. Products like Olaplex No. 3 and K18 Leave-In Molecular Repair Mask don’t just coat the hair — they work at a molecular level to reconnect broken disulfide bonds (the chemical links inside the cortex that give hair its tensile strength). A 2022 study published in the International Journal of Cosmetic Science found that bis-aminopropyl diglycol dimaleate (the active in Olaplex) measurably reduced hair breakage compared to untreated controls. These products are worth the investment specifically for chemically damaged or bleached hair.
How to Apply a Deep Conditioning Mask
Most people leave their mask on for two minutes in the shower. That’s not enough time for the ingredients to penetrate. Across professional haircare communities, the consistent recommendation is a minimum 20–30 minutes for a mask to deliver meaningful results.
Here’s the correct application process:
- Shampoo hair first — clean hair absorbs treatment better than hair with product buildup
- Squeeze out excess water so the mask isn’t diluted
- Apply generously from roots to ends (unlike regular conditioner)
- Use a wide-tooth comb to distribute evenly
- Cover with a shower cap or plastic wrap — trapping body heat opens the cuticle and helps the treatment penetrate
- Wait 20–30 minutes (or use a hooded dryer for 15 minutes for deeper penetration)
- Rinse thoroughly with cool water
After applying a deep conditioning mask weekly for 4 weeks, users typically notice significantly improved elasticity and reduced breakage — the hair starts to feel pliable again rather than stiff or straw-like.
Natural Oils That Repair Damaged Hair
Natural oils are one of the most accessible and effective tools in your repair routine — but they’re not all the same. Some oils penetrate the hair shaft; others simply coat the outside.
The community wisdom on this is clear. As one user in r/HaircareScience summarized:
“Start using oils (I like Jojoba but many people like coconut) on the ends, replace your shampoo with a no sulfate wash, stop washing your hair as much, stop…”
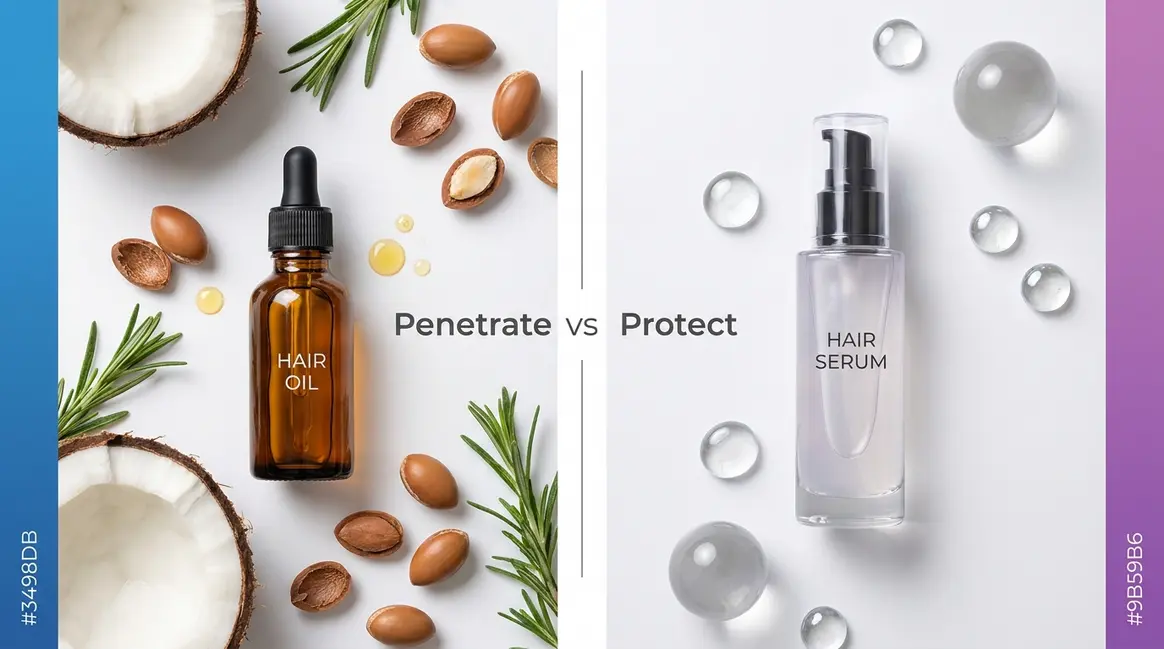
This mirrors the research. A 2003 study in the Journal of Cosmetic Science (Rele & Mohile) found that coconut oil was the only common oil to measurably reduce protein loss in both damaged and undamaged hair — because its small molecular structure (lauric acid) allows it to penetrate the hair shaft rather than just sit on top. Mineral oil and sunflower oil showed no such penetration in the same study.
Best oils for damaged hair:
- Coconut oil — penetrates the shaft; reduces protein loss (PubMed, 2003); best used as a pre-wash treatment on dry hair, left on 30–60 minutes before shampooing
- Jojoba oil — closely mimics the scalp’s natural sebum; excellent for sealing moisture on dry ends
- Argan oil — rich in vitamin E and fatty acids; great as a finishing oil on damp hair to reduce frizz and add shine
- Castor oil — thick and heavy; best used on the scalp to support follicle health, diluted with a lighter oil
✓ Checkpoint: You should now have a weekly mask scheduled, know whether you need protein or moisture first, and have an oil chosen for your end-care routine.
Step 4: Treat Chemical Damage (Bleach & Dye)
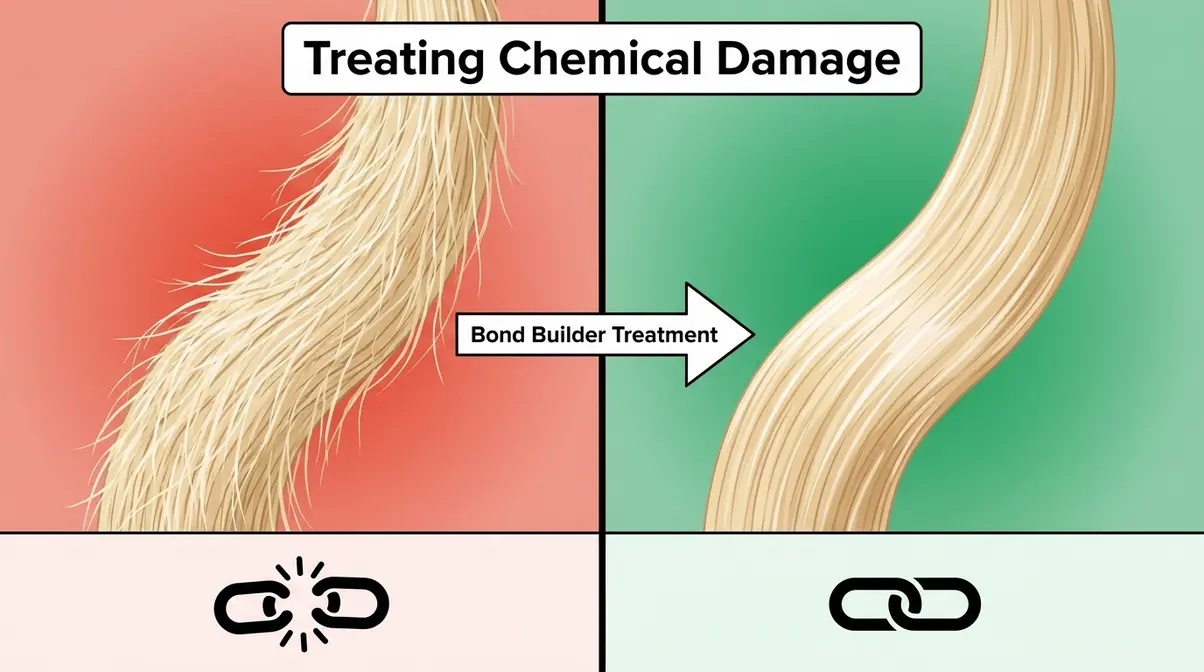
Chemical damage is the most severe form of hair damage — and the most misunderstood. If your hair has been bleached, colored, permed, or relaxed, it needs a fundamentally different repair approach than heat-damaged or mechanically damaged hair.
How Bleach & Dye Damage Hair Structure
To understand why chemically damaged hair behaves the way it does — super dry, mushy when wet, snapping off — you need to understand what bleach actually does inside the hair shaft.
Bleach works by triggering an oxidative reaction that breaks apart the melanin (color pigment) in the cortex. According to NIH research on chemical hair damage, chemical processes like bleaching can decrease hair’s tensile strength by up to 50% and significantly increase porosity. This same oxidative process also breaks disulfide bonds — the chemical bridges between keratin (protein) chains that give hair its structure and strength. Think of disulfide bonds as the rungs of a ladder: bleach snaps those rungs, leaving the structure intact on the outside but hollow and weak inside.
Regular conditioner and even protein treatments cannot reconnect broken disulfide bonds — they can only fill in surface gaps. This is exactly why bond builders exist, and why they’re non-negotiable for anyone with bleached or heavily color-treated hair. Research cited in Allure’s hair science coverage confirms that bond-repair systems represent one of the most significant advances in at-home hair repair in the past decade.
Recovery Routine for Chemical Damage
This routine is designed for hair that has been bleached, colored multiple times, permed, or relaxed. Follow it consistently for at least 6–8 weeks:
- Week 1: Clarifying wash (once) to remove buildup, followed immediately by a deep hydrating mask — do NOT use protein yet on severely compromised hair
- Weeks 2–3: Sulfate-free wash + bond builder treatment (e.g., Olaplex No. 3 or K18 mask) once per week; hydrating conditioner every wash
- Week 4: Introduce a gentle protein treatment (look for “hydrolyzed keratin” or “hydrolyzed silk protein” on the label) — assess elasticity first; if hair still feels mushy, wait another week
- Ongoing: Rotate bond builder (biweekly) → protein treatment (monthly) → hydrating mask (weekly)
- Daily: Jojoba or argan oil on ends; no heat without protectant
✓ Checkpoint: You should now have a clear weekly schedule for your chemical damage recovery. Your hair should feel less mushy and more resilient within 2–3 weeks of starting bond builder treatments.
Step 5: Reverse Heat Damage from Styling Tools
A crucial part of how to repair damaged hair involves addressing heat exposure. Heat damage is the second most common type of damaged hair — and unlike chemical damage, it’s entirely preventable going forward. The challenge is that many people don’t realize their hair is heat-damaged until the damage is already significant.
Signs of Severe Heat Damage
Heat damage has specific signatures that distinguish it from simple dryness. Look for:
- Permanent loss of curl or wave pattern — heat-damaged curly hair goes straight in sections and won’t revert even when wet
- Rough, sandpaper-like texture that doesn’t soften after conditioning
- Extreme frizz at specific sections where you frequently use heat tools
- White dots along the hair shaft — these are heat bubbles where the hair’s internal moisture has literally vaporized
- Uneven porosity — sections absorb water differently because the cuticle is damaged unevenly
Heat damage occurs at temperatures above 230°C (446°F) for most hair types — though fine, bleached, or naturally dry hair can sustain damage at temperatures as low as 180°C (356°F), according to research published in the Journal of Investigative Dermatology Supplement.
Your Weekly Heat Recovery Routine
Recovery from heat damage is slower than chemical damage because it primarily requires moisture restoration and new growth. This weekly routine supports both:
| Day | Action | Why |
|---|---|---|
| Wash day | Hydrating mask (30 min) + cool rinse | Replenish lost moisture |
| Day 2 | Apply argan oil to dry ends | Seal cuticle, reduce friction |
| Day 3–4 | Co-wash (conditioner-only wash) if needed | Refresh without stripping |
| Day 5–6 | Protective style (braid, bun) | Minimize mechanical friction |
| Ongoing | No heat or max 150°C with protectant | Stop adding new damage |
✓ Checkpoint: You should now recognize your heat damage signs and have a weekly schedule that eliminates or dramatically reduces heat exposure. Expect to see improved texture within 3–4 weeks.
Step 6: Handle Wet Hair Gently to Stop Breakage
Wet hair is at its most vulnerable. The hydrogen bonds that give hair its structure temporarily weaken when wet, making strands up to three times more elastic. Consequently, rough towel-drying or aggressive brushing will snap these vulnerable strands immediately. This step costs nothing but attention.
The Right Way to Detangle Wet Hair
Follow this sequence every single wash day to dramatically reduce mechanical breakage:
- Apply conditioner before detangling — never detangle dry or product-free wet hair
- Use a wide-tooth comb or your fingers — brushes create too much tension on wet strands
- Start at the ends, work upward — grip the section above where you’re combing to prevent tension traveling to the roots
- Work in sections — part hair into 4–6 sections for more control and less tangling
- Never yank through a knot — hold the knot between your fingers and gently work it loose from below
- Pat dry, don’t rub — rubbing with a towel roughens the cuticle; use a microfiber towel or a soft cotton t-shirt to squeeze water out gently
Additionally, swap cotton pillowcases for satin or silk — cotton creates friction as you move in your sleep, which causes mechanical breakage over hours of nightly contact.
Heat Styling Habits That Speed Up Repair
If you can’t give up heat tools entirely, these habits make a measurable difference:
- Always use a heat protectant before any heat tool — look for products containing silicones (dimethicone) or thermal barrier polymers, which form a protective layer on the cuticle
- Lower your temperature — 150–180°C (300–350°F) is sufficient for most styles; you don’t need 230°C+ unless you have extremely coarse hair
- Limit heat to once per week maximum during your repair period
- Air dry 70–80% first before blow-drying — the more you can reduce heat exposure time, the better
- Use a diffuser on curly or wavy hair to distribute heat without concentrating it
✓ Checkpoint: You should now be detangling correctly and have reduced or eliminated unnecessary heat exposure. Most people notice significantly less breakage during detangling within one week of this change alone.
Step 7: Tailor Repair to Your Hair Type
The Repair Stack works for all hair types — but certain hair types have specific needs that require adjustments to the standard routine. This step ensures your repair plan is actually built for your hair, not for a generic “average” that may not apply to you.
Repairing Damaged Curly Hair
Curly hair is structurally more prone to dryness because the natural oils from the scalp have difficulty traveling down the spiral shaft. In fact, coily hair types retain up to 30% less natural moisture than straight hair. When it’s also damaged, the combination of dryness and compromised structure makes it especially fragile.
Key adjustments for curly hair repair:
- Protein sensitivity is common — curly hair often responds poorly to heavy protein treatments, becoming stiff and crunchy. Start with a light protein (hydrolyzed silk or wheat protein) and do a strand test first
- LOC or LCO method — Layer products: Liquid (water or leave-in), Oil (jojoba or argan), Cream (curl cream) to lock in moisture
- Avoid sulfates and silicones — both disrupt the curl pattern and build up on the shaft
- Pineapple at night — loosely gathering curls at the top of your head before sleep reduces friction and preserves curl integrity
Hair Repair Tips for Men
Men’s hair repair is an underserved area in most guides, but the principles are the same — with some practical differences for shorter hair:
- Shorter hair means faster visible results — a trim removes a higher percentage of damaged ends relative to total length
- Scalp health matters more — with shorter hair, scalp condition is more visible; a healthy scalp produces stronger new growth
- Product weight — avoid heavy oils and creams on short styles; a lightweight argan oil serum or leave-in spray works better
- Wash frequency — men often over-wash; 2–3 times per week with a sulfate-free shampoo is optimal for most hair types
Repairing Damaged Black Hair (4b/4c)
4b and 4c hair types have the tightest curl pattern of all hair types, making them the most prone to dryness, tangles, and mechanical breakage — especially when also chemically processed (relaxed or colored).
Key adjustments:
- Moisture is the priority — 4c hair needs hydration above all else; deep condition weekly without fail
- Protective styles (braids, twists, wigs) reduce daily manipulation and allow hair to grow and retain length while it repairs
- Avoid overwashing — once per week maximum; co-washing between washes maintains moisture without stripping
- Seal with a heavy butter (shea butter, mango butter) after moisture application — lighter oils evaporate too quickly on very porous 4c hair
✓ Checkpoint: You should now have a type-specific routine adjustment added to your Repair Stack. These small changes compound significantly over weeks.
Step 8: Target Follicles, Cuticles & Split Ends
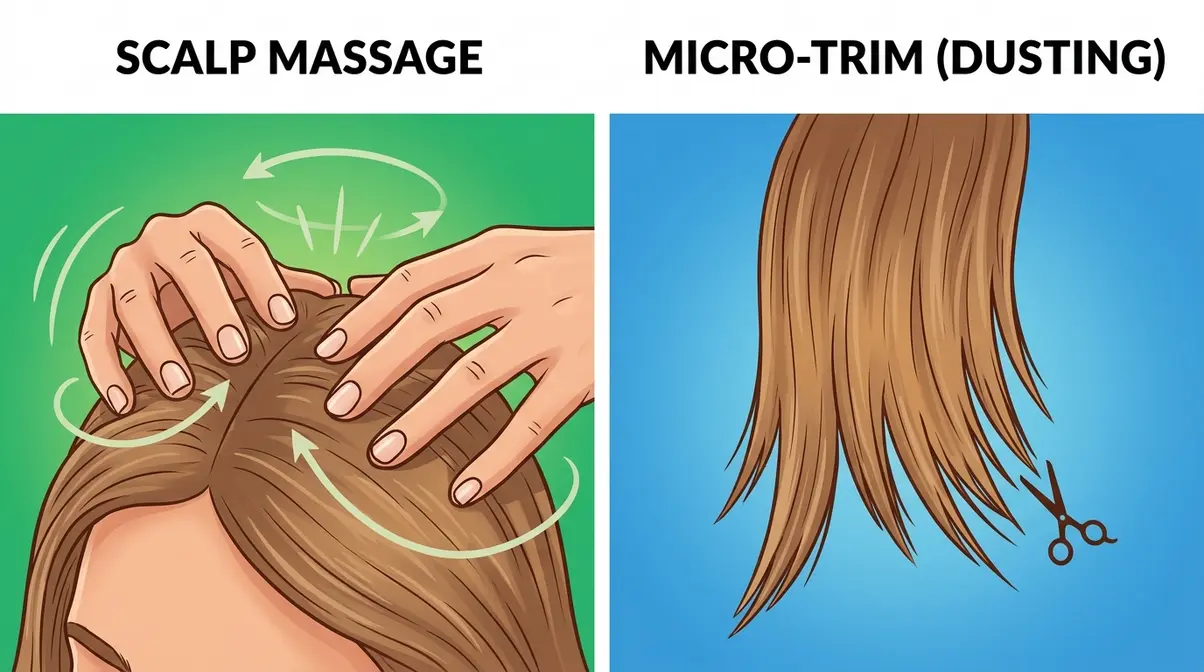
Repairing the hair you can see is only half the equation. Long-term hair health depends on what’s happening at the scalp level — where each strand originates — and on managing existing damage at the ends without sacrificing length.
Scalp Health: The Repair Foundation
Every strand of hair grows from a follicle embedded in your scalp. If those follicles are clogged, inflamed, or oxygen-deprived, the new hair they produce will be weaker before it even emerges. Research from the NIH suggests that oxidative stress at the scalp level is associated with increased hair shedding and reduced follicle function — meaning scalp health directly impacts the quality of new growth.
Practical scalp care steps:
- Scalp massage (5 minutes, 3–4 times per week) increases blood circulation to follicles — a small 2019 study in ePlasty found that standardized scalp massage over 24 weeks was associated with increased hair thickness
- Clarify monthly — product buildup on the scalp clogs follicles; use a clarifying shampoo or apple cider vinegar rinse (1 part ACV to 3 parts water) once a month
- Scalp serums containing niacinamide, caffeine, or rosemary extract support follicle health and have emerging evidence for reducing shedding
- Avoid tight hairstyles that create traction on the follicle — chronic tension can lead to traction alopecia (follicle damage from prolonged pulling)
Fixing Split Ends Without Losing Length
Split ends (where the hair shaft physically splits lengthwise at the tip) cannot be repaired permanently — once the cortex is exposed and splitting, the only true fix is a trim. However, you can seal split ends temporarily with the right products to buy time between cuts and prevent the split from traveling further up the shaft.
- Dusting (micro-trim of ¼ inch or less) removes split ends without visible length loss — do this every 8–10 weeks
- Split-end serums containing silicones temporarily bond split ends together — they don’t repair the damage but prevent further splitting between trims
- Avoid anything that stresses the ends: tight elastics, rough towel-drying, sleeping on cotton
- Focus moisture treatments on the ends — they’re the oldest, driest, and most damaged part of any hair strand
✓ Checkpoint: You should now have a scalp care habit in place and a realistic plan for managing split ends. New growth from a healthy scalp will be noticeably stronger within 2–3 months.
Verify Your Results and Set a Realistic Timeline
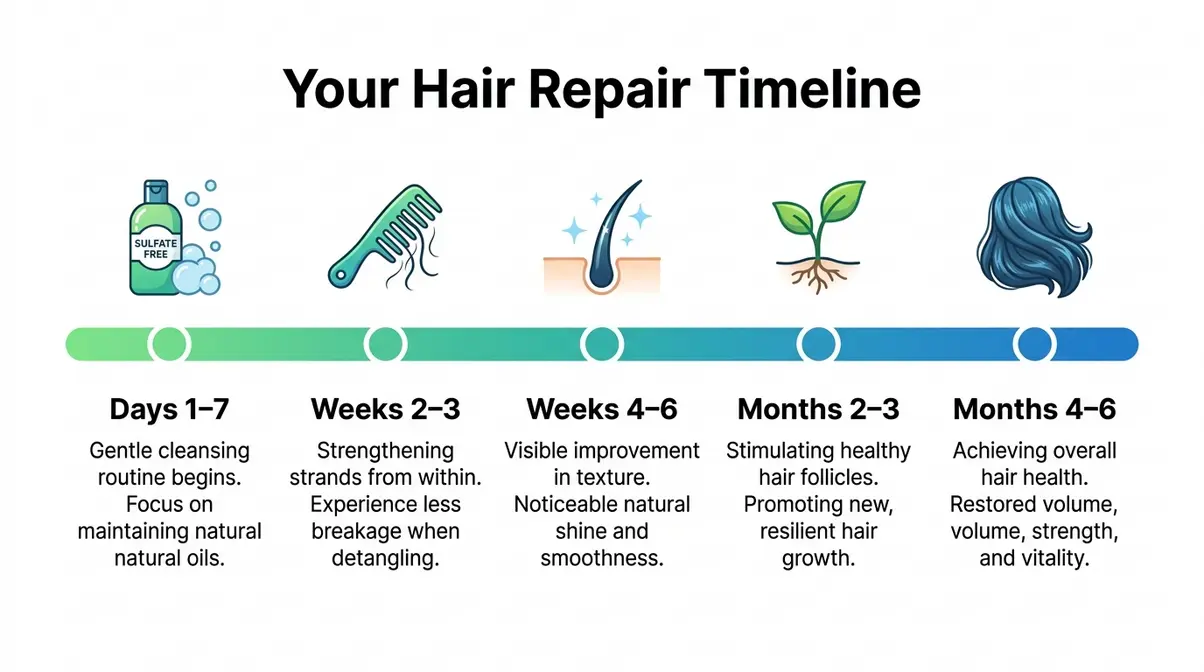
Knowing what to expect — and when — keeps you from abandoning the routine too early. Hair repair is not linear, and the first two weeks often feel like nothing is happening before a noticeable shift occurs.
Timeline Expectation: Mild damage improves in 2–4 weeks, while severe chemical damage requires 3–6 months of consistent bond-building.
What to Expect Week by Week
| Timeframe | What You Should Notice | What’s Happening |
|---|---|---|
| Days 1–7 | Less stripping after washing; slightly softer texture | Sulfate-free wash + conditioner reducing surface damage |
| Weeks 2–3 | Reduced breakage during detangling; less frizz | Cuticle beginning to smooth; moisture retention improving |
| Weeks 4–6 | Visible shine returning; elasticity improving | Bond builders and masks working at cortex level |
| Months 2–3 | New growth visibly stronger and thicker | Scalp health improvements producing better-quality hair |
| Months 4–6 | Significant length retention; ends less split | Damage growing out; protective habits compounding |
For mild damage (occasional heat, minor dryness), expect visible improvement in 2–4 weeks. For moderate damage (regular heat, one-process color), expect 6–10 weeks. For severe damage (bleaching, multiple chemical processes, relaxers), expect 3–6 months of consistent care — and potentially a strategic trim to remove the most compromised sections.
When to See a Hair Professional
Some damage genuinely requires professional intervention, and recognizing this early saves you months of frustration and money spent on products that can’t fix a structural problem.
See a licensed cosmetologist or trichologist (a scalp and hair health specialist) if you experience:
- Hair that’s gummy or mushy when wet and doesn’t improve after 4 weeks of bond builder use — this may indicate hygral fatigue (over-moisturized, structurally compromised hair)
- Significant shedding (more than 100–150 strands per day consistently) — this may indicate a scalp condition or nutritional deficiency requiring medical evaluation
- Bald patches or significant thinning — see a dermatologist, as this may indicate alopecia or a hormonal issue
- Hair that won’t hold any style despite treatment — a professional can assess porosity and recommend a corrective treatment plan
A board-certified dermatologist can also evaluate whether underlying health factors — thyroid function, iron levels, or vitamin D deficiency — are contributing to hair fragility.
✓ Checkpoint: You now have a realistic timeline and know when to escalate to professional help. Set a calendar reminder for your 4-week and 8-week check-ins.
Common Mistakes That Slow Down Recovery
Even with the right products, these mistakes can stall your progress — or actively make damage worse.
1. Protein overload: Over 60% of at-home repair failures stem from using too many protein treatments back-to-back, which makes hair stiff, brittle, and more prone to snapping. Always balance protein with moisture — for every protein treatment, follow with at least 2 hydrating sessions.
2. Skipping heat protectant: No heat protectant = continued damage that undoes every treatment. This is the most common and costly mistake in any repair routine.
3. Using hot water: Hot water strips natural oils and lifts the cuticle. Always rinse conditioner and masks with cool or lukewarm water.
4. Over-washing: Washing daily with any shampoo — even sulfate-free — strips moisture faster than your routine can replace it. More washing is not more cleaning; it’s more damage.
5. Applying oil to wet hair incorrectly: Oil applied to soaking wet hair sits on top of the water and doesn’t penetrate. Apply oil to damp (not dripping wet) hair, or use it as a pre-wash treatment on dry hair.
6. Ignoring elasticity: Many people focus on shine and softness but ignore elasticity. If your hair still snaps when stretched after 4 weeks, you need more bond-building work — not more conditioner.
Limitations and When to Reconsider This Approach
The Reality Check: Topical treatments can rebuild bonds and seal cuticles, but they cannot bring dead tissue back to life—true repair requires patience and new growth.
Common Pitfalls
- The Repair Stack is a maintenance system, not a cure. Existing damaged hair cannot regenerate — the goal is to strengthen what’s there while growing healthier new hair. Anyone expecting a complete reversal within days will be disappointed.
- Bond builders are not universal. If your hair is primarily heat-damaged or mechanically damaged (not chemically processed), bond builders like Olaplex may offer limited benefit compared to a consistent moisture routine. Spending $30–$50 on a bond builder for simple dryness is unnecessary.
- Natural oils are not a substitute for treatment. Oils seal and protect — they don’t rebuild structure. Using only coconut oil on severely damaged hair will make it feel softer temporarily but won’t address the underlying bond or protein damage.
When to Choose Alternatives
- If shedding is your primary concern (not breakage or dryness), the root cause is likely internal — nutritional deficiency, hormonal change, or stress. A topical repair routine won’t address systemic shedding; see a dermatologist.
- If you have a scalp condition (seborrheic dermatitis, psoriasis, fungal infection), a standard moisture-focused routine may worsen scalp symptoms. A medicated shampoo prescribed by a dermatologist should take priority over cosmetic treatments.
- If damage is severe and you need fast results for a specific event, a professional keratin treatment or Brazilian blowout (performed by a licensed stylist) can dramatically improve manageability within hours — though these are not long-term repair solutions.
Troubleshooting: Why Your Hair Isn’t Improving
Knowing how to repair damaged hair means adjusting your approach based on how your strands respond over time. If your hair still feels dry after 3 weeks of masking, you may have high-porosity hair—strands that absorb moisture quickly but can’t retain it. Studies show that highly porous hair can lose up to 50% more moisture throughout the day than normal hair. Try protein treatments to fill cuticle gaps before moisturizing, and use heavier sealants (shea butter, castor oil) rather than lightweight oils.
If your hair feels stiff and crunchy after treatment, you are likely dealing with classic protein overload. Pause all protein products for 2-3 weeks and focus exclusively on hydrating masks and leave-in conditioners. The stiffness will resolve as moisture balance is restored.
Experiencing more breakage, not less, after starting the routine? Check your detangling method first—this is the most common cause of increased breakage when starting a new routine. Also, assess whether you’ve introduced a new protein treatment too early before your hair was adequately moisturized.
Frequently Asked Questions
Can damaged hair really be repaired?
Damaged hair can be significantly improved — but not fully “healed” in the way skin heals. The hair shaft is dead tissue; once the cuticle or cortex is compromised, it cannot regenerate itself. However, treatments like bond builders, deep conditioning masks, and protein treatments can restore strength, elasticity, and shine to a degree that feels like repair. New growth from a healthy scalp will be undamaged. With consistent care, most people see dramatic improvement in 4–8 weeks, per evidence reviewed by trichologists and reported across professional haircare communities.
How do I fix extremely damaged hair?
Start with a bond builder — this is the consistent recommendation from hairstylists and dermatologists for severely damaged hair. Products like Olaplex No. 3 or K18 Leave-In Molecular Repair Mask work at the molecular level to reconnect broken disulfide bonds that conditioner cannot reach. Pair this with weekly hydrating masks and complete elimination of heat tools for at least 4–6 weeks. If hair is mushy when wet and doesn’t improve after a month of bond building, see a licensed trichologist — hygral fatigue may require professional corrective treatment.
Can I bring damaged hair back to life?
The fastest way to bring damaged hair back to life is to follow The Repair Stack in sequence: switch to sulfate-free washing, introduce a weekly hydrating mask, add a bond builder (for chemical damage) or protein treatment (for heat/mechanical damage), and stop all heat styling. Most people notice a visible difference in texture and shine within 7–10 days of starting this routine. Consistency matters more than product brand — a $10 hydrating mask used weekly outperforms a $40 treatment used once.
How can I repair hair damage naturally?
Coconut oil is the most evidence-backed natural option for damaged hair repair. A 2003 study in the Journal of Cosmetic Science found it was the only common oil to measurably reduce protein loss in hair, due to its ability to penetrate the shaft. Apply it to dry hair 30–60 minutes before washing and rinse thoroughly. Jojoba oil seals moisture on ends post-wash. A DIY honey and olive oil mask (2 tbsp honey + 1 tbsp olive oil) can temporarily smooth the cuticle. However, natural treatments work best for mild damage — severe chemical or heat damage requires bond builders or protein treatments that natural ingredients cannot replicate.
How can I fix straw-like hair?
Straw-like texture is almost always a moisture deficit, though it can also signal protein overload. Start with a clarifying wash to remove any product buildup that’s blocking moisture absorption, then apply a deep hydrating mask for 30 minutes. If hair still feels stiff and straw-like after 2 weeks of weekly masking, introduce a light protein treatment — straw-like texture can also result from a lack of structural protein leaving the cuticle rough and porous. Avoid heat entirely until texture improves. Most people with straw-like hair see significant softening within 2–3 weeks of consistent masking.
What do stylists recommend for damage?
Professional hairstylists consistently recommend three things: first, stop the source of damage (heat, harsh chemicals, rough handling); second, introduce a bond builder for any chemically processed hair; third, commit to weekly deep conditioning. Vogue’s hair expert interviews consistently cite Olaplex, K18, and Redken Extreme as professional-grade repair systems. Beyond products, stylists emphasize that regular micro-trims (every 8–10 weeks) prevent split ends from traveling up the shaft — protecting length while removing the most damaged sections.
Which vitamin deficiency causes breakage?
Biotin (vitamin B7) deficiency is the most commonly cited cause of hair breakage, though true biotin deficiency is rare in people eating a balanced diet. More commonly, iron deficiency (especially in women with heavy periods), vitamin D deficiency, and zinc deficiency are associated with increased hair shedding and fragility, per research published in the Journal of Cosmetic Dermatology (2017). If your hair is breaking despite a consistent repair routine, ask your doctor for a blood panel checking ferritin (stored iron), vitamin D, and zinc levels. Supplementing without testing is not recommended — excess iron and zinc can cause their own health issues.
Repair Your Hair — Starting Tonight
If you’ve been wondering how to repair damaged hair, the most important thing you can do is start — imperfectly — tonight. Swap your current shampoo for a sulfate-free formula, do a 30-minute hydrating mask this week, and stop using heat until you’ve given your routine 2–3 weeks to work. These three changes alone will produce a noticeable difference in texture before the end of week one.
The Repair Stack works because it addresses the right problems in the right order — not because any single product is miraculous. Moisture before protein, identification before treatment, protection before styling. That sequence is what separates people who see results from people who keep buying products that don’t work.
Your hair is not beyond help. Ready to transform your hair? Start tonight by swapping your harsh shampoo for a sulfate-free alternative, and schedule your first 30-minute hydrating mask for this weekend. The strands you protect today are the length you keep tomorrow.

Dave King
Writes evidence-based hair-care guides for Care About Your Hair — for every hair type, jargon-free and independent.