 Dave King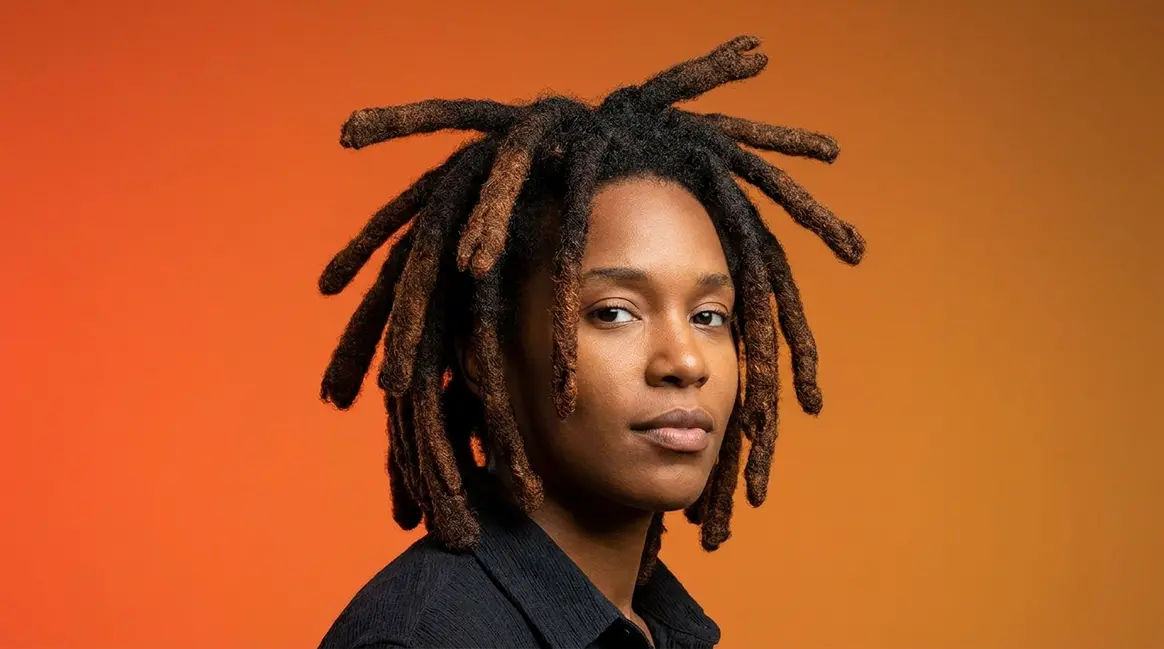
If you’ve ever seen someone walking down the street with thick, rope-like columns of hair projecting outward from their scalp — each one roughly as wide as your thumb — you’ve seen wicks hair. This wicks hairstyle turns heads wherever it goes. But every time you search for answers, you land on a vague gallery post or a salon booking page. Nobody explains what wicks actually are, where they came from, or how to get them.
This guide changes that. You’ll learn exactly what wicks hair is, how it’s made, what it costs, and how to keep it healthy — so you can decide confidently whether this bold, expressive style is right for you. We cover everything: the definition, the cultural history behind The Florida Method, step-by-step creation methods, style variations, a mold-prevention maintenance routine, and a realistic cost breakdown.
Wicks hair are thick, rope-like locs formed by combining multiple dreadlocks into single, cylindrical sections — a style rooted in South Florida’s Haitian-American community and popularized by artists like Kodak Black.
- What they are: Wicks are oversized, fused locs — not individual dreadlocks
- How they’re made: The crochet method is the most beginner-friendly starting point
- The Florida Method: Authentic wicks follow a specific cultural formation and care tradition developed in South Florida’s Haitian-American community
- Cost reality: Professional installation ranges from $500 to $1,000 (Allure, 2024)
- Biggest risk: Inadequate drying causes mildew inside thick loc cores
What Is Wicks Hair? Definition, Origin & Meaning
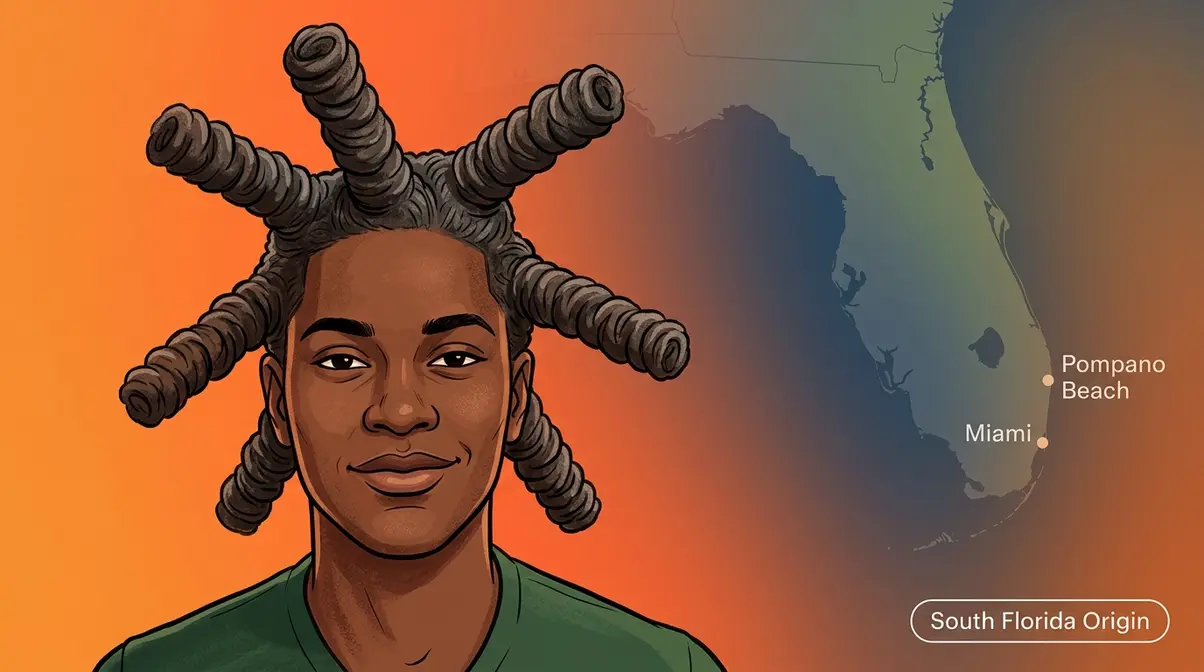
Wicks hair are thick, cylindrical locs formed by fusing multiple individual dreadlocks into single, rope-like sections. Each wick typically ranges from the width of a finger to the width of a thumb in diameter, projecting outward from the scalp in bold, upright columns. Understanding what wicks actually are — not just “big dreads” — is the first step to deciding if this protective hairstyle is right for you.
As Wikipedia’s wicks hairstyle entry) documents, wicks hair are thick, cylindrical locs formed by fusing multiple individual dreadlocks — a style originating in South Florida’s Haitian-American community (Wikipedia contributors, 2024).
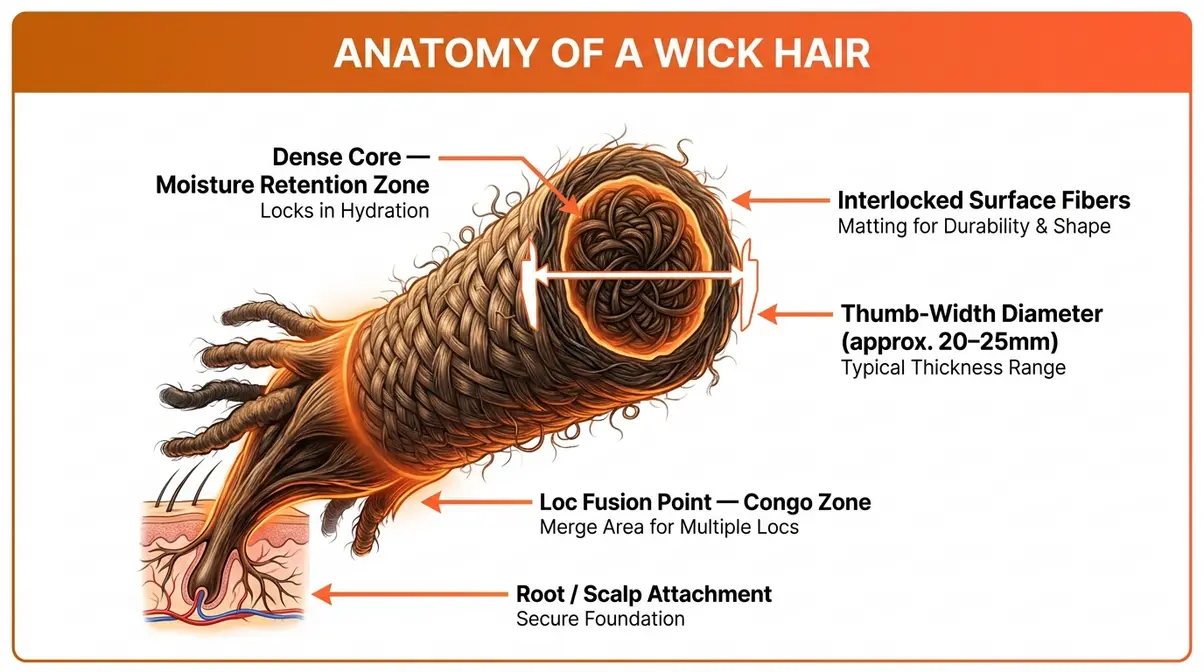
This guide covers what practitioners call The Florida Method — the authentic approach to wicks hair as it developed in South Florida — from formation to long-term care. You’ll find the full breakdown in the Cultural Roots section.
The Wicks Hairstyle Explained
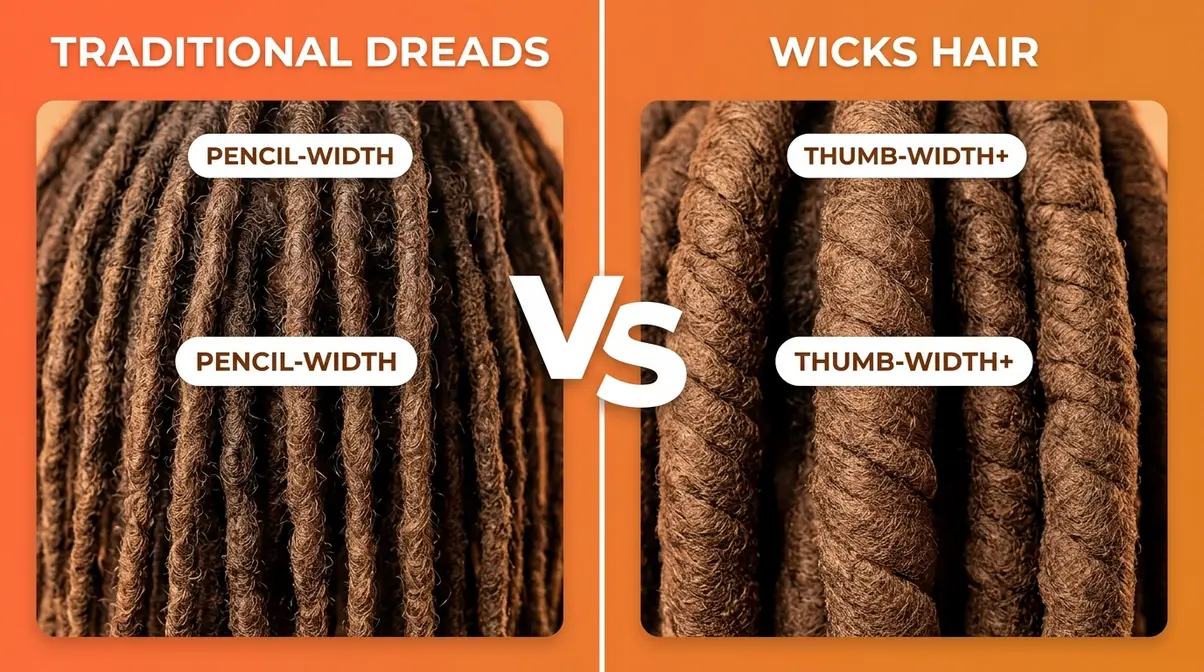
The wicks hairstyle is, at its core, a type of loc — not a completely different hairstyle built from scratch. Wicks begin as individual dreadlocks (locs, which are individual sections of matted natural hair formed by the natural coiling and knotting of kinky strands). Over time, those individual locs are combined, or “congoed,” into fewer, much thicker columns.
Each finished wick is a single, thick column of fused locs, typically ranging from the width of a finger to the width of a thumb. The hair community often calls them rope-like locks because of that dense, cylindrical texture. They’re also sometimes called congo wicks locs or simply “congo locs” — the word “congo” referring to the merging or combining of locs into one unified section.
Here’s a simple way to picture it: imagine starting with 50 individual dreadlocks. Over time, you or your loctician (a hairstylist who specializes in loc-based styles) combines groups of those locs together until you have 10–15 thick, unified columns. Those are your wicks. This combining process is what separates wicks from standard dreadlocks — it’s not just size, it’s intentional fusion.
Where Do Wicks Come From?
The wicks hairstyle origin traces directly to South Florida, specifically within the Haitian-American community in cities like Miami and Pompano Beach. Thick, combined locs were a cultural expression in this community long before they became a mainstream trend. The style reflects the rich Afro-Caribbean hair traditions of the Haitian diaspora, where natural hair worn in bold, protective formations carries deep cultural identity.
The style gained national visibility in the early-to-mid 2010s, largely through Florida-based hip-hop artists — most famously Kodak Black (covered fully in the next section). As Complex’s history of Florida wicks documents, the style’s Afro-Caribbean cultural roots and South Florida origin were later amplified through celebrity exposure (Complex).
“Florida wicks hair” is a real phrase people search for — because the connection between the style and its geographic home is that strong. The style didn’t just happen to come from Florida; it is intrinsically Floridian in its cultural DNA. When someone says “Florida wicks,” they’re acknowledging both the origin and the attitude the style carries.
Why Are They Called Wicks?
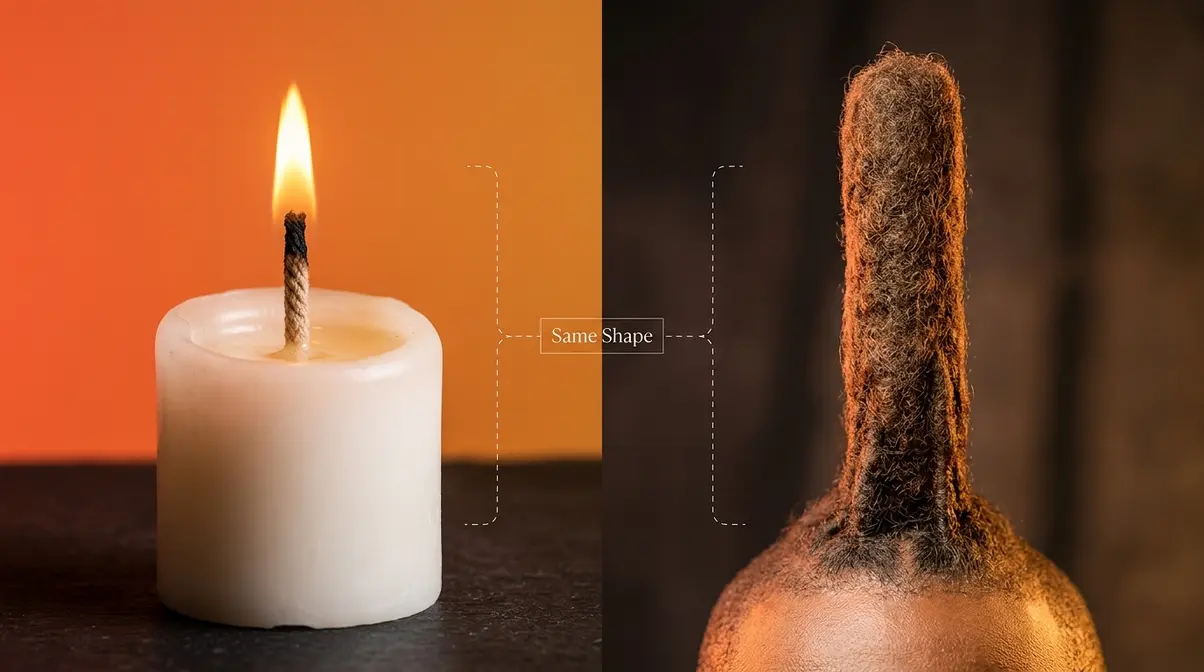
The name comes from a straightforward visual analogy. The most widely accepted explanation is that the thick, cylindrical locs resemble the wick of a candle — a single, upright column rising from a base. Some practitioners also note a functional similarity: a thick loc “wicks” moisture from the scalp outward along its length, similar to how a candle wick draws wax upward. This dual meaning — visual shape and moisture behavior — is what gives the wicks hair meaning its staying power.
Think of a thick pillar candle. The wick in the center is exactly the shape these locs create: tall, cylindrical, and singular. Once you see that comparison, the name becomes obvious.
“Wicks hair are named for their candle-wick shape — thick, upright, cylindrical columns of fused locs that project outward from the scalp.”
Now that you understand what wicks are and where they come from, let’s tackle the question that trips up almost every beginner: what’s the actual difference between wicks and dreads?
Wicks vs. Dreads: Key Differences Explained
Wicks and traditional dreadlocks share the same foundation — natural hair that loc’s over time — but they are not the same style. The differences come down to size, formation method, maintenance demands, and cultural intent. Knowing these distinctions helps you make the right choice for your hair type, lifestyle, and aesthetic goals.
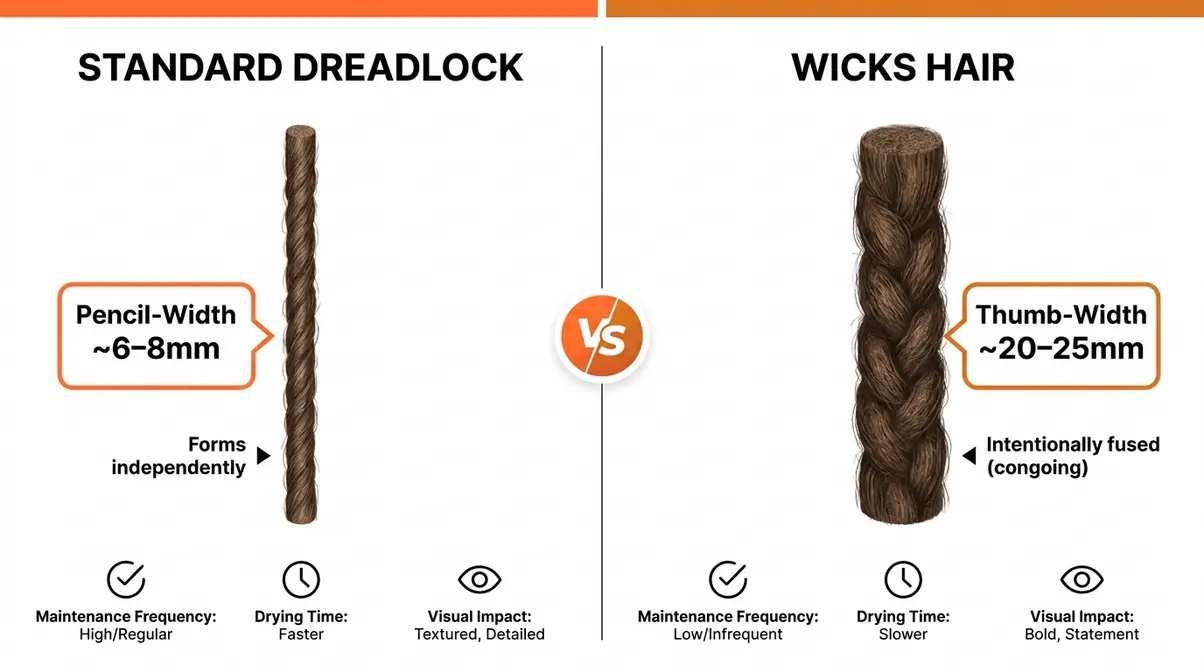
“A standard dreadlock is pencil-width and forms independently; a wick is thumb-width or larger and is intentionally created by fusing multiple locs together.”
Size and Formation: The Core Difference
The most visible difference is size. A standard dreadlock (a loc formed by the natural matting and coiling of hair sections over time) is typically pencil-width — roughly 6–8mm in diameter. A wick, by contrast, is intentionally formed to be much thicker — from thumb-width to finger-width or even larger, depending on how many locs are combined.
That size difference comes from the formation process. Traditional dreads form independently: each section of hair mats and coils on its own. Wicks are engineered — a loctician deliberately combines two, three, or more individual locs using techniques like the crochet method (a technique using a small hook to interlock hair fibers) or the rubber band and combine method. The result is a single, unified wick rather than a cluster of separate locs.
This combination process is also called “congoing” in the loc community. When locs congo naturally (growing together on their own without intervention), the result is often uneven and unpredictable. Intentional congoing — what a skilled loctician does — produces the clean, symmetrical columns that define authentic wicks.
Maintenance: How Wicks and Dreads Differ
Maintenance is where the real difference in commitment shows up. Standard dreadlocks require regular retwisting (the process of palm-rolling or interlocking new growth at the root to keep locs neat) every 4–8 weeks. They dry relatively quickly because each loc is narrower, with less core mass to hold moisture.
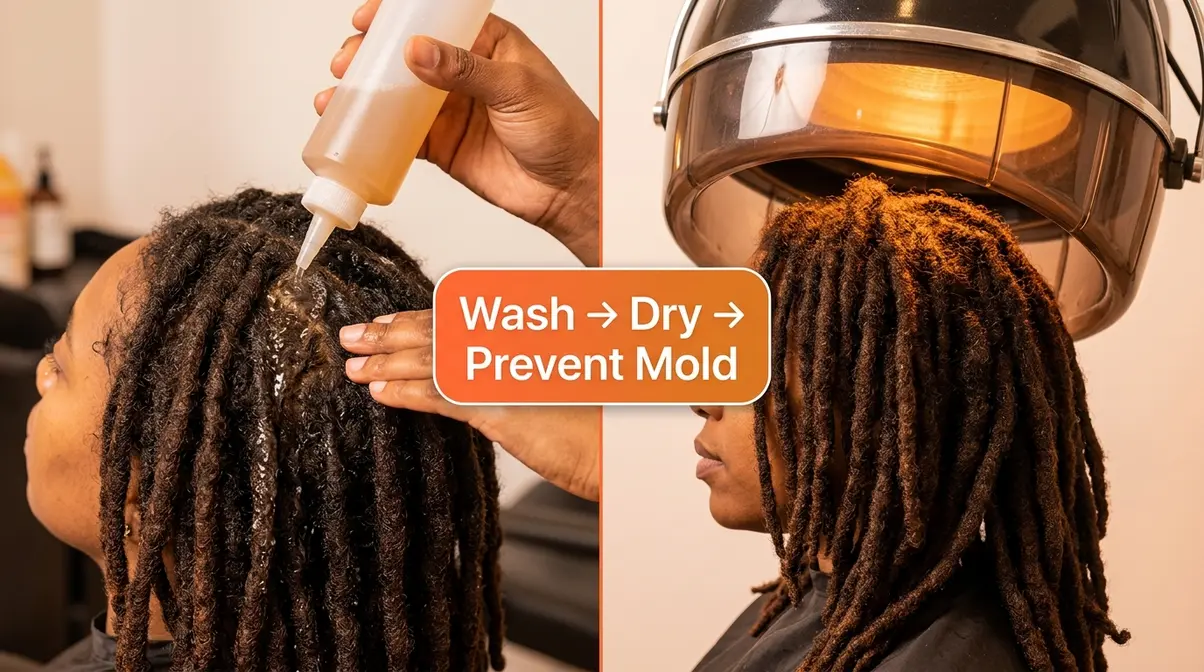
Wicks, because of their thickness, require a more deliberate drying routine. The dense interior of a wick holds moisture for much longer than a standard loc — sometimes 24–48 hours after washing. This creates a real risk of mildew or mold forming inside the loc core if the hair isn’t dried thoroughly. Professional locticians consistently report that improper drying is the number one maintenance mistake wick wearers make.
On the upside, wicks typically require less frequent retwisting than standard locs. Because each wick is so thick, new growth at the root becomes part of the wick more naturally. Many wick wearers visit their loctician every 6–10 weeks rather than every 4 weeks.
Which Style Is Right for You?
The honest answer depends on three things: your hair texture, your lifestyle, and your aesthetic goal.
- Choose if:
- You want a bold, high-impact protective hairstyle that makes a statement
- You have naturally kinky or coily hair (Type 4a–4c) that locs easily and thickly
- You’re comfortable with a longer, more involved drying routine after washing
- You’re drawn to the cultural heritage and community identity of the style
- Choose if:
- You prefer a more understated, versatile loc style
- Your hair is finer or less densely coiled, making thick loc formation harder
- You want a faster wash-and-dry routine
- You’re not ready for the full commitment of thick loc fusion
Are wicks better than locs? Neither is objectively better — they serve different goals. Wicks are a more expressive, culturally specific style with higher maintenance demands. Traditional locs are more versatile and lower-maintenance. The right choice is the one that fits your life.
Where wicks and dreads share the same roots, the cultural context of wicks runs much deeper. That story starts in one specific place.
The Cultural Roots of Wicks: Florida’s Signature Style

Wicks hair isn’t just a hairstyle — it’s a cultural artifact. To understand why wicks look the way they do, why they’re cared for the way they are, and why they carry the weight they do in certain communities, you have to understand where they came from. The answer is South Florida, and specifically its Haitian-American community.
“Wicks hair originated in South Florida’s Haitian-American community as a cultural expression of Afro-Caribbean identity — long before the style appeared in music videos or on social media.”
South Florida’s Haitian-American Origins
South Florida — particularly Broward County cities like Pompano Beach, Lauderhill, and parts of Miami — has one of the largest Haitian-American populations in the United States. Within this community, thick, combined locs were worn as a form of cultural identity rooted in Afro-Caribbean traditions of natural hair care and styling.
The Haitian tradition of wearing thick, protective locs carries historical and spiritual significance. Natural hair worn in bold, unconventional formations has long been a form of resistance and self-expression in the African diaspora. Wicks — thick, imposing, impossible to ignore — fit naturally into that tradition.
“In Florida, wicks aren’t just hair — they’re a statement.”
This quote from the South Florida loc community captures exactly why the style spread the way it did. The wicks hairstyle wasn’t adopted because it was trendy. It was worn because it meant something. That meaning — pride, identity, belonging — is what practitioners of The Florida Method carry forward today.
Kodak Black and the Celebrity Effect
No discussion of wicks hair and celebrity culture is complete without Kodak Black. The Pompano Beach rapper — born Dieuson Octave — became the most visible face of wicks hair to national audiences starting around 2015–2016. His thick, upward-projecting wicks became as recognizable as his music, and millions of fans searched “Kodak Black wicks hair” trying to understand what they were looking at.

Kodak Black didn’t invent wicks — he was born into the community where they already existed. But his visibility brought the style to audiences far outside South Florida. Searches for wicks hair spiked on Google Trends following his early mixtapes and his rise to mainstream recognition. Other Florida artists followed, and the style became synonymous with a specific sound, a specific place, and a specific community.
The celebrity effect matters because it changed who was asking about wicks. Before Kodak Black, wicks were largely an insider style. After, they became a style that people across the country — and internationally — wanted to understand and replicate.
Why Florida Became the Home of Wicks
Florida wicks hair carries its geographic label for a reason. South Florida’s unique cultural mix — heavy Haitian, Jamaican, and broader Caribbean-American populations concentrated in a specific region — created the conditions for this style to develop and thrive. The climate also plays a role: South Florida’s heat and humidity means hair that loc’s thickly and retains moisture, which suits the thick formation that wicks require.
The result is that “Florida wicks” is both a geographic description and a quality marker. When someone says their wicks were done “the Florida way,” they’re referring to The Florida Method — the authentic combination of thick loc formation, intentional congoing, and a specific maintenance approach developed within this community. It’s not just about where the locs were made. It’s about how they were made, and why.
How to Get Wicks: Step-by-Step Methods
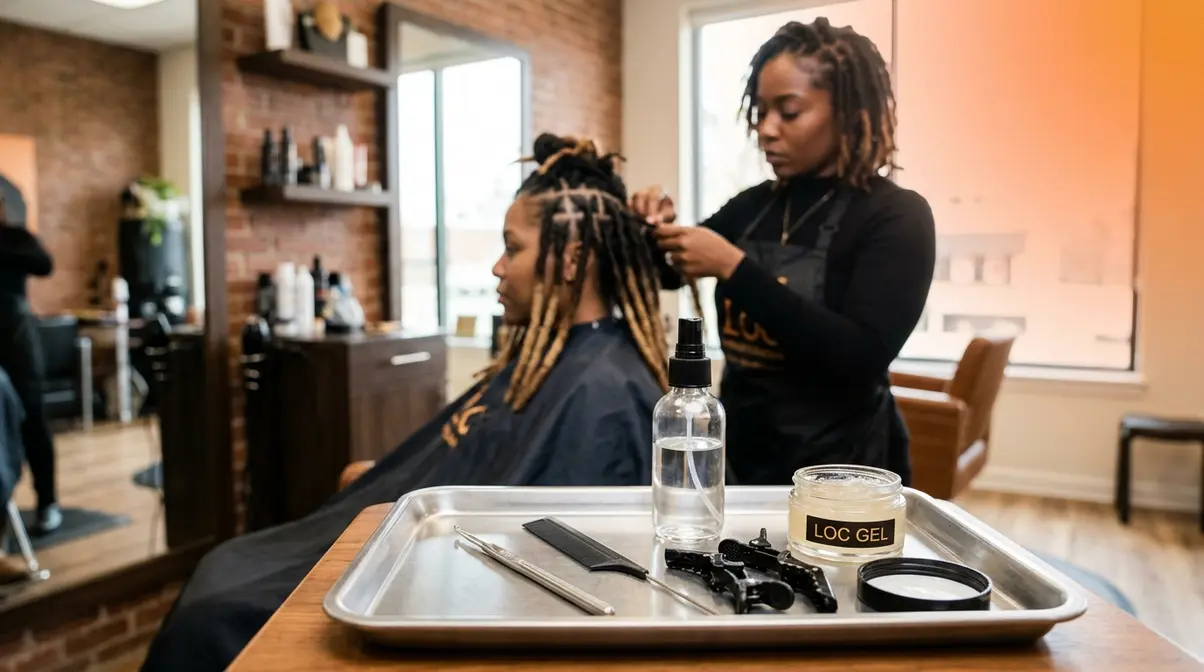
Getting wicks starts with understanding that there’s no single universal method. The approach depends on your current hair length, texture, and whether you’re starting from scratch or working with existing locs. Locticians across the South Florida community have refined several techniques over the years, and each has its place depending on your starting point.
- Prerequisites before you begin:
- Hair type: Naturally kinky or coily hair (Type 4a–4c) loc’s most easily and produces the thickest, most defined wicks. Straighter textures can work but require more product and patience.
- Hair length: A minimum of 3–4 inches is generally recommended for the crochet method. Shorter hair can be started with extensions (covered in H2-8).
- Tools: A crochet needle (size 0.75mm–1.0mm), rubber bands (for the combine method), rat-tail comb for parting, and a spray bottle with water.
- Time commitment: Initial installation takes 4–8 hours depending on hair length and number of wicks. Budget a full day.
Method 1 — The Crochet Method
The crochet method is the most beginner-friendly and most commonly recommended starting point. A loctician uses a small crochet needle (size 0.75mm–1.0mm) to interlock hair fibers together, forming a tight, unified loc section. Here is the step-by-step process as performed by professional locticians:
Tools needed: Crochet needle (0.75mm–1.0mm), rat-tail comb, sectioning clips, water spray bottle, loc gel or butter (optional). Estimated time: 4–8 hours for a full head.
- Section the hair. Using the rat-tail comb, divide the hair into clean, even sections — the size of each section determines the final thickness of each wick. Larger sections = thicker wicks. Clip each section to keep them separated.
- Dampen the section. Lightly mist each section with water. Hair should be damp, not soaking wet. Damp hair is more pliable and accepts interlocking more easily.
- Insert the crochet needle. Push the needle through the center of the hair section from underneath, near the scalp. The hook faces upward.
- Hook and pull hair fibers. Use the hook to catch loose hair fibers and pull them back through the section, interlocking them into the core of the loc. Repeat this motion moving from the root toward the tip, working in small increments (about 1cm at a time).
- Repeat until the section is firm. The goal is a dense, unified column that holds its shape without rubber bands or pins. This typically takes 10–20 passes per section depending on hair thickness.
- Roll and shape. Once the section is interlocked, roll it between your palms to smooth the surface and encourage a cylindrical shape.
- Repeat for all sections. Work systematically across the head — front to back or side to side — keeping sections consistent in size for a uniform look.
- Allow to dry completely. Do NOT cover or wrap the hair immediately after installation. Air dry for a minimum of 4 hours, then finish with a hooded dryer for 30–45 minutes (see Maintenance section for full drying protocol).
As NaturallyCurly’s guide to loc formation methods notes, the crochet method produces tighter initial loc formation than freeform techniques, which is why it’s particularly well-suited to creating the dense, uniform columns that define wicks (NaturallyCurly, 2024).
Method 2 — The Rubber Band and Combine Method
The rubber band and combine method is a two-phase approach. It works particularly well for people who already have established locs and want to combine them into wicks. It’s also a common method for starting wicks on shorter hair that isn’t yet long enough for reliable crochet interlocking.
- Phase 1 — The Rubber Band Stage:
- Section the hair into the desired wick groups (typically 3–5 individual locs per wick, depending on desired thickness).
- Secure each group at the root with a small rubber band. Use a band that sits flat against the scalp without excessive tension — tight rubber bands cause traction alopecia (hair loss from scalp tension).
- Leave the rubber bands in place for 2–4 weeks during the initial locking phase.
- Phase 2 — The Combine Stage:
- Once the banded sections have begun to mat and interlock at the root, remove the rubber bands carefully (use scissors if needed — never rip them out).
- Use the crochet needle to reinforce the combined root, interlocking any loose fibers at the base where the rubber band sat.
- Palm-roll each combined section to encourage cylindrical formation.
- Repeat the interlocking and palm-rolling process at each maintenance appointment (every 6–8 weeks).
The combine method produces slightly less uniform initial results than crochet, but many locticians prefer it for clients whose hair needs more time to establish before heavy interlocking.
Method 3 — Freeform Wicks
Freeform wicks are exactly what they sound like: wicks that form naturally, without the structured intervention of crochet needles or rubber bands. You section the hair at the start, keep sections separated during washing, and allow the locs to mat, thicken, and eventually congo on their own over time.
Freeform wicks hair takes significantly longer to achieve — typically 12–24 months before the locs are thick enough to be considered true wicks. However, freeform wicks often have the most organic, textured appearance, with natural variations in thickness and shape that many wearers find more authentic to the original South Florida style.
The trade-off is control: freeform locs don’t always congo evenly. Without a loctician’s guidance, some sections may combine in ways you didn’t intend. Most practitioners recommend a hybrid approach — freeform growth with occasional loctician visits to guide the congoing process.
Starting Wicks with Short or Straight Hair

One of the most common questions beginners ask is whether they can start wicks with short hair or naturally straight hair. The honest answer: it’s possible, but it requires a different approach.
- For short hair (under 3 inches):
- The crochet method requires enough hair length to interlock effectively. With very short hair, most locticians recommend starting with loc extensions (synthetic or human hair wicks extensions attached at the scalp) to provide immediate length and volume. Once the extensions are installed and your natural hair begins to grow and interlock with them, you remove the extensions gradually and maintain the wicks naturally.
- Alternatively, use the rubber band method to begin banding sections immediately — even at 1–2 inches — and allow the locs to develop with growth.
- For straight or wavy hair (Type 1–2):
- Straighter hair textures resist natural loc formation. The hair fibers don’t coil and knot as readily as Type 4 textures. Locticians often use a stronger hold product (loc gel or beeswax) and more frequent crochet interlocking to compensate.
- Be aware: straight hair wicks tend to be less dense and may require more ongoing maintenance to hold their shape. Discuss realistic expectations with your loctician before committing.
understand the wicks hairstyle — this resource covers hair type compatibility for wicks in more detail.
Wicks Styles and Variations
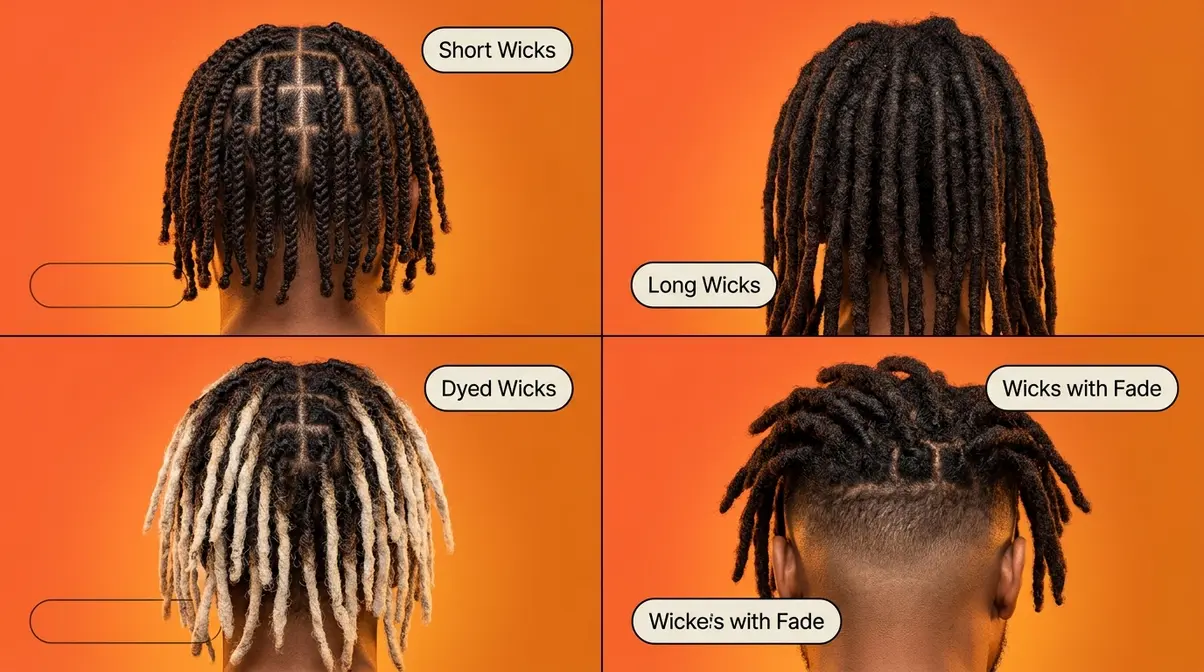
One of the most appealing aspects of wicks hair is how much creative range the style offers. Once you understand the basic formation, the variations — in length, thickness, color, and pairing with other cuts — are nearly endless. Locticians across the South Florida community have developed a visual vocabulary of wick styles that serves every aesthetic from subtle to dramatic.
“Wicks styles range from short, tight columns close to the scalp to floor-grazing ropes of fused locs — the thickness and length you choose defines the entire visual statement.”
Wicks by Length: Short, Medium, and Long
Length is the most fundamental style variable in wicks hair. Here’s how each range looks and functions:
| Length | Approximate Size | Visual Character | Best For |
|---|---|---|---|
| Short wicks | Scalp to chin | Bold, tight columns close to the head | Low-maintenance, athletic lifestyles |
| Medium wicks | Chin to shoulder | More movement, visible texture | Versatile everyday wear |
| Long wicks | Shoulder and beyond | Dramatic, sweeping columns | Maximum visual impact, performance |
Short wicks hair (scalp to chin length) create a tight, architectural look — the columns project outward and upward more dramatically because they’re not weighted down. Many beginners start here because shorter wicks are easier to dry thoroughly, which reduces the mold risk.
Long wicks hair is the most visually striking variation. As wicks grow past shoulder length, they develop more movement and weight. Drying long wicks takes significantly more time — sometimes 6–8 hours — making the maintenance routine more demanding. However, long wicks are the version most associated with the South Florida aesthetic and the style’s cultural roots.
Wicks by Thickness: Mini, Standard, and Big
Thickness is the second major variable — and it’s determined at the very beginning of the process by how large your initial sections are.
Mini wicks hair uses smaller sections, producing narrower columns (roughly pencil-to-finger width). Mini wicks give a denser, fuller appearance because there are more columns across the head. They’re also faster to dry than thicker versions.
Standard wicks (finger to thumb width) are the most common size. They balance visual impact with manageable drying time.
Big wicks hair — sometimes called “fat wicks” in the community — uses very large sections, producing thick wicks that can be as wide as two fingers or more. Big wicks are the most dramatic version and the most closely associated with the original Florida aesthetic. They’re also the highest-maintenance, as the dense core takes the longest to dry fully. Thick wicks hair of this size is what most people are referring to when they say “Florida wicks.”
Creative Variations: Dyed Wicks and Wicks with Fades
Beyond length and thickness, wicks offer several creative directions:
Dyed wicks are one of the most popular variations. Because wicks are thick and dense, color sits differently on them than on standard hair. Bleaching the tips while leaving the roots natural — an ombré effect — is particularly common and creates striking contrast. Full bleach and color (platinum, blonde, or vivid colors) is possible but requires a loctician experienced in color-treating locs, as over-processing can weaken the loc structure.
Wicks with fades pair the thick, bold columns on top with a clean fade (a graduated short cut) on the sides and back. This combination has become one of the most requested barbershop/loctician collaboration styles in Florida and beyond. The contrast between the tight fade and the projecting wicks creates a sharp, modern aesthetic.
Flat wicks are a less common variation where the locs are encouraged to flatten slightly rather than form a fully cylindrical column. Flat wicks have a slightly different texture and silhouette — broader but thinner — and are sometimes preferred for their softer visual weight.
Wicks Maintenance: Washing, Drying & Mold Prevention
Maintenance is where most beginners struggle — and where the difference between healthy, long-lasting wicks and damaged, mildew-prone locs is decided. The thickness that makes wicks so visually striking is the same property that makes them demanding to care for. Professional locticians consistently report that inadequate washing and drying are the two most common reasons wicks develop problems.
“Wicks hair requires a dedicated drying routine after every wash — the dense loc core holds moisture for up to 48 hours, making thorough drying essential to preventing mold.”
How to Wash Wicks Without Causing Damage
Washing wicks hair requires a different approach than washing loose natural hair or even standard dreadlocks. The goal is to clean the scalp and loc surface thoroughly without saturating the loc core so deeply that drying becomes impossible.
How to wash wicks — step by step:
- Dilute your shampoo. Mix a clarifying or residue-free shampoo (avoid shampoos with heavy silicones or waxes — these build up inside locs and are nearly impossible to remove) with water in a squeeze bottle at roughly a 1:3 ratio (one part shampoo, three parts water). Diluted shampoo distributes more evenly and rinses out more completely.
- Apply to the scalp first. Direct the squeeze bottle nozzle to the scalp between wicks and apply the diluted shampoo at the roots. Gently massage the scalp with your fingertips — do not scrub aggressively, which can loosen the loc structure.
- Work down the wick. Squeeze the diluted shampoo gently along the length of each wick, working from root to tip.
- Rinse thoroughly. Rinse with warm water for at least 2–3 minutes per section. Any shampoo residue left in the dense core of a wick will cause buildup and odor over time.
- Squeeze out excess water. After rinsing, gently squeeze each wick from root to tip — do not wring or twist, which can unravel newly formed locs.
- Proceed immediately to drying. Never leave wet wicks wrapped in a towel or covered. Move directly to the drying protocol.
As Byrdie’s guide to dreadlock maintenance notes, residue-free shampoos are essential for loc health — product buildup inside thick locs creates conditions where mold can develop (Byrdie, 2024).
The ACV Deep Cleanse: Mold Prevention Protocol
The ACV (Apple Cider Vinegar) deep cleanse is a maintenance ritual that locticians across the South Florida community recommend every 4–6 weeks for wick wearers. It removes buildup, rebalances scalp pH, and — critically — creates an acidic environment that inhibits mold and mildew growth inside the loc core.
Why this matters: The dense interior of a thick wick is a warm, moist environment after washing. Without regular deep cleansing, lint, product residue, dead skin cells, and mineral deposits from hard water accumulate inside the loc. This buildup traps moisture and creates ideal conditions for mold. Locticians report that mold-related loc damage is significantly more common in wick wearers than in people with standard dreadlocks, simply because of the greater core mass.
ACV Deep Cleanse Recipe and Protocol:
- What you need:
- 1 cup raw, unfiltered apple cider vinegar (with the “mother” — the cloudy sediment that contains beneficial bacteria)
- 4 cups warm water
- A large basin or clean sink
- Optional: 5 drops of tea tree essential oil (adds antifungal properties)
- Steps:
- Mix the solution. Combine 1 cup ACV with 4 cups warm water in the basin. Add tea tree oil if using. Stir gently.
- Submerge the wicks. Lower your wicks into the basin and allow them to soak for 10–15 minutes. You will likely see the water discolor — this is normal and shows the cleanse is working, pulling buildup out of the loc core.
- Massage the scalp. While the wicks soak, use your fingertips to gently massage the scalp to loosen any buildup at the roots.
- Rinse thoroughly with clean water. Rinse the wicks completely with clean warm water for 2–3 minutes until the vinegar smell dissipates. Incomplete rinsing leaves an acidic residue that can irritate the scalp.
- Follow with your regular shampoo wash (as described above) to remove any remaining ACV solution.
- Proceed immediately to the drying protocol.
Drying Wicks Properly to Prevent Mildew
Drying is the single most critical step in wicks maintenance. A thick wick that isn’t dried completely retains moisture in its core for 24–48 hours. In that time, mildew can begin to form — and once mildew establishes itself inside a loc, it is extremely difficult to eliminate without damaging the loc structure.
The mandatory drying schedule for wicks:
| Step | Method | Duration | Purpose |
|---|---|---|---|
| 1 | Squeeze excess water (towel press) | 5 min | Remove surface moisture |
| 2 | Air dry (open, uncovered) | 2–4 hours | Allow initial evaporation |
| 3 | Hooded dryer on medium heat | 30–45 min | Drive moisture from loc core |
| 4 | Final air dry | 1–2 hours | Cool down and confirm dryness |
- Do not:
- Wrap wet wicks in a satin bonnet or scarf immediately after washing — this traps moisture
- Go to bed with damp wicks — overnight moisture retention is the primary cause of mildew
- Use a regular blow dryer on high heat directly on wicks — this can cause surface dryness while the core stays wet, creating a false sense of security
How to check if your wicks are fully dry: Squeeze the thickest wick at its center point. If it feels cool to the touch or you can feel any moisture when pressing, it needs more drying time. Fully dry wicks feel warm, firm, and consistent throughout.
Common concerns reported by wick wearers include a musty smell after washing — this is almost always a sign of incomplete drying rather than a problem with the loc itself. Addressing the drying routine resolves the smell in most cases.
Wicks Hair Cost Breakdown & Finding the Right Stylist
Cost is the number one practical question every potential wick wearer has — and it’s the question that almost every other guide fails to answer clearly. The honest reality: wicks are a premium hairstyle that requires a skilled specialist. You get what you pay for. Understanding the cost framework upfront helps you budget appropriately and avoid the trap of choosing the cheapest option available.
“Professional wicks hair installation costs between $500 and $1,000 depending on hair length, method, and region — making it one of the higher-investment natural hairstyles (Allure, 2024).”
Wicks Cost Calculator: What to Expect to Pay
The cost of wicks dreads varies based on four key factors: current hair length, the creation method used, the number of wicks, and your geographic location.
| Factor | Lower End | Higher End | Why It Affects Cost |
|---|---|---|---|
| Short hair (under 6 inches) | $300–$450 | $500–$600 | Less work per wick, but may need extensions |
| Medium hair (6–12 inches) | $450–$650 | $700–$850 | Standard installation time |
| Long hair (12+ inches) | $600–$800 | $900–$1,000+ | Significantly more time per section |
| Extensions added | Add $150–$300 | Add $300–$500 | Depends on extension type and quantity |
| South Florida / major metro | Higher end of range | — | Higher loctician rates in competitive markets |
| Smaller markets | Lower end of range | — | Lower overhead, less demand premium |
Maintenance appointments (every 6–10 weeks) typically cost $75–$200 depending on what’s needed — retwisting, interlocking, and ACV cleanse treatments are billed separately by most locticians.
The extension factor: If you’re starting wicks with short hair and need wicks hair extensions to add length immediately, budget an additional $150–$500 depending on whether you choose synthetic or human hair extensions. Human hair wicks extensions cost more but blend more naturally and last longer.
According to Allure’s coverage of loc and wicks pricing (Allure, 2024), the $500–$1,000 range for professional installation reflects the skilled labor involved — a full installation typically takes 6–10 hours of a loctician’s time.
Red flags to watch for: Any quote significantly below $300 for a full head of wicks should raise questions. Wicks require a skilled loctician — not just a general braider or natural hair stylist. Underpriced services often reflect inexperience, and a poorly executed installation can damage your hair or create uneven wicks that are difficult to correct.
How to Find a Qualified Loctician Near You
Finding a qualified loctician for wicks hair near you requires more specificity than a general Google search for a hair salon. Not every natural hair stylist or braider has experience with wicks specifically — the congoing and interlocking techniques require dedicated training.
How to find the right loctician:
- Search specifically for wicks. Use search terms like “wicks loctician near me,” “wicks hair salon near me,” or “loc specialist wicks .” General searches for “dreadlock salon” will return results that may not have wicks experience.
- Check Instagram and TikTok portfolios. Most skilled locticians showcase their work on social media. Search hashtags like #wickshair, #floridawicks, and #wickslocs to find locticians who specialize in this style. Look for consistent quality across multiple clients.
- Ask about their wicks-specific experience. When you contact a loctician, ask directly: “How many wicks installations have you done?” and “Can I see before/after photos of your wicks clients?” A confident specialist will answer readily.
- Request a consultation first. Before committing to a full installation, book a consultation appointment. This lets you assess the loctician’s knowledge, discuss your hair type and goals, and get a written quote.
- Check reviews for wicks-specific mentions. General positive reviews are useful, but look specifically for reviews that mention wicks by name.
As Aaliyah Beauty Bar’s guide to wicks installation notes, finding a loctician who specializes in thick loc formation — not just general dreadlock maintenance — is the most important factor in getting wicks that last (Aaliyah Beauty Bar, 2024).
Essential Wicks Products, Tools & Extensions
Having the right tools and products makes a measurable difference in both the installation process and long-term maintenance. Professional locticians working in the South Florida tradition use a specific toolkit — and recommending the right products to clients is a standard part of the loctician consultation.
“The three tools no wick wearer should be without are a quality crochet needle, a residue-free clarifying shampoo, and a hooded dryer — each serves a specific, non-negotiable function.”
Must-Have Tools for Starting and Maintaining Wicks
| Tool | What It Does | What to Look For |
|---|---|---|
| Crochet needle (0.75–1.0mm) | Interlocks hair fibers for loc formation and maintenance | Smooth, rounded tip; comfortable handle |
| Rat-tail comb | Creates clean, precise sections | Fine-toothed metal tip for accuracy |
| Hooded dryer | Dries loc core thoroughly after washing | Consistent heat distribution; adjustable temperature |
| Spray bottle | Dampens hair for crochet work | Fine mist setting |
| Clarifying shampoo | Removes buildup without leaving residue | Sulfate-free, silicone-free formula |
| Loc gel or butter | Provides hold during initial formation | Water-soluble (washes out cleanly) |
The wicks hair tool most beginners overlook is the hooded dryer. Many people assume a standard blow dryer is equivalent — it isn’t. A hooded dryer distributes gentle, consistent heat around all the wicks simultaneously, drying the core from the outside in. A direct-heat blow dryer dries the surface quickly while leaving the interior wet.
For scalp health, locticians recommend a lightweight oil (jojoba or sweet almond oil) applied to the scalp — not the locs — between wash days. Applying heavy oils directly to the loc can cause buildup in the dense core over time.
Wicks Extensions: Adding Length and Volume
Wicks hair extensions allow people with short natural hair to achieve the full wicks look immediately, rather than waiting 12–18 months for natural locs to grow and thicken. They’re also used by people who want to add volume to existing wicks that haven’t congoed as thickly as desired.
Synthetic extensions are the most affordable option ($50–$150 for a full set of extension hair). They’re pre-made in wick shapes and attached at the scalp. The downside: synthetic extensions don’t blend as naturally with your hair texture and may look more artificial, especially as your natural hair grows out.
Human hair wicks extensions (SV: 40) offer a more natural result. Human hair extensions can be color-matched to your natural hair, styled with heat, and blended more seamlessly into the interlocking process. They cost significantly more — typically $200–$500 for the extension hair alone, before labor — but locticians consistently report that clients are more satisfied with the long-term results.
How extensions are attached: Extensions are typically installed using the crochet method — the loctician uses the crochet needle to interlock the extension hair with your natural hair at the scalp, creating a secure attachment point. Over time, as your natural hair grows, it intertwines with the extension and the two become indistinguishable.
As Lion Locs’ guide to dreadlock extensions notes, the key to natural-looking extension wicks is matching the extension diameter to your natural loc thickness — extensions that are significantly thicker or thinner than your natural locs will look mismatched as they grow (Lion Locs, 2024).
Risks, Common Mistakes & When to Seek Help
Every hairstyle has limitations and risks, and wicks are no exception. Understanding these honestly — before you commit — is part of making an informed decision. Locticians across the community are consistent on which mistakes cause the most damage and which situations warrant professional intervention rather than DIY attempts.
Common Pitfalls to Avoid
1. Choosing sections that are too small at the start.
If your initial loc sections are too thin, the resulting wicks will be undersized and may not achieve the thick, bold look you’re aiming for. This is one of the hardest mistakes to correct — combining already-thin locs requires significant work. Discuss your desired final thickness with your loctician before sectioning begins, and err on the side of larger sections.
2. Skipping the drying step.
This is the most damaging mistake wick wearers make, and locticians report it consistently. Going to bed with damp wicks, even once, can initiate mildew growth inside the loc core. Mildew-damaged locs develop a persistent musty smell that is extremely difficult to eliminate and, in severe cases, requires cutting the loc to remove the affected section.
3. Using wax-based products.
Wax is frequently marketed for loc formation and maintenance, but professional locticians in the wicks community strongly advise against it. Wax builds up inside the dense core of a wick — it doesn’t wash out, it accumulates over months and years, eventually causing a waxy, stiff, discolored interior. Use water-soluble products only.
4. Over-interlocking.
More crochet work is not always better. Excessive interlocking — particularly at the root — can cause thinning at the scalp junction (the point where the wick meets the scalp). This weakens the wick’s foundation and can lead to breakage. Professional locticians recommend interlocking maintenance every 6–8 weeks, not more frequently.
5. DIY installation without prior training.
The crochet method looks straightforward in video tutorials but requires consistent technique to produce even, well-formed wicks. Uneven needle pressure creates locs with thin spots and weak points. For first-time installation, a professional loctician is strongly recommended — DIY maintenance (palm-rolling, rubber band removal) is reasonable once the wicks are established.
When to Choose a Different Approach
If your hair is Type 1–2 (straight to wavy): Natural wicks formation will be slow and require significantly more product and maintenance than Type 4 hair. Consider whether the ongoing effort aligns with your lifestyle before committing.
If you have a sensitive scalp or history of traction alopecia: The tension involved in loc formation and maintenance can aggravate existing scalp conditions. Consult a dermatologist before beginning, and inform your loctician of any scalp sensitivities.
If you need a low-maintenance style: Wicks are beautiful but demanding. If your lifestyle doesn’t allow for the drying routine after each wash, the style will likely develop maintenance problems over time. Traditional dreadlocks or a different protective hairstyle may be a better fit.
When to Seek Professional Help
- Seek a loctician’s assessment (rather than attempting to fix issues yourself) if:
- You notice a persistent musty smell that doesn’t resolve after a thorough ACV cleanse and complete drying — this may indicate established mold that requires professional treatment
- Wicks are thinning significantly at the scalp junction — this requires a structural assessment before the loc breaks
- You want to combine or separate existing wicks — these structural changes require experienced hands to execute without damage
- You’re considering adding extensions to established wicks — improper attachment can stress the existing loc structure
Frequently Asked Questions About Wicks Hair
What does it mean to wick hair?
“Wicking” hair means combining multiple individual dreadlocks into single, thicker, fused columns called wicks. The process involves interlocking hair fibers using a crochet needle or rubber band method to merge separate loc sections. The term “wick” refers to the cylindrical, candle-wick shape the resulting loc takes. Wicking is done intentionally — it’s not the same as locs that accidentally grow together (which is called natural congoing). Most people wick their hair with the help of a professional loctician who specializes in thick loc formation.
What’s the difference between wicks and dreads?
Wicks and dreads both start as natural locs, but wicks are intentionally combined into much thicker columns. A standard dreadlock is roughly pencil-width and forms independently. A wick is thumb-width or larger and is created by fusing multiple dreadlocks together through a process called congoing. Wicks also require a more involved drying routine because their dense core holds moisture longer — up to 48 hours after washing. Traditional dreads dry faster and require less drying infrastructure. The visual impact of wicks is significantly bolder than standard dreadlocks.
What hairstyle is “wicks”?
Wicks is a thick, rope-like loc hairstyle formed by combining multiple dreadlocks into single, cylindrical columns. Each wick projects outward from the scalp and can range from finger-width to thumb-width or larger. The style originated in South Florida’s Haitian-American community and gained mainstream recognition through Florida rapper Kodak Black. Wicks are classified as a protective hairstyle (a style that protects natural hair from environmental damage and manipulation) — one of the boldest and most visually striking options in the natural hair community.
Why do people in Florida have wicks?
Wicks originated in South Florida’s Haitian-American community, where thick, combined locs were a cultural expression of Afro-Caribbean identity before becoming a mainstream trend. South Florida cities like Pompano Beach, Lauderhill, and parts of Miami have some of the largest Haitian-American populations in the United States. The style’s deep roots in this community — combined with visibility from Florida-based artists like Kodak Black — created such a strong geographic association that “Florida wicks hair” became its own recognized phrase. When someone says their wicks are done “the Florida way,” they’re referencing this specific cultural tradition.
How long does wicks hair last?
Wicks hair is a permanent loc style — it doesn’t have a fixed “expiration date” the way protective styles like braids or twists do. Once formed, wicks grow continuously with your natural hair. The style lasts as long as you choose to maintain it — many wick wearers keep the style for years or decades. What changes over time is the length (wicks grow roughly half an inch per month) and the maintenance required. The main factor limiting longevity is proper care: wicks that are regularly deep-cleansed, properly dried, and maintained by a skilled loctician can last indefinitely.
How much does wicks dreads cost?
Professional wicks installation costs between $500 and $1,000 depending on hair length, method, and location (Allure, 2024). Short hair installations typically fall in the $300–$600 range, while longer hair or installations requiring extensions can reach $900–$1,000 or more. Maintenance appointments every 6–10 weeks typically add $75–$200 per visit. Adding human hair wicks extensions costs an additional $200–$500 for the extension hair before labor. The wide price range reflects the skilled labor involved — a full installation takes 6–10 hours of a loctician’s time. Always get a written quote before committing to an appointment.
The Florida Method: Your Path to Wicks Hair
Wicks hair is one of the most visually striking protective hairstyles in natural hair culture — and now you know exactly what they are, where they came from, and what it takes to get and maintain them. For anyone with naturally kinky or coily hair who wants a bold, culturally rooted style, wicks offer something few hairstyles can: a look that carries genuine history and meaning alongside its visual impact. Professional installation costs $500–$1,000 (Allure, 2024), the maintenance routine is more demanding than standard locs, and the drying protocol is non-negotiable — but the result is a style that commands attention and respect.
The Florida Method is the framework that ties it all together: the authentic South Florida approach to wicks that combines Haitian-American cultural heritage, intentional thick loc formation, and a specific maintenance tradition built around deep cleansing and thorough drying. This isn’t just a style you get — it’s a practice you learn and maintain. Every element of The Florida Method exists for a reason, from the way sections are sized at installation to the ACV deep cleanse performed every 4–6 weeks.
Your next step is a consultation with a qualified loctician who specializes in wicks — not just dreadlocks generally, but wicks specifically. Use the search strategies in the Cost & Stylist section to find someone with a verified portfolio of wicks work. Book a 30-minute consultation before committing to a full installation. Come with your section size preference, your length goals, and a realistic picture of your washing and drying routine. Within one appointment, you’ll know exactly whether wicks are the right fit — and if they are, you’ll be ready to start.

Dave King
Writes evidence-based hair-care guides for Care About Your Hair — for every hair type, jargon-free and independent.