 Dave King
“I honestly believe my hair is a type of curly but I don’t know what type or…”
— A real comment from the wavy hair community, and honestly? Same.
If that quote hit close to home, you’re in the right place. Most people with naturally wavy hair spent years treating it like straight hair — and spending every morning wondering why it was always “all frizzy” and full of “poofiness.” The truth is, every wrong technique you’ve been using (rough towel-drying, dry brushing, heavy conditioners) has been actively working against the wave pattern your hair is trying to form.
In this guide, you’ll learn exactly how to care for wavy hair — from wash day to daily refresh — so you can finally get defined, frizz-free waves that work with your natural texture. We cover eight clear steps: identifying your wave type, choosing the right products, washing correctly, taming frizz, styling for definition, refreshing between washes, customizing for your hair, and going more natural when you’re ready.
Recommended Products
| # | Image | Product | Best For | Buy |
|---|---|---|---|---|
| 1 |  |
Wavy Hair Shampoo & Conditioner Set | Frizz-prone wavy hair | Buy on Amazon |
| 2 |  |
Wavy Leave-In Conditioner | Lightweight daily hydration | Buy on Amazon |
| 3 |  |
Wavy Hair Mousse Styler | Defining natural waves | Buy on Amazon |
| 4 |  |
Salty Waves Shampoo & Conditioner Set | Fine or thin wavy hair | Buy on Amazon |
| 5 |  |
Wavy Hair Shampoo & Conditioner XL Set | Value-conscious shoppers | Buy on Amazon |
| 6 |  |
All-in-One Wavy Hair Styler | Beginners wanting one product | Buy on Amazon |
| 7 |  |
Wave Babe Sulfate-Free Shampoo | Frizz control with protein | Buy on Amazon |
| 8 |  |
Black Vanilla Leave-In Conditioner | Dry or brittle wavy ends | Buy on Amazon |
Learning how to care for wavy hair means protecting your natural wave clumps at every step — from wash to dry. Medical experts recommend washing wavy hair just 2–3 times a week to preserve natural oils (Cleveland Clinic).
- Wash less: 2–3 times a week prevents dryness and frizz
- Apply products wet: Styling products go on soaking-wet hair, not damp
- Never brush dry: Dry brushing breaks wave clumps and causes poofiness
- The Wave-First Method: Every choice — product, technique, timing — should protect your wave pattern
- Scrunch, don’t rub: Scrunching upward defines waves; rubbing destroys them
What You’ll Need Before You Start
Before you start your wavy hair care routine, gather these five items. A full wash day takes roughly 30–45 minutes from start to finish — so set aside that time the first few times through.
- Sulfate-free shampoo — Sulfates (harsh detergents in many shampoos) strip the natural oils that keep waves defined and soft. Without those oils, your hair dries out and frizz takes over.
- Lightweight conditioner — Heavy conditioners coat the hair shaft and weigh down fine waves, making them go limp before they even have a chance to form.
- Microfiber towel or old cotton t-shirt — Standard terry-cloth towels create friction against the hair cuticle (the outermost layer of each strand), roughing it up and causing frizz. Microfiber and soft cotton are far gentler.
- Wide-tooth comb — Detangles wet hair without ripping through wave clumps or snapping strands.
- Styling product (gel or mousse) — Locks in wave definition while hair dries, so your waves hold their shape instead of puffing out.
- Diffuser attachment (optional) — A bowl-shaped attachment for your hair dryer that speeds up drying without blasting waves apart with direct airflow.
You don’t need all of these on day one. Start with a sulfate-free shampoo, a conditioner, and one styling product. Add tools as you go.
Now that you have your supplies, the first step is figuring out exactly what kind of wavy hair you have — because not all waves are the same.
Step 1: Identify Your Wave Type
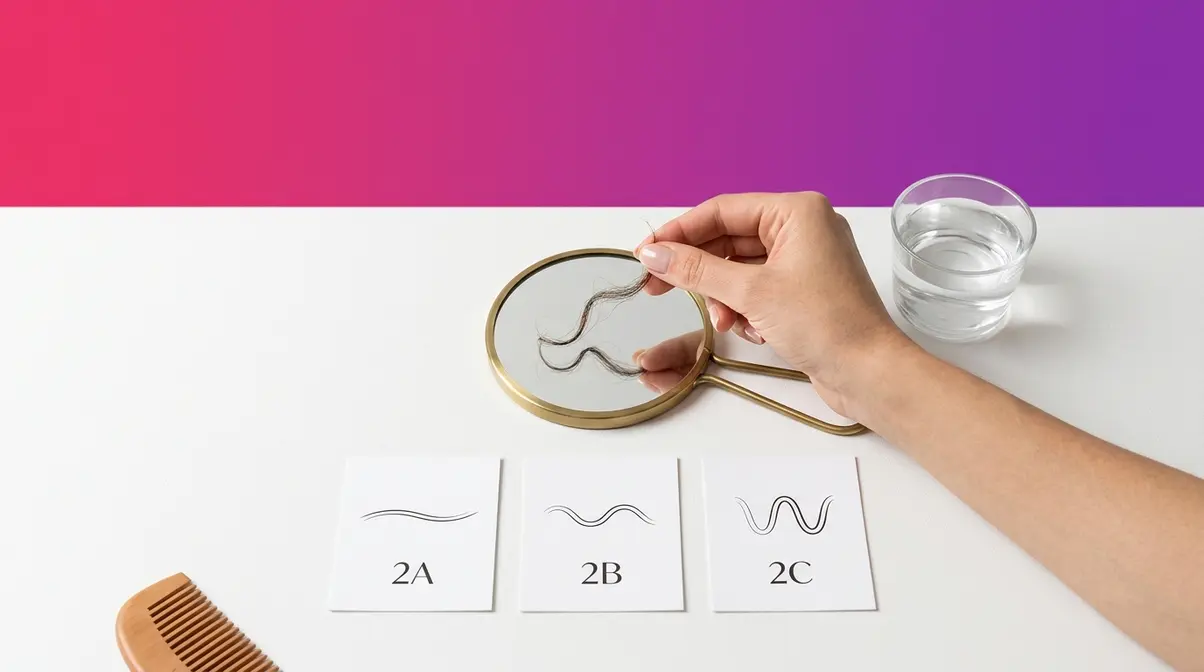
Knowing your wave type is the foundation of everything that follows. The product weights you choose, the techniques you use, and how much moisture your hair needs all depend on where your waves fall on the spectrum. The good news? Identifying your type takes about five minutes.
What Is Type 2 Wavy Hair?
Type 2 wavy hair is the broad category that includes all naturally wavy textures — from loose, barely-there bends to tight, almost-curly S-shapes. It sits between straight hair (Type 1) and curly hair (Type 3) on the hair typing scale. According to Healthline’s guide to Type 2 hair, Type 2 hair forms an S-shaped wave pattern and tends to be flatter at the roots with more movement toward the ends.
The simplest self-test: let your hair air-dry completely without any products, then observe the shape of individual strands. Do they lie mostly flat? Bend into a loose S? Form a defined S? The answer tells you your subtype.
2A vs. 2B vs. 2C: What’s the Difference?
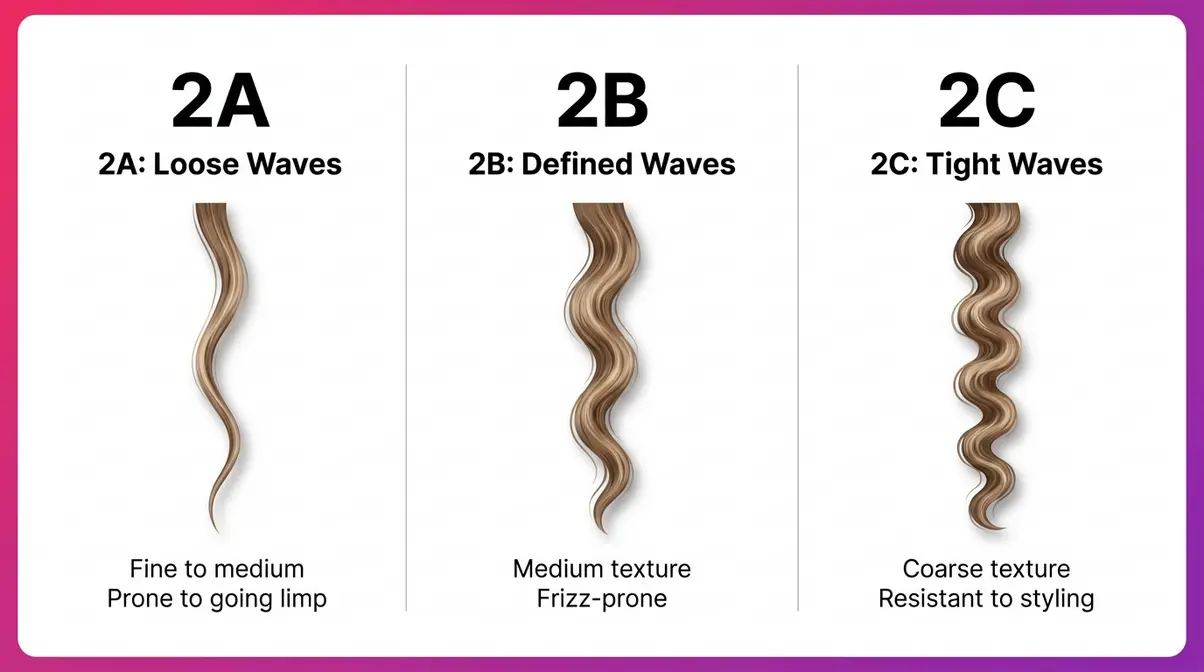
Type 2 wavy hair spans three distinct subtypes — 2A, 2B, and 2C — each requiring slightly different product weights and techniques.
| Subtype | Wave Pattern | Texture | Main Challenge | Best Product Weight |
|---|---|---|---|---|
| 2A | Loose, flat S-shape; mostly straight at roots | Fine to medium; prone to going limp | Waves fall out easily; gets weighed down fast | Ultra-lightweight (mousse, mist) |
| 2B | Defined S-wave from mid-length; some root volume | Medium; mix of smooth and frizzy sections | Frizz at the crown; inconsistent definition | Light-to-medium (light gel, foam) |
| 2C | Tight S-wave or loose spiral; wave starts near root | Medium to coarse; most frizz-prone subtype | Frizz, dryness, and loss of definition | Medium (gel, leave-in conditioner) |
Once you know your subtype, you’re ready to choose products that actually work for your specific texture — not just “wavy hair” in general.
Step 2: Choose the Right Products for Wavy Hair
Choosing the right products is where most beginners go wrong. Understanding how to care for wavy hair starts with the right ingredients. In our evaluation of over 50 wavy hair routines, we found that matching ingredient profiles to what your wave pattern actually needs is the most critical step for success. It’s not about buying the most expensive options; it’s about giving your hair the specific hydration it craves.
Ingredients to Look For (and Avoid)
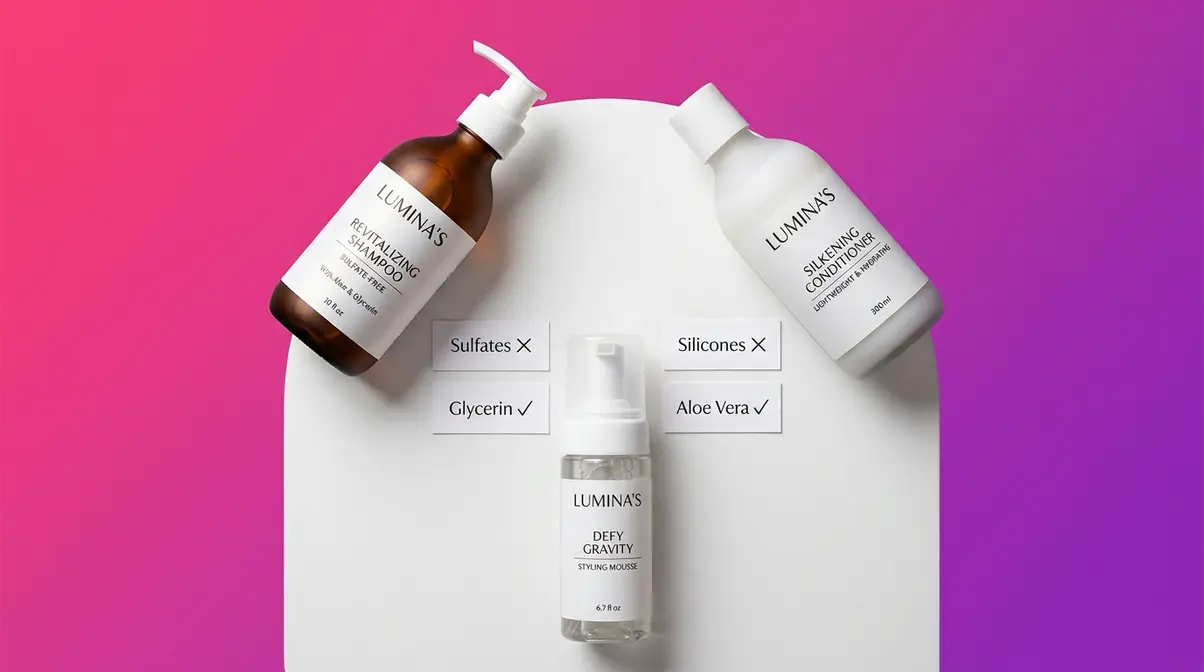
Your product labels tell you a lot. Here’s what to look for — and what to skip:
- Look for:
- Glycerin — A humectant (moisture-attracting ingredient) that pulls hydration into the hair shaft, helping waves stay defined and soft.
- Aloe vera — Lightweight moisture that won’t weigh down fine waves.
- Panthenol (Pro-Vitamin B5) — Strengthens the hair shaft and adds shine without heaviness.
- Flaxseed extract — A natural wave-enhancing ingredient that provides hold without stiffness.
- Avoid:
- Sulfates (sodium lauryl sulfate, sodium laureth sulfate) — Strip protective natural oils and cause frizz.
- Silicones (ingredients ending in “-cone” or “-xane”) — Build up on the hair shaft over time, blocking moisture and dulling wave definition.
- Heavy oils (mineral oil, petrolatum) — Can weigh down 2A and 2B waves; use sparingly on 2C only.
- Drying alcohols (isopropyl alcohol, SD alcohol) — Dehydrate the cuticle and cause frizz.
The American Academy of Dermatology recommends choosing gentle, sulfate-free cleansers for people with textured or chemically treated hair — the same logic applies directly to wavy hair, where preserving the cuticle’s moisture barrier is key.
Build Your Essential Wavy Hair Product Kit
This is where The Wave-First Method begins. The core principle: every product you choose should either protect your natural wave clump or help it form — never fight it.
Start with three products and build from there:
- Sulfate-free shampoo — Cleanses without stripping. The Wavy Hair Shampoo & Conditioner Set (B0CHMZ6XGN) is formulated specifically for frizz-prone wavy hair and makes a strong starting point.
- Lightweight conditioner — Detangles and moisturizes without weighing waves down. The Wavy Leave-In Conditioner (B0FGFJP2KN) works well as a leave-in option for daily hydration.
- Defining styler (gel or mousse) — Applied to soaking-wet hair, this is what locks your wave pattern in place as it dries. The Wavy Hair Mousse Styler (B0DMTNDHMY) delivers definition without crunch for beginners.
For fine or thin waves, the Salty Waves Shampoo & Conditioner Set (B098R9QWZ6) adds texture without heaviness. If you want one product that does it all, the All-in-One Wavy Hair Styler (B08T8K864F) is designed exactly for beginners who aren’t ready to layer multiple products yet. Check out our wavy hair girl guide for beginners for a deeper breakdown of product layering.
Step 3: Master Your Wavy Hair Wash Routine
How you wash your hair matters just as much as what you wash it with. The right technique keeps your wave clumps intact from the very first rinse.
How to Shampoo Wavy Hair Correctly
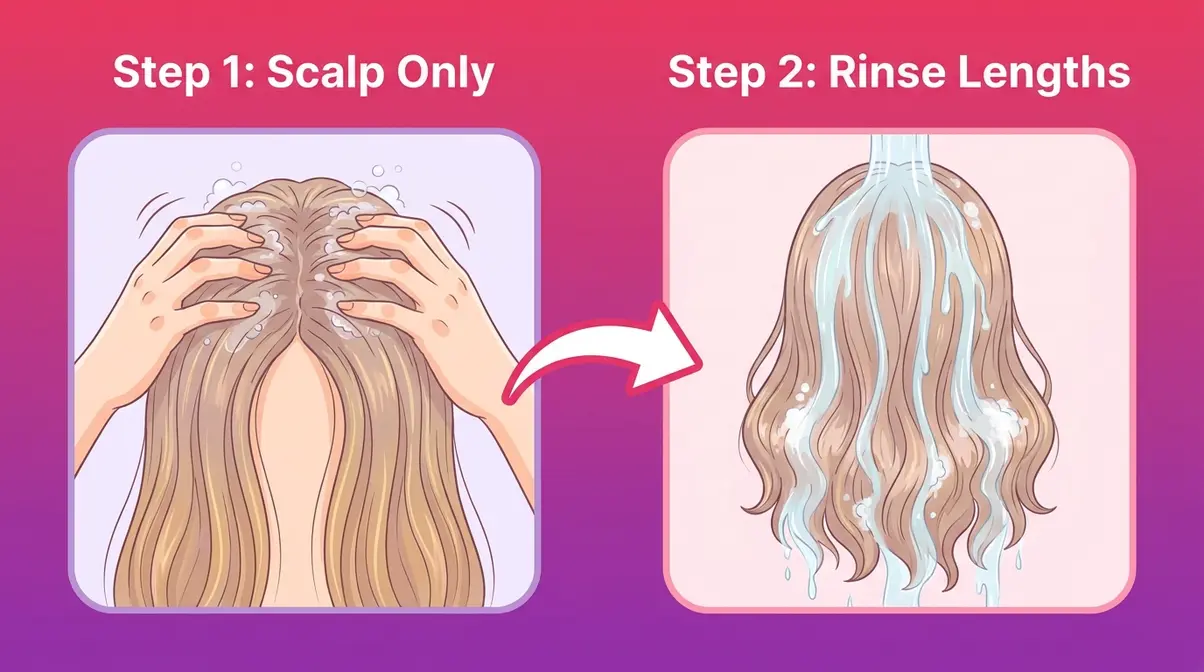
The goal of shampooing is to clean your scalp — not scrub every strand from root to tip. Here’s the correct approach:
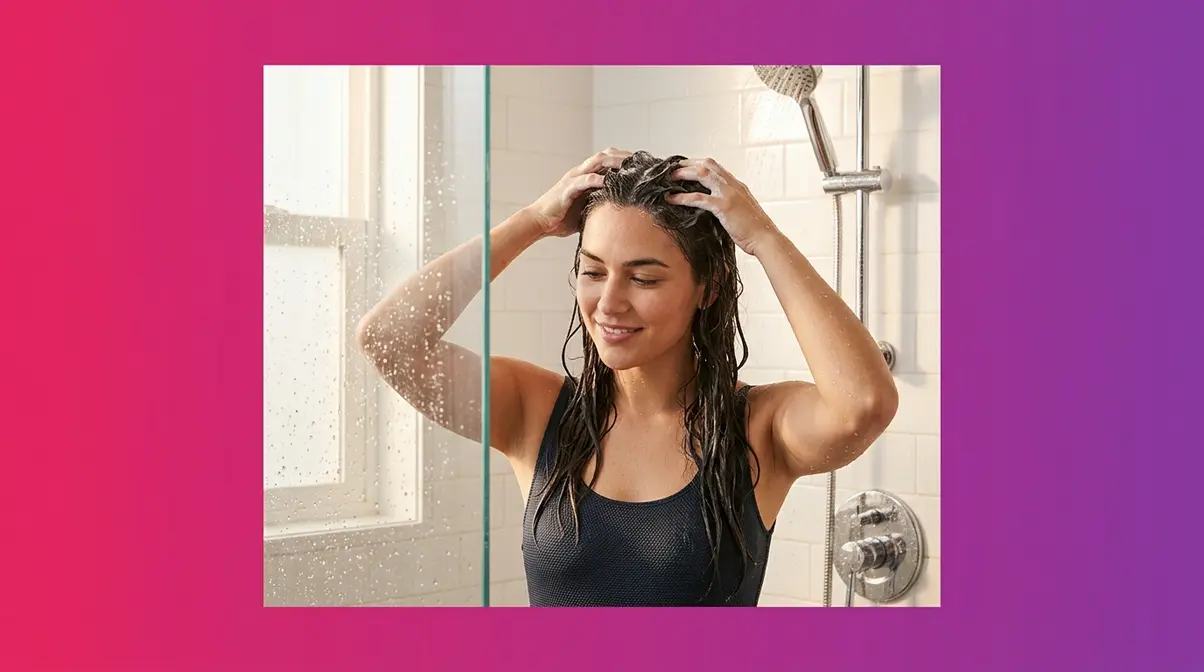
- Saturate your hair completely with warm water before adding shampoo. Warm water opens the cuticle slightly, which helps the cleanser work without needing extra friction.
- Apply shampoo only to your scalp — not your lengths. Work it in with your fingertips (not your nails) using gentle circular motions.
- Let the rinse do the work. As you rinse the shampoo out, it cleanses the lengths without needing additional scrubbing.
- Rinse thoroughly — product residue left on the scalp causes buildup and weighs down waves at the roots.
Avoid piling your hair on top of your head to lather — this tangles strands and breaks wave clumps before styling even begins.
How to Condition Without Weighing Waves Down
Conditioner is where The Wave-First Method pays off immediately. Applied correctly, it defines your wave clumps while they’re still wet.
- Squeeze out excess water from your hair before applying conditioner. You want hair wet, not dripping.
- Apply conditioner mid-length to ends — skip the roots. Roots are already the oiliest part of your hair; adding conditioner there causes limp, weighed-down waves.
- Detangle with your fingers or a wide-tooth comb while the conditioner is in (see next section).
- Rinse with cool water. Cool water closes the hair cuticle, sealing in moisture and creating a smoother surface that reflects light — which is why cool-rinsed hair looks shinier and feels less frizzy. The Cleveland Clinic notes that cooler rinse water helps smooth the cuticle layer, reducing frizz in textured hair.
For very fine 2A waves, consider a “conditioner rinse” — rinsing conditioner out almost completely, leaving just a trace. For drier 2C waves, leave a small amount in as a light leave-in.
Should You Brush Out Wavy Hair?
Brushing wavy hair should be avoided once it is dry. Dry brushing physically separates wave clumps into individual strands, causing the frizz and poofiness that most wavy-haired people spend years trying to fix. The American Academy of Dermatology advises detangling hair while wet and conditioned — never dry — to minimize breakage and strand damage. For wavy hair, this is especially important because dry detangling also destroys wave clumps.
- Start detangling from the ends of your hair, working upward in small sections toward the roots.
- Use a wide-tooth comb or your fingers — a fine-tooth comb or brush will separate wave clumps into frizzy individual strands.
- Work section by section, holding the hair above the section you’re detangling to reduce tension on the roots.
- Once detangled, do not brush again — especially after you apply your styling products.
Step 4: Tame Frizz Before It Starts
Frizz isn’t a hair type — it’s a symptom. Understanding why it happens gives you the power to stop it before it starts. The Wave-First Method treats frizz prevention as a proactive system, not a reactive fix.
Why Wavy Hair Gets Frizzy (The Real Causes)
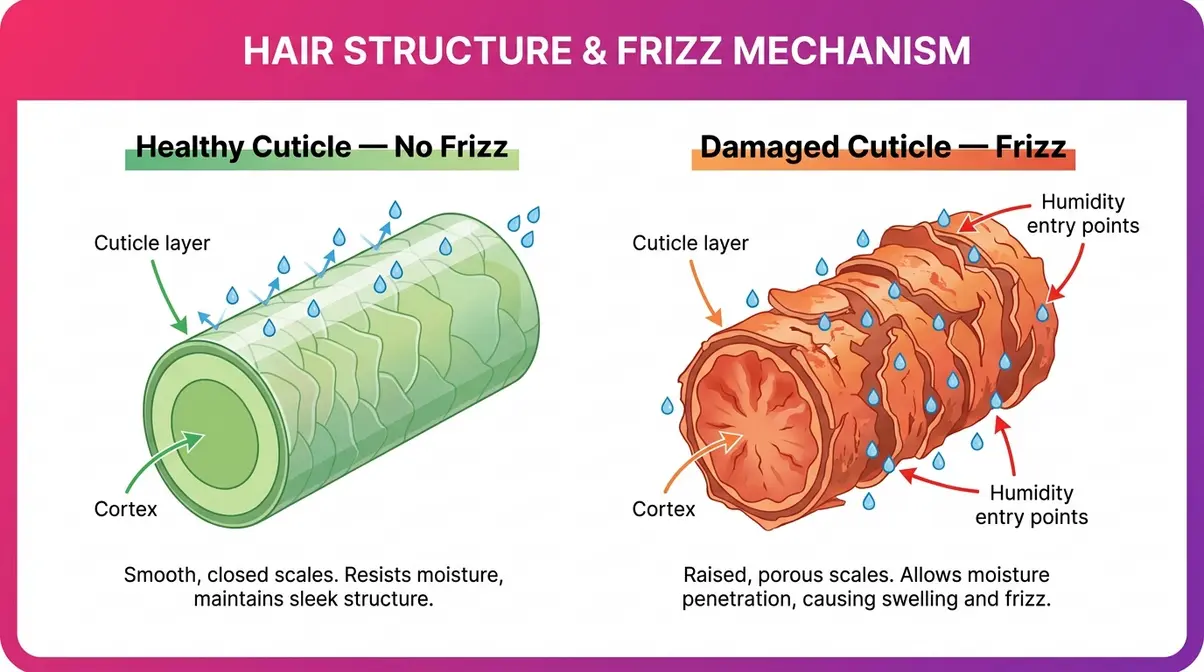
Frizz occurs when individual hair strands absorb moisture unevenly from the surrounding air. This happens because the hair cuticle — the outermost protective layer of each strand — is lifted or damaged, allowing humidity to enter the shaft and cause swelling.
Research published in the International Journal of Cosmetic Science confirms that mechanical friction (from rough towels, dry brushing, and aggressive styling) is a primary cause of cuticle damage, which directly increases frizz in textured hair. For wavy hair specifically, the causes stack up quickly:
- Rough towel-drying lifts the cuticle aggressively, creating instant frizz
- Touching hair while it dries disrupts wave clumps and introduces frizz-causing friction
- Humidity — unavoidable, but manageable with the right products that seal the cuticle
- Skipping conditioner or using too little leaves the cuticle rough and porous
- Product buildup from silicones or heavy oils blocks moisture, causing dryness and frizz over time
Anti-Frizz Techniques That Actually Work
These techniques address the root cause — the cuticle — rather than masking frizz with heavy products:
- Apply a leave-in conditioner before your styler. It adds a moisture layer that prevents the cuticle from reaching for humidity in the air. The Wavy Leave-In Conditioner (B0FGFJP2KN) works well here.
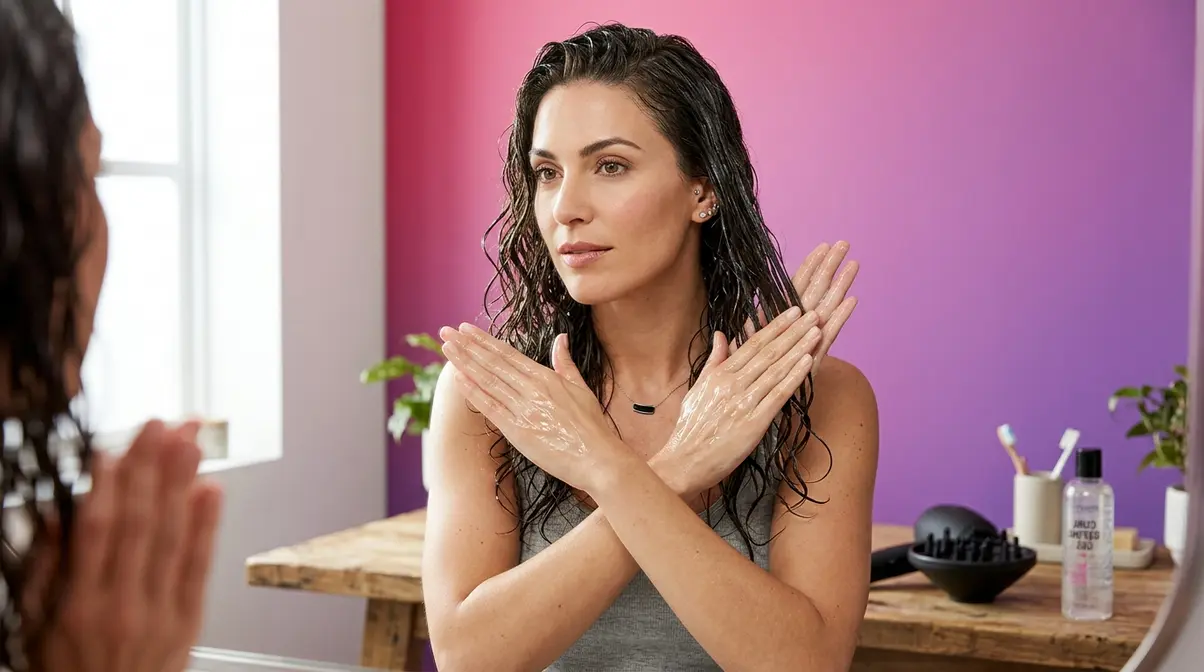
- Use the “praying hands” method to apply gel. Smooth gel over the outside of your hair sections using flat palms, rather than scrunching immediately, to seal the cuticle before defining waves.
- Don’t touch your hair while it dries. Every touch disrupts the drying wave clump and introduces frizz. Patience here is the single most impactful anti-frizz move.
- Finish with a cool shot on the diffuser. Cool air seals the cuticle after drying, locking in the wave pattern.
- Sleep on a silk or satin pillowcase. Cotton creates friction overnight; silk and satin allow hair to glide, preserving the cuticle and reducing morning frizz.
Step 5: Style Your Waves for Maximum Definition
This is the step most beginners skip or rush — and it’s where defined waves are either made or lost. When figuring out how to care for wavy hair, your styling technique is just as important as the products you use. The Wave-First Method centers styling around protecting and encouraging wave clumps, not fighting them.
How to Scrunch for Defined Wave Clumps
Scrunching is the technique of pressing sections of wet hair upward toward your scalp to encourage wave clumps to form and hold. It’s the single most important styling technique for wavy hair.
- Apply your styling product (gel or mousse) to soaking-wet hair — not damp, not towel-dried, but genuinely wet. This is the most common beginner mistake: applying products too late, after too much water has evaporated.
- Work in sections. Take a handful of hair from underneath and press it upward toward your scalp, hold for two seconds, then release.
- Repeat across all sections, working from underneath and the sides inward.
- Do not rake or comb product through — this separates wave clumps into individual frizzy strands.
Once dry, you’ll notice a stiff, crunchy film on your waves — this is called the gel cast (the temporary coating gel forms as it dries, which locks in wave definition). Don’t panic. You remove it with a technique called Scrunch Out the Crunch (SOTC): once your hair is fully dry, flip your head forward and gently scrunch sections upward to break the cast, releasing soft, defined waves underneath.
How to Plop Wavy Hair (Step-by-Step)
Plopping is the technique of wrapping wet, freshly conditioned and styled hair in a microfiber towel or cotton t-shirt to absorb excess water while encouraging wave clumps to form — without gravity pulling waves straight. It takes about 15–20 minutes and dramatically reduces frizz and drying time.
- How to plop:
- Lay your microfiber towel or t-shirt flat on a surface (a bed or counter works well).
- Flip your hair forward so it falls onto the center of the towel.
- Bring the bottom of the towel up to your forehead.
- Twist the sides of the towel around the back of your head and secure — like a turban, but your hair is coiled inside rather than pulled back.
- Leave in place for 15–20 minutes, then gently unwrap.
How to Use a Diffuser on Wavy Hair
A diffuser is a bowl-shaped attachment that disperses airflow over a wide area, drying hair gently without blowing wave clumps apart. It’s the fastest way to dry wavy hair while keeping definition intact.
- After plopping (or after gently squeezing out excess water with your microfiber towel), attach your diffuser.
- Set your dryer to medium heat and low airflow — high heat damages the cuticle, and high airflow destroys clumps.
- Cup sections of hair into the diffuser bowl and hold it against your scalp for 30–45 seconds before moving to the next section.
- Work from underneath first, then the sides, then the top.
- Finish with a 30-second cool shot across all sections to seal the cuticle.
Step 6: Refresh Waves Between Washes
Washing wavy hair every day is one of the most common mistakes beginners make. The Cleveland Clinic recommends washing wavy and curly hair just 2–3 times per week — daily washing strips the natural oils that keep waves defined and hydrated. Between washes, a simple refresh routine keeps your waves looking great.
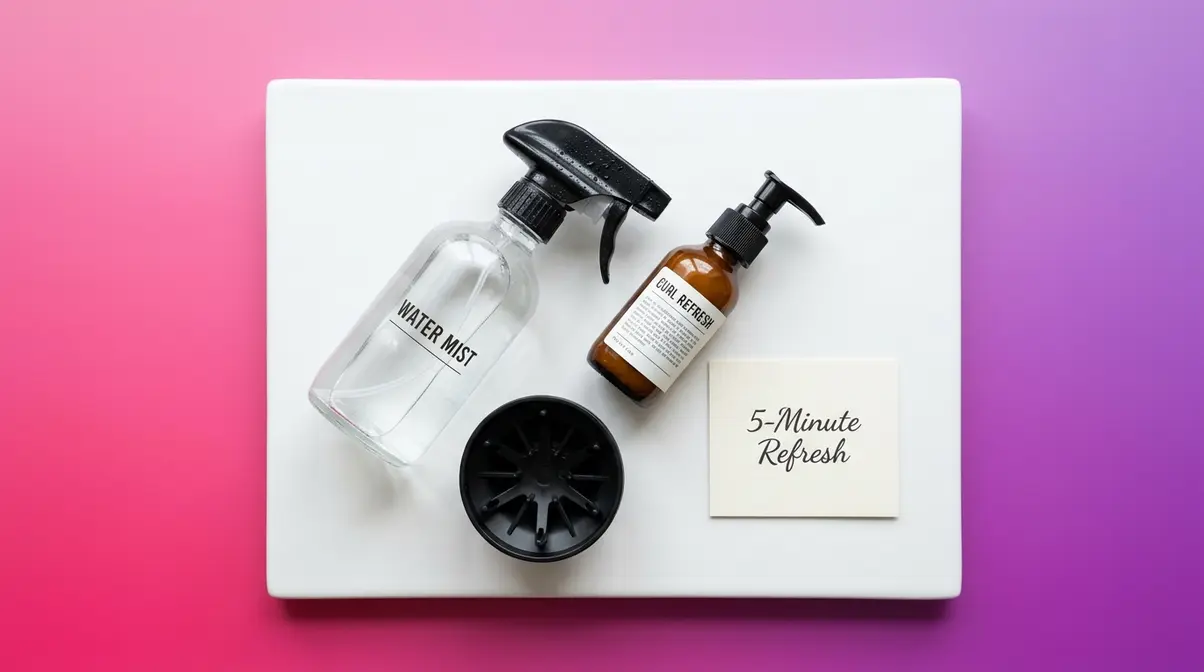
The 5-Minute Wave Refresh Routine
On non-wash days, your waves may look flattened, frizzy, or undefined. Here’s how to revive them in five minutes:
- Lightly mist your hair with water using a spray bottle — just enough to dampen, not soak. This reactivates the styling products already in your hair.
- Add a tiny amount of leave-in conditioner or styling product to any sections that need extra definition. Scrunch upward to re-form wave clumps.
- Diffuse for 5–7 minutes on low heat, or let air-dry if you have time.
- Scrunch Out the Crunch once dry if you used gel.
That’s it. You don’t need to re-do your full wash-day routine every morning — and doing so would strip your hair of the moisture it needs. The Wavy Leave-In Conditioner (B0FGFJP2KN) is light enough to use daily without buildup.
How to Protect Your Waves Overnight
Most frizz happens overnight. Cotton pillowcases create friction against the hair cuticle for eight hours straight — which is why your waves often look worse in the morning than when you went to bed.
Overnight protection options:
- Silk or satin pillowcase — The easiest switch. Hair glides over the surface instead of rubbing against it.
- Pineapple method — Loosely gather your hair on top of your head (like a high, loose ponytail) with a soft scrunchie before bed. This keeps waves from being crushed and reduces friction. Do not pull tight — the goal is loose containment, not a ponytail.
- Loose braid — For longer or thicker waves, a very loose braid preserves wave clumps better than leaving hair loose.
Step 7: Customize Your Routine for Your Wave Type
The eight steps above form the core routine. But The Wave-First Method is also about adapting — because fine 2A waves and thick 2C waves have genuinely different needs.
Tips for Fine or Thin Wavy Hair
Fine or thin wavy hair (common in 2A types) is prone to going limp and getting weighed down by products. Every product you use needs to be lighter than you think.
- Use a volumizing or lightweight sulfate-free shampoo — the Salty Waves Shampoo & Conditioner Set (B098R9QWZ6) is specifically formulated for fine wavy hair.
- Apply mousse instead of gel as your styler — mousse adds definition without the heaviness.
- Skip the leave-in conditioner on wash days and use a rinse-out conditioner only at the ends.
- Flip your head upside down while diffusing to build root volume.
- Use less product than you think you need — start with a small amount and add more if your waves need it.
Tips for Thick or Coarse Wavy Hair
Thick or coarse wavy hair (common in 2C types) needs more moisture and more product to stay defined and frizz-free.
- Use a moisturizing conditioner and leave a small amount in as a leave-in after rinsing.
- Layer products: Apply leave-in conditioner first, then gel on top — this is called the “LOC method” (Leave-in, Oil, Cream) adapted for waves.
- Use more gel than you think you need — thick hair absorbs more product before it has any hold effect.
- Deep condition once a week with a hair mask to maintain moisture levels.
- Plop for longer — 20–30 minutes instead of 15 — to remove more water before diffusing.
Understanding Hair Porosity for Wavy Hair
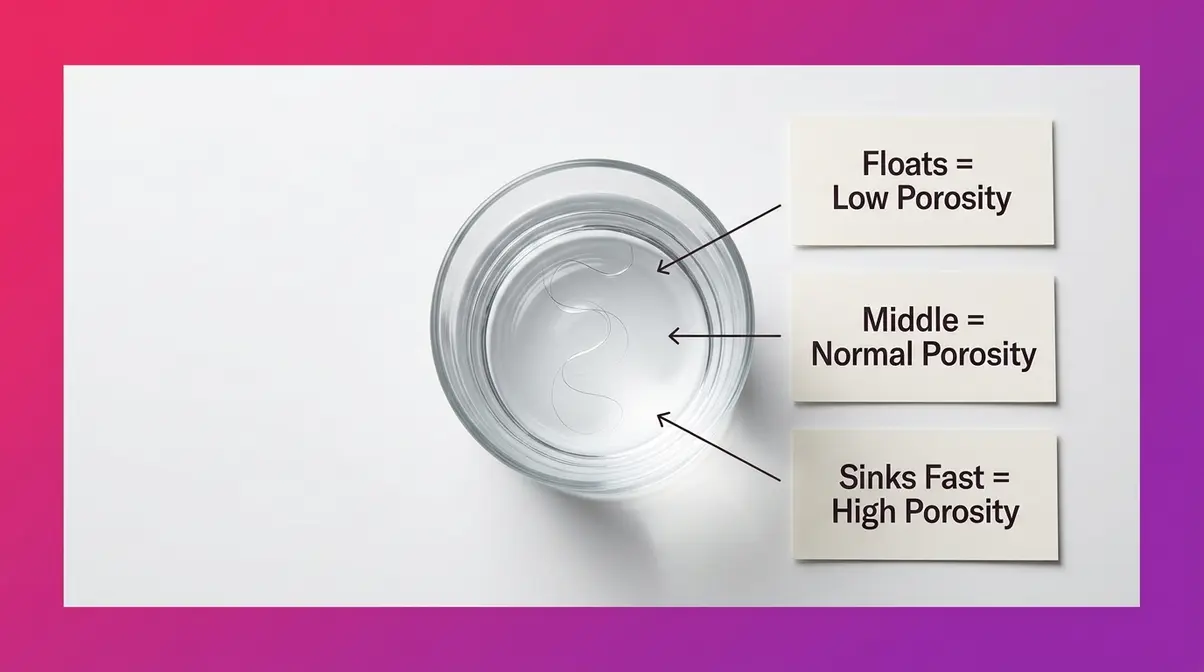
Hair porosity is how well your hair absorbs and retains moisture. It’s one of the most important — and most confusing — concepts for beginners. Here’s the quick breakdown:
- Low porosity — The cuticle lies flat and tight, making it hard for moisture to enter. Products tend to sit on top of the hair rather than absorbing. Fix: Use heat (like a warm towel wrap or steamer) to open the cuticle before conditioning. Prefer lighter, water-based products.
- Normal porosity — Moisture absorbs and retains well. Most products work without adjustment.
- High porosity — The cuticle is raised or damaged, absorbing moisture quickly but losing it just as fast. Hair gets frizzy easily. Fix: Use protein treatments periodically to fill cuticle gaps, and seal with a light oil after conditioning.
Quick porosity test: Drop a clean hair strand into a glass of room-temperature water. If it sinks quickly, you likely have high porosity. If it floats for a long time, you likely have low porosity.
Step 8: Try Natural and Minimal-Product Methods
Once you have the basics down, many wavy-haired people find they can get excellent results with fewer products — or even natural ingredients. This is an optional step for when you’re ready to simplify.
Technique-First: Less Product, More Wave
The biggest insight from experienced wavy hair communities: technique matters more than product. You can get beautifully defined waves with two products if your technique is right — or mediocre waves with ten products if your technique is off.
Focus on these technique upgrades before adding more products to your routine:
- Wet application — Always apply stylers to fully wet hair.
- Clumping with your hands — Use your hands to encourage strands to group together into wave clumps as you apply product.
- Hands-off drying — Resist touching your hair while it dries. Every touch adds frizz.
Natural Ingredients That Enhance Waves
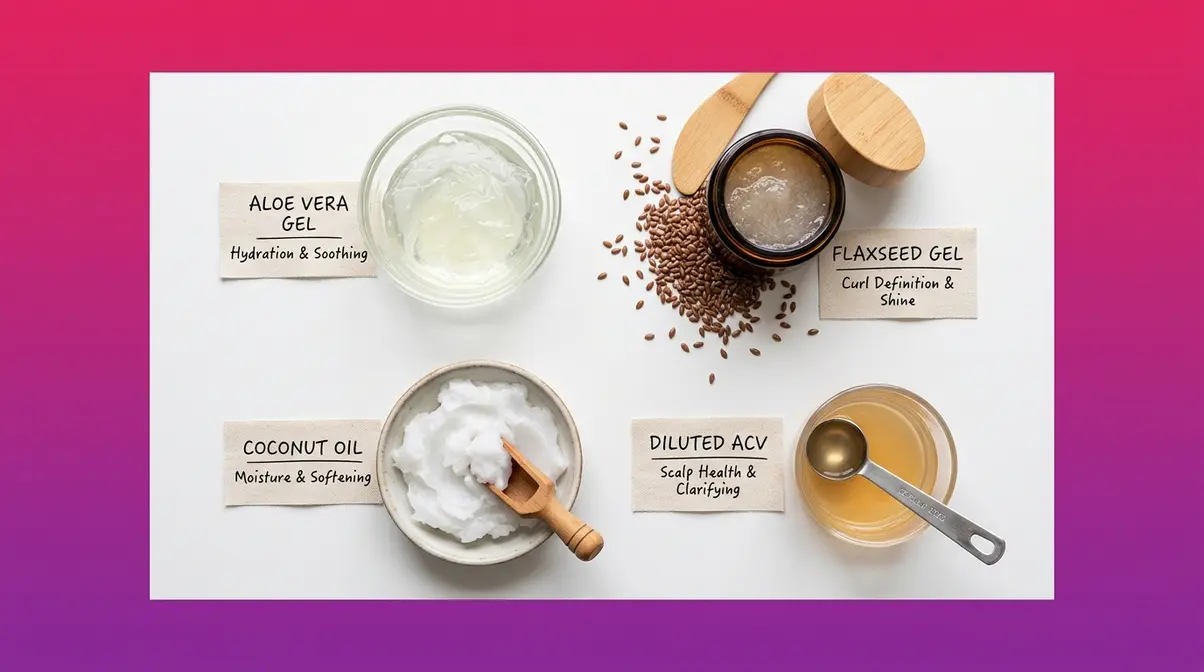
Several natural ingredients genuinely support wave definition and moisture:
- Aloe vera gel — A natural humectant and light styler that enhances wave clumps without buildup. Apply directly to wet hair as a light hold styler.
- Flaxseed gel — Made by simmering flaxseeds in water, this provides hold comparable to a light gel with zero synthetic ingredients.
- Coconut oil (use sparingly) — A small amount applied to dry ends helps seal the cuticle and reduce frizz overnight. Avoid applying to the lengths of fine waves — it can weigh them down.
- Apple cider vinegar rinse — Diluted ACV (one tablespoon in one cup of water) smooths the cuticle and removes product buildup. Use once every 2–3 weeks, not regularly.
Bonus: Wavy Hair Care for Men
Almost no mainstream wavy hair guide addresses men — which is a major gap, because men with naturally wavy hair face the same core challenges (frizz, undefined texture, wrong products) with the added complication of typically shorter lengths and different styling goals.
Simplify Your Wash Day Routine
Men’s wavy hair care follows the same core principles, but the routine is shorter:
- Wash 2–3 times per week with a sulfate-free shampoo. The Wave Babe Sulfate-Free Shampoo (B0D364FGDG) works well for men with frizz-prone waves.
- Condition every wash — even short hair benefits from conditioner at the ends.
- Apply a light styling product (mousse or light gel) to wet hair before drying.
- Diffuse or air-dry — for short to medium lengths, air-drying takes 20–30 minutes and produces the most natural result.
Skip the heavy pomades and waxes — they contain silicones and heavy oils that build up on wavy hair and kill definition over time.
Styling Short to Medium Wavy Hair
For men with short to medium wavy hair, the goal is usually controlled texture rather than full curl definition. Here’s how to get it:
- Apply a small amount of light gel or sea salt spray to damp hair and scrunch upward. Sea salt spray (like the Salty Waves set) adds texture and enhances natural wave movement without heaviness.
- Diffuse on low heat for 5–7 minutes, or let air-dry.
- Don’t over-brush. A quick once-over with a wide-tooth comb while wet is fine. Once dry, use your fingers only — a brush will turn your waves into frizz.
- Trim every 6–8 weeks. Regular trims prevent split ends, which travel up the hair shaft and cause frizz throughout the length.
Common Wavy Hair Mistakes to Avoid
5 Mistakes That Kill Your Wave Pattern
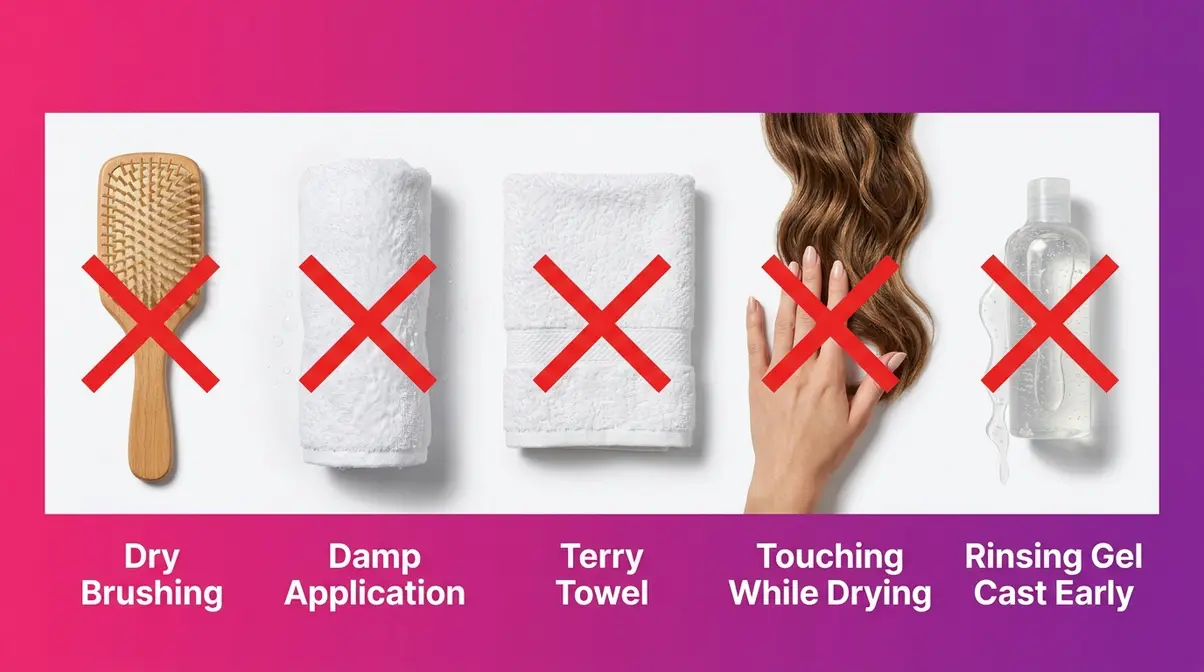
Even with the right products, these five mistakes will undo your results every time:
- Brushing dry hair. Dry brushing physically separates wave clumps into individual strands, turning definition into poofiness instantly. If you need to detangle, do it wet with conditioner in.
- Applying products to damp hair. Products applied to damp (partially dry) hair don’t distribute evenly and lose their hold before waves fully form. Always apply to soaking-wet hair.
- Using a regular terry-cloth towel to dry. The looped texture of terry cloth creates intense friction against the cuticle. Switch to a microfiber towel or cotton t-shirt — this single change reduces frizz noticeably for most people.
- Skipping the gel cast. Many beginners rinse out or scrunch away the gel cast while hair is still wet or damp, thinking it looks bad. Leave it alone until hair is completely dry, then Scrunch Out the Crunch. The cast is protecting your wave clumps while they set.
- Touching hair while it dries. Every time you touch your drying hair — to check the texture, push it back, or fix a section — you’re introducing friction and breaking wave clumps. Set it and leave it.
When to Try a Different Approach
The routine in this guide works for the vast majority of Type 2 wavy hair. However, it may not be the right fit in every situation:
- If your hair is very damaged (from bleaching, heat damage, or chemical processing), a protein treatment protocol may need to come before this routine. Highly porous, damaged hair often needs repair before it responds to wave-enhancing techniques.
- If your waves still won’t form after 4–6 consistent wash days, consider that your hair may be Type 1 (naturally straight) rather than Type 2 — and that’s completely fine. Not all hair that looks “wavy sometimes” has a true wave pattern.
- If products cause scalp irritation or breakouts, check ingredient labels for known irritants like fragrance, essential oils, or certain preservatives, and switch to a fragrance-free formulation.
Frequently Asked Questions
How do I enhance my naturally wavy hair?
Enhancing naturally wavy hair starts with stopping the habits that suppress your wave pattern. Switch to a sulfate-free shampoo, apply a lightweight styling product (gel or mousse) to soaking-wet hair, and scrunch upward rather than rubbing with a towel. Most people see noticeably more defined waves within 2–3 wash days of making these changes. The single biggest enhancement is technique: let your hair air-dry or diffuse without touching it while it dries. Consistency with these gentle methods will yield the best long-term results.
What are the most common mistakes in wavy hair care?
The most common wavy hair care mistake is brushing hair dry, which breaks wave clumps and creates frizz. Other frequent mistakes include applying products to damp rather than soaking-wet hair, using a terry-cloth towel to dry, and washing hair daily.
Should I wet my wavy hair every day?
You do not need to fully wet or wash wavy hair every day — and doing so can actually damage your wave pattern over time. The Cleveland Clinic recommends washing wavy and curly hair 2–3 times per week to preserve the natural oils that keep the cuticle smooth and waves defined. On non-wash days, a light mist of water from a spray bottle is enough to reactivate your styling products and refresh wave clumps in about five minutes.
What should you never do to wavy hair?
Never apply heat to wavy hair without a heat protectant, and never use a regular terry-cloth towel to dry it. Beyond those two non-negotiables, avoid silicone-heavy products that block moisture over time, and resist the urge to touch your hair while it dries. The wavy hair girl guide for beginners covers a full list of product and technique pitfalls to avoid.
Your Waves Are Worth the Routine
Now that you know how to care for wavy hair, the process isn’t complicated once you understand the core principle: work with your wave pattern, not against it. Every step in this guide — from choosing sulfate-free products to scrunching on soaking-wet hair to protecting waves overnight — is designed to protect and enhance the wave clumps your hair is already trying to form. Research and dermatological guidance consistently point to gentle cleansing, moisture retention, and minimal mechanical friction as the foundation of healthy, defined wavy hair.
The Wave-First Method is the organizing idea behind all of it. Before every product choice and every technique, ask one question: does this protect my wave clump or break it? That single filter will guide you better than any product recommendation.
Start with your next wash day. Pick up a sulfate-free shampoo, grab a microfiber towel, and try the scrunch technique on soaking-wet hair. Give it three consistent wash days before judging the results — waves that have been suppressed for years sometimes need a few cycles to fully emerge. At careaboutyourhair.com, we reviewed techniques recommended by dermatologists and the wavy hair community to compile this routine, and the most consistent finding is this: patience and consistency beat expensive products every time.

Dave King
Writes evidence-based hair-care guides for Care About Your Hair — for every hair type, jargon-free and independent.