 Dave King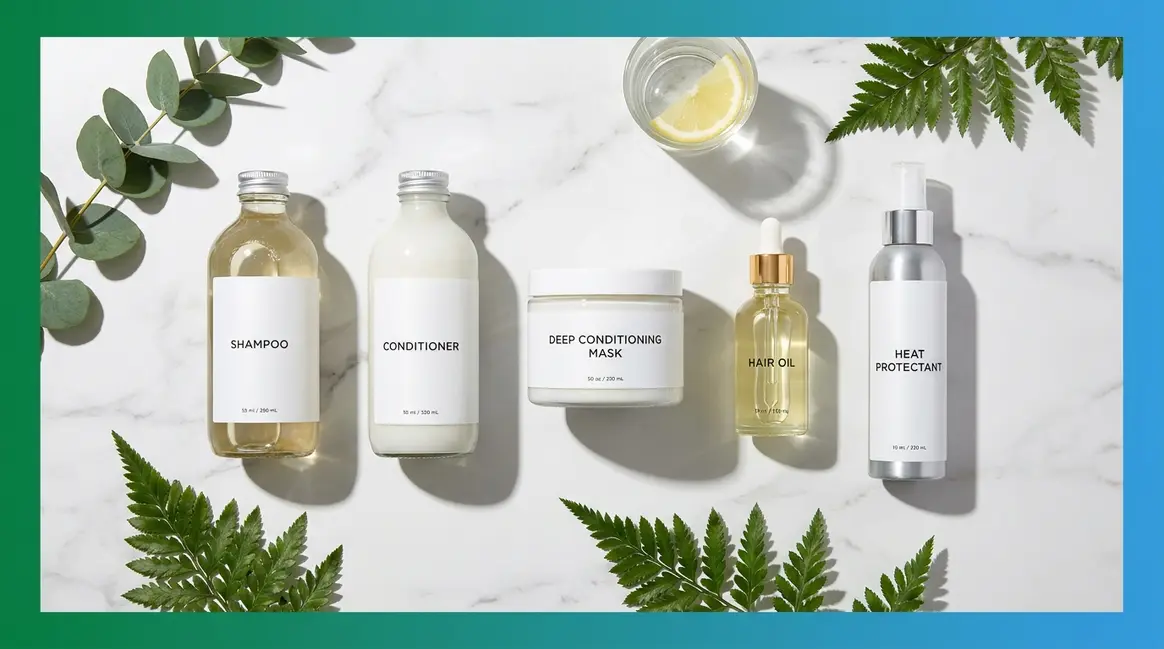
“I am trying to get my hair healthier, thicker and longer. I have fine hair and would love to hear what you all use and what is your step by step products…”
If that sounds familiar, you’re not alone — and the problem usually isn’t your hair. It’s the lack of a clear plan.
Most hair advice online gives you a list of products but never tells you when to use them, in what order, or why certain steps matter for your specific hair type. That gap is exactly what leads to buildup, breakage, and wasted money on products that don’t work.
By the end of this guide, you’ll have a complete, step-by-step hair care routine tailored to your hair type — so you can stop guessing and start seeing real results. We cover the universal core steps, routines for growth and damage repair, guides for every hair texture, and an advanced section on porosity and scalp health.
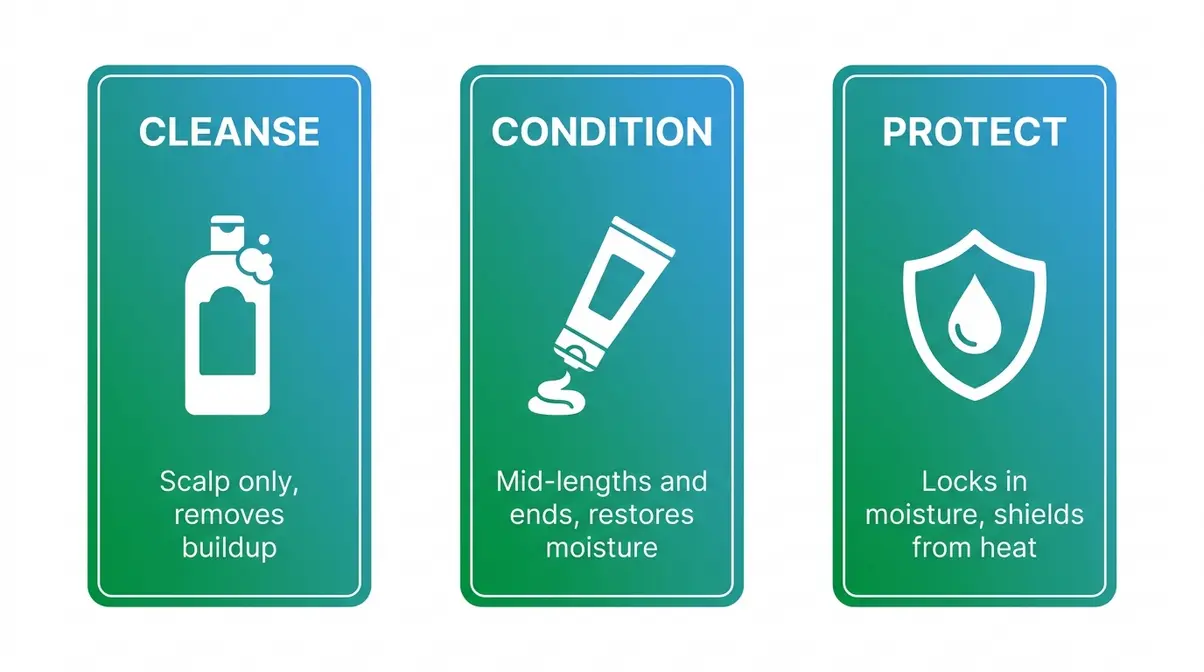
A good hair care routine follows three pillars — cleanse, condition, protect — adapted to your hair type and porosity for best results.
- The Hair Cycling Method organizes care into daily, weekly, and monthly tasks — no more guessing when to do what
- Most hair types benefit from washing 2–3 times a week, not daily — daily washing strips the scalp’s natural oils
- Scalp health is the foundation of hair growth — neglecting it stalls progress no matter how good your products are
- Porosity (how your hair absorbs moisture) determines which products actually work for you
- Damage repair requires bond-building treatments, not just deep conditioner
What Is a Hair Care Routine?
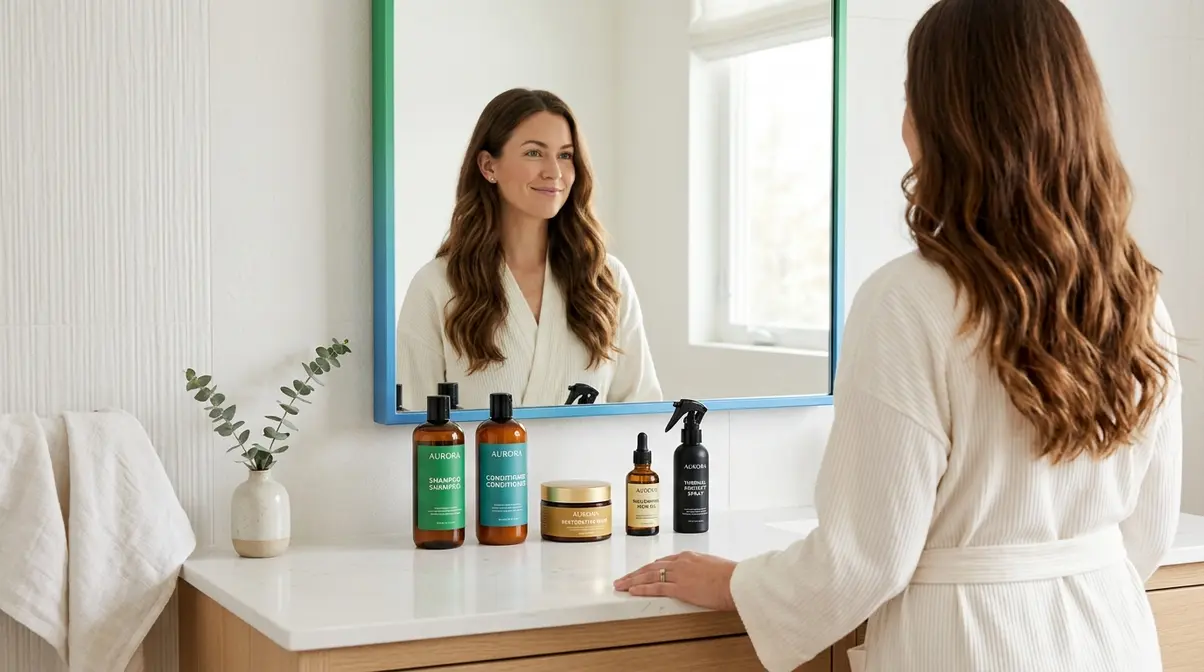
A hair care routine is a consistent set of steps — cleansing, conditioning, and protecting — performed on a regular schedule to keep your hair healthy, strong, and manageable. According to the American Academy of Dermatology, skipping protective steps after washing is one of the most common causes of preventable hair damage. Without a consistent routine, hair becomes more prone to breakage, frizz, and slow growth — no matter how good your individual products are.
The reason so many routines fail isn’t a lack of effort. It’s a lack of structure. That’s where The Hair Cycling Method comes in — our framework for organizing hair care into daily (refresh), weekly (wash and condition), and monthly (deep treatment) cycles. By cycling your care intentionally, nothing is left to guesswork, and every step earns its place.
3 Pillars: Cleanse, Condition, Protect
Every effective hair care routine — regardless of hair type — is built on three non-negotiable pillars.
Pillar 1 — Cleanse: Shampoo removes buildup (dirt, oil, and product residue) from the scalp. One important rule beginners often miss: shampoo is for the scalp, not the lengths. The lengths get cleaned simply by the shampoo rinsing through them.
Pillar 2 — Condition: Conditioner restores moisture to the mid-lengths and ends — the oldest, driest part of the hair. According to an overview published by the NIH Hair Cosmetics research team, conditioners work by neutralizing the negative electrical charge in hair fibers — which is exactly what reduces frizz and makes hair easier to detangle (NIH, 2026).
Pillar 3 — Protect: This step locks in moisture and shields hair from heat, UV, and friction. Products in this category include leave-in conditioner, heat protectant (a product that coats the hair shaft to shield it from styling tools), and lightweight hair oils.
Think of these three steps like washing, moisturizing, and applying SPF to your face. Skip any one of them, and the results suffer.
Before you can apply these pillars correctly, there’s one thing you need to know about your hair — and most guides skip it entirely: your hair’s porosity.
Hair Type & Porosity Change Everything
Hair type refers to the natural curl pattern of your hair. The most widely used scale runs from Type 1 (straight) through Type 2 (wavy), Type 3 (curly), and Type 4 (coily or kinky). This matters because different textures have different moisture needs, density, and fragility.
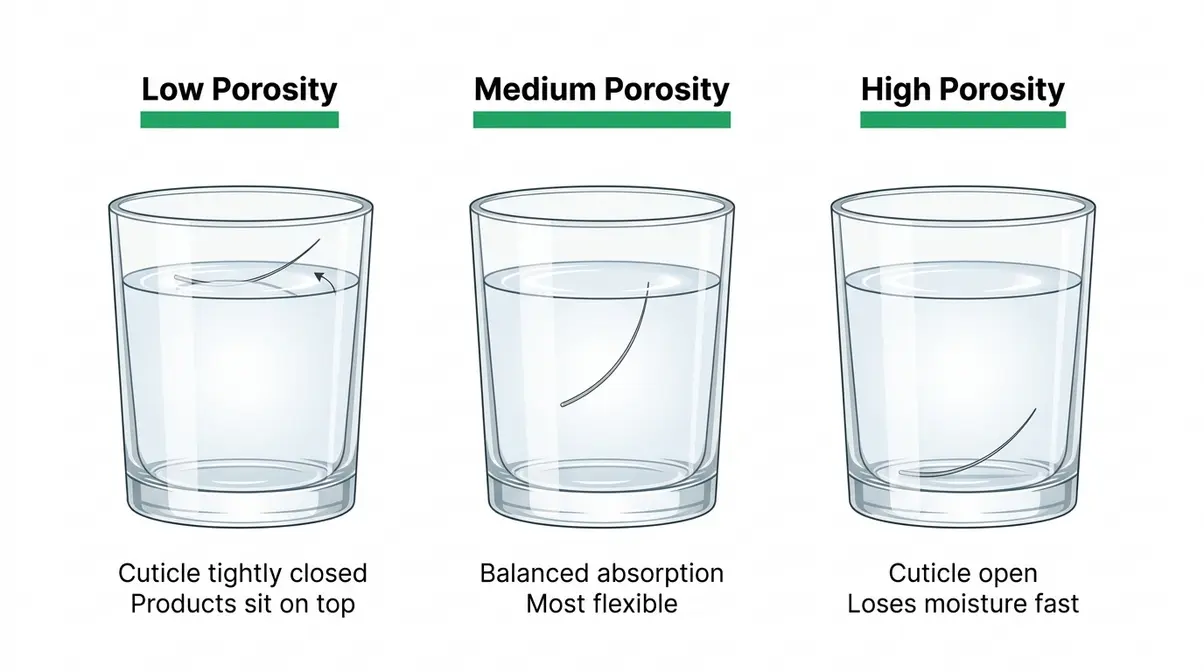
Hair porosity (how easily your hair absorbs and holds onto moisture) is equally important — and far less discussed. Low porosity means your hair cuticles are tightly closed, so products tend to sit on top rather than absorb. High porosity means the cuticles are open or damaged, so moisture enters quickly but escapes just as fast.
Here’s why this matters for your hair routine:
| Low Porosity | High Porosity | |
|---|---|---|
| Cuticle State | Tightly closed | Open or damaged |
| Moisture Absorption | Slow — products sit on top | Fast — but moisture escapes quickly |
| Feels Like | Greasy after heavy products | Dry even after conditioning |
| Best Products | Lightweight, water-based | Rich, heavy, sealing products |
| Common Cause | Natural genetics | Heat, bleach, chemical processing |
A deep conditioning mask that works beautifully for your friend’s high-porosity curls might leave your low-porosity straight hair greasy and flat. Knowing your porosity before you shop saves you from buying the wrong things.
Identify Your Hair Type in 5 Minutes
This is the first step of a proper hair care routine — and you can do it right now with items you already have at home.
Hair Type Test: Let your hair air-dry completely with zero product. Straight with no bend = Type 1. Loose S-waves = Type 2. Springy, defined curls = Type 3. Tight coils or zigzag pattern = Type 4.
The Porosity Float Test (4 Steps):
- Take a clean strand of hair from your brush (make sure it’s free of product).
- Fill a glass with room-temperature water.
- Place the strand on the water’s surface and wait 2–4 minutes.
- Sinks quickly = high porosity. Floats = low porosity. Sinks slowly to the middle = medium porosity.
Now that you know your hair type and porosity, you’re ready to build your routine from the ground up — starting with the core steps.
Step-by-Step Routine: Core Framework
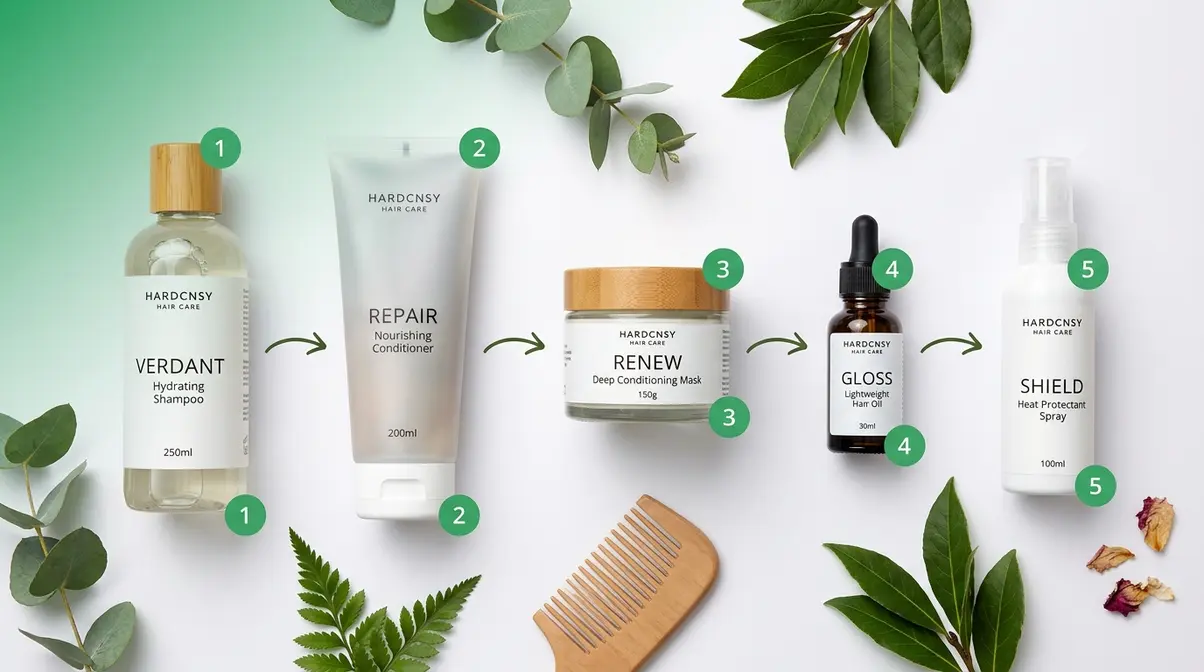
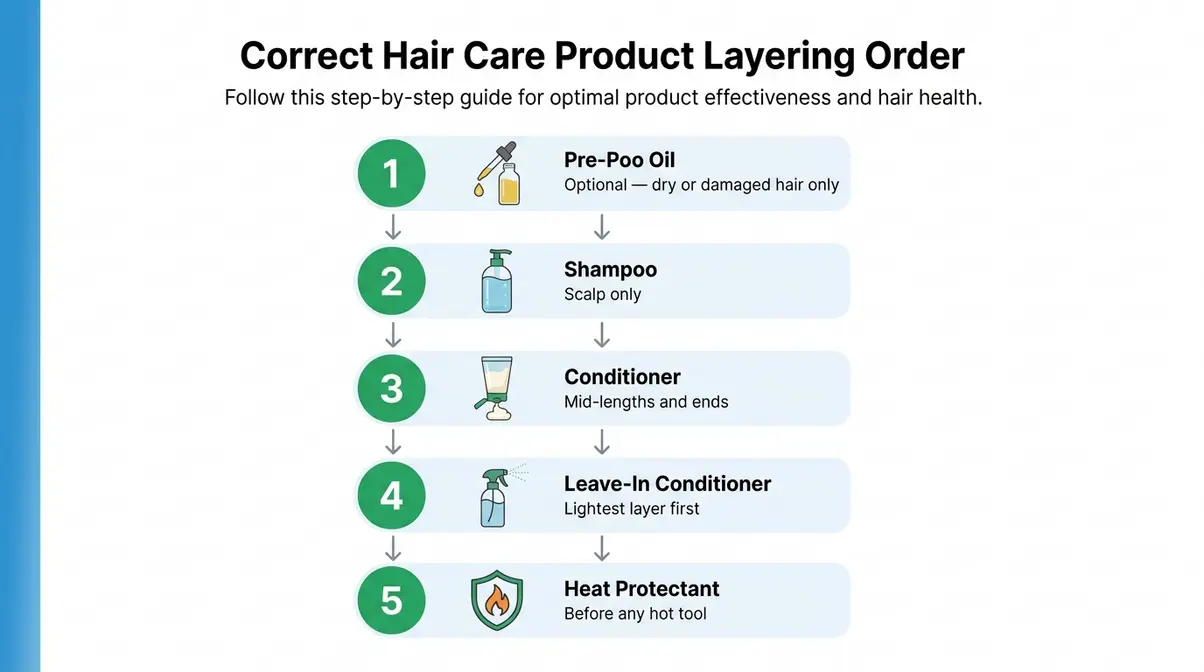
The correct order for a hair care routine is: pre-treat (optional), cleanse, condition, post-wash treatment, and protect. According to the Cleveland Clinic (2026), washing hair every two to three days is ideal for most people — daily washing strips natural oils and can leave hair dry and brittle. Following this order consistently is what separates a routine that transforms your hair from one that merely maintains the status quo.
A consistent hair care routine reduces breakage and improves hair strength by addressing cleansing, moisture, and protection in the correct order — a principle dermatologists and the American Academy of Dermatology consistently emphasize.
Step 1: Pre-Shampoo Treatment
For most people, a daily hair care routine doesn’t include this step — it’s a weekly treatment reserved for dry, damaged, or high-porosity hair.
A pre-poo treatment (short for pre-shampoo) is an oil — coconut, argan, or olive — or a conditioner applied to dry hair before washing. It creates a protective barrier so shampoo doesn’t strip too much moisture. Think of it like washing a dry sponge under a powerful jet: without protection, it strips more than it cleans.
Who needs it: Dry hair, high-porosity hair, and curly or coily types. Straight, oily hair can skip this step entirely.
- How to apply:
- Section your hair into four parts.
- Apply oil generously to the lengths and ends — avoid the scalp.
- Leave on for 15–30 minutes (or overnight under a shower cap for deeper penetration).
Once your pre-treatment has done its job, it’s time for the most important step: cleansing.
Step 2: How to Shampoo Correctly
These hair care routine steps matter because technique is just as important as the product you choose.
The core rule is simple: shampoo is for the scalp, not the lengths. The lengths get cleaned by the shampoo rinsing through them. Here’s the correct technique:
- Wet hair thoroughly with warm water.
- Apply a quarter-sized amount of shampoo to the scalp only.
- Use your fingertips (not nails) to massage in circular motions for 60 seconds.
- Rinse thoroughly with cool water to help close the hair cuticle.
For dry, color-treated, or curly hair, use a sulfate-free shampoo (a formula without harsh foaming agents that strip natural oils). For oily or fine hair, a clarifying shampoo once per week removes product buildup effectively.
DO rinse with cool water to close the cuticle and reduce frizz. DON’T rub vigorously — according to Johns Hopkins Medicine (2026), gently squeezing water out rather than rubbing significantly reduces breakage.
With a clean scalp, your conditioner can now do exactly what it’s designed to do.
Step 3: Condition Mid-Lengths & Ends
In a weekly hair care routine, the deep conditioning step is what separates average results from great ones.
The core rule: conditioner goes on mid-lengths and ends — never the scalp. Applying conditioner to the scalp causes greasiness and product buildup that can clog follicles over time.
| Conditioner Type | Leave-On Time | Frequency |
|---|---|---|
| Rinse-out conditioner | 2–5 minutes | Every wash |
| Deep conditioning mask | 20–30 minutes | Once per week |
| Leave-in conditioner | Don’t rinse | Post-wash, as needed |
Conditioners work by neutralizing the negative electrical charge in damaged hair fibers — that’s what reduces frizz and makes hair easier to detangle (NIH, 2026). The longer you leave a deep mask on (with a shower cap to trap heat), the more effectively it penetrates.
After rinsing out your conditioner, your hair is clean, moisturized — and vulnerable. This is when protection matters most.
What Should I Apply on My Hair Daily?
The correct post-wash product order follows the lightest-to-heaviest rule. Most hair types don’t need daily product application, but if you must apply products, follow this sequence:
- Leave-in conditioner (water-based, lightest)
- Hair oil or serum (seals the moisture in)
- Styling product — cream, gel, or mousse (heaviest, applied last)
Always apply a heat protectant (a product that coats the hair shaft to prevent heat damage from styling tools operating above 300°F) before using any hot tool. Skipping this step on color-treated or fine hair accelerates cumulative damage with every styling session.
If your hair is very dry, a few drops of a lightweight smoothing hair oil on the ends daily can maintain moisture between washes. However, over-applying builds up residue that weighs hair down. Apply all products to damp, not soaking-wet, hair for the best absorption.
Understanding what to apply is half the battle. The other half is knowing when — which is where The Hair Cycling Method comes in.
Daily vs. Weekly Task Schedule
This 7-day hair care routine schedule is the core structure of The Hair Cycling Method — breaking care into manageable cycles so nothing is overdone or forgotten.
| Frequency | Task | Products Needed |
|---|---|---|
| Daily | Gentle detangle (wide-tooth comb) | Wide-tooth comb |
| Daily | Lightweight oil on ends if dry | Hair oil |
| Daily | Sleep on a silk or satin pillowcase | Silk pillowcase |
| 2–3× per week | Full cleanse + condition routine | Shampoo, conditioner |
| Weekly | Deep conditioning mask | Deep mask, shower cap |
| Monthly | Scalp exfoliation scrub | Scalp scrub or brush |
| Monthly | Protein treatment (damaged/high-porosity hair) | Protein mask |
With the core routine in place, the next step is to optimize it for your most pressing goal — whether that’s growth, repair, or managing a specific ongoing concern.
Video: Step-by-step hair care routine tutorial — Source: Create
Hair Routine for Growth & Thickness
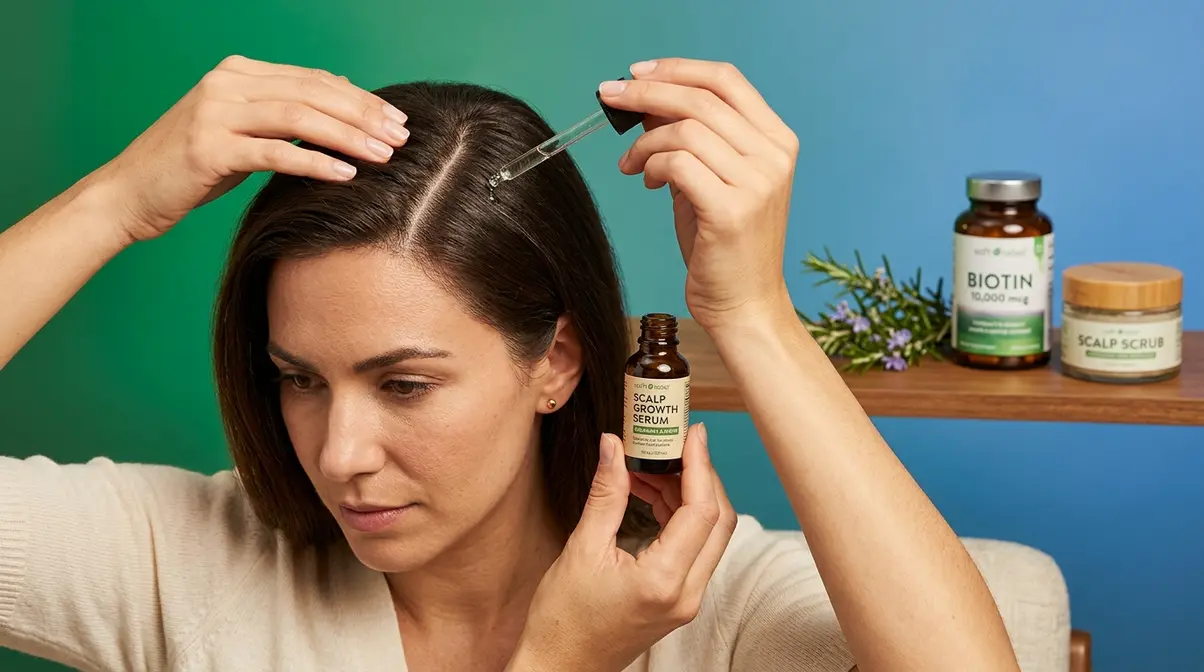
⚠️ Disclaimer: The information in this section is for general educational purposes only. For persistent hair loss or significant thinning, consult a board-certified dermatologist. Hair loss can have medical causes that require professional diagnosis.
A hair care routine for growth and thickness starts with the scalp — not the hair itself. Research from the National Institutes of Health (NIH, 2026) shows that imbalances in the scalp microbiome (the community of bacteria and fungi that live on your scalp and directly affect hair follicle health) are strongly linked to hair thinning and slowed growth. Think of the scalp like soil: if the soil is unhealthy, the plant can’t grow. The good news is that several of these factors are within your control through consistent, targeted routine adjustments.
Deficiencies in vitamins D, iron, and biotin represent a modifiable risk factor for hair loss — addressing them through diet or supplementation can support regrowth (PubMed, 2026).
Scalp Massage: Free Growth Technique
A hair care routine for healthy hair growth should include scalp massage as a non-negotiable step — and it costs nothing.
Scalp massage increases blood circulation to hair follicles, delivering more oxygen and nutrients directly to the root. A landmark 2016 study published in ePlasty found that 4 minutes of daily standardized scalp massage increased hair thickness measurably over 24 weeks, with participants reporting reduced hair shedding. This makes scalp massage one of the most evidence-backed free tools available.
- How to do it correctly (4 steps):
- Place your fingertips (not nails) at the temples.
- Apply gentle, firm pressure and move in small circular motions.
- Work gradually from the temples toward the crown of the head.
- Continue for 4–5 minutes during shampooing or while applying a scalp serum.
A silicone scalp massage brush provides more consistent pressure than fingers and is easier to use during washing. Aim for daily massage during shampooing, or at minimum 3–4 times per week.
Beyond massage, the products you use — and the nutrients you eat — play a major role in whether your hair grows or stalls.
Growth-Boosting Ingredients to Look For
In a hair care routine for thin hair, these ingredients are especially important for supporting follicle health from the outside in.
- Rosemary oil: A 2015 study published in Skinmed Journal found that rosemary oil performed comparably to 2% minoxidil for hair regrowth over 6 months — with less scalp itching reported in the rosemary group. It’s now one of the most clinically supported natural alternatives for thinning hair.
- Biotin (Vitamin B7): Biotin is a B-vitamin essential for keratin production — the protein hair is made of. Deficiency is linked to hair thinning and brittle nails. Food sources include eggs, almonds, and sweet potatoes.
- Iron and Vitamin D: According to research indexed on PubMed (2026), deficiencies in iron and Vitamin D are among the most common modifiable causes of hair loss — meaning they respond well to correction through diet or supplementation.
- Caffeine (topical): Found in some detoxing scalp serums, topical caffeine has been shown in preliminary research to stimulate follicle activity by blocking the effects of DHT (dihydrotestosterone), a hormone linked to pattern hair loss.
If you suspect a deficiency, a simple blood panel from your doctor can confirm it before you invest in supplements. Self-diagnosing and over-supplementing — particularly with biotin — can mask other test results.
Ingredients matter — but so does what you eat and how you manage stress, both of which have a direct impact on how fast your hair grows.
Lifestyle Factors Impacting Hair Growth
A hair care routine for hair loss should include these lifestyle adjustments alongside topical treatments — because no serum can outwork a nutrient-poor diet or chronic stress.
Diet: Hair is made of keratin — a protein. Aim for at least 0.8g of protein per kg of body weight daily. Include iron-rich foods (spinach, lentils, red meat) and omega-3 fatty acids (salmon, walnuts, flaxseed) to support follicle function and scalp circulation.
Stress: Chronic stress triggers telogen effluvium — a clinically recognized condition where hair prematurely enters the shedding phase, causing diffuse thinning across the scalp. According to the Mayo Clinic (2026), adopting a gentle hair care routine and reducing physical and emotional stressors can help prevent this type of stress-related shedding.
Sleep: Hair cell division peaks during deep sleep. Most adults need 7–9 hours per night for optimal cellular repair. These lifestyle factors aren’t quick fixes — they work over 3–6 months of consistent practice, and patience is genuinely part of the routine.
One of the most common questions about hair growth is whether thinning is permanent — here’s what the research actually says.
How Do You Fix Thinning Hair?
In many cases, thinning hair caused by nutrient deficiencies, stress, or postpartum hormonal shifts is reversible. These are reversible causes, and a hair care routine for thicker hair starts with addressing the root cause of thinning rather than treating symptoms.
However, androgenetic alopecia (pattern hair loss) causes permanent follicle miniaturization over time. If your hairline is actively receding or you’re seeing defined bald patches, a hair care guide is not the right tool — that requires a dermatologist’s assessment, not a new shampoo.
Realistic expectations: Visible improvement from lifestyle and routine changes typically takes 3–6 months of consistent effort. Hair grows approximately 6 inches (15cm) per year on average, so patience is essential. Consistency with the right routine matters far more than any single product.
⚠️ For persistent or significant hair loss, consult a board-certified dermatologist before changing your routine.
Whether your hair is thinning or chemically processed, the next section addresses the specific routine adjustments that help damaged hair recover.
Routine for Damaged and Treated Hair
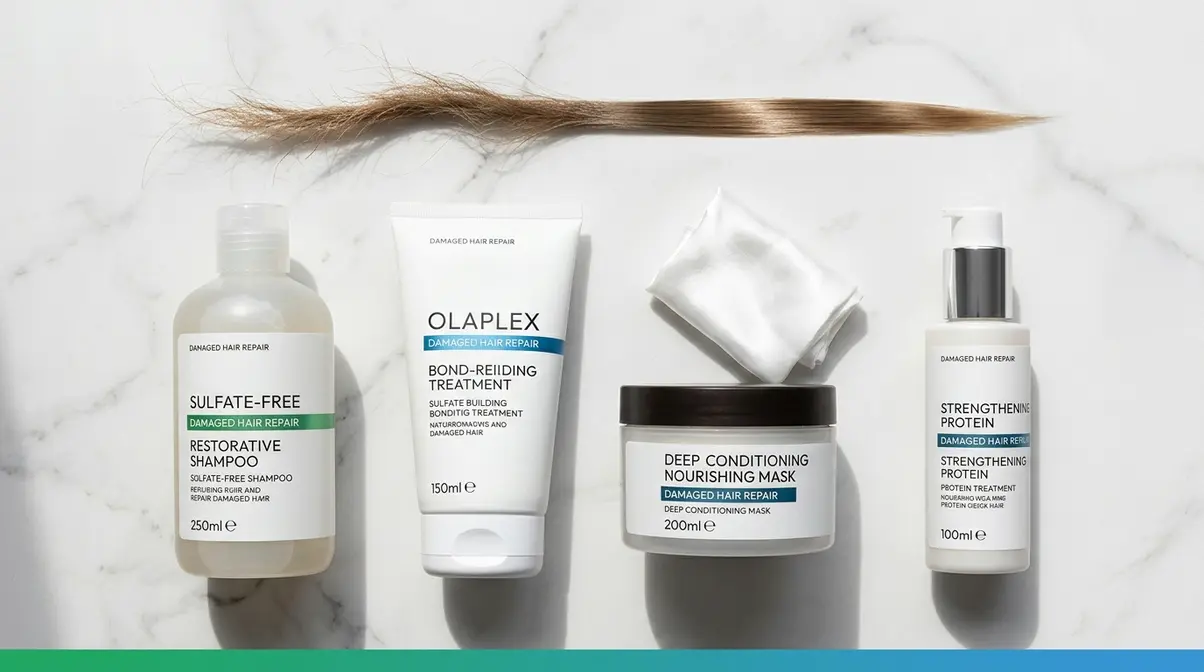
A damaged hair care routine is a targeted approach to repairing broken hair bonds, restoring moisture, and preventing further breakage — using bond-building treatments, protein masks, and gentle handling techniques. According to Johns Hopkins Medicine (2026), the most preventable cause of breakage is rough drying and skipping conditioner after every wash. Using a conditioner after every shampoo and gently wrapping hair in a towel instead of rubbing reduces breakage significantly — a simple habit that most people overlook.
What Causes Your Hair Damage?
A damaged hair care routine addresses all three damage types — because the solution differs depending on the cause.
- Chemical damage: Bleach breaks the disulfide bonds inside the hair shaft — the structural connections that give hair its strength. Color treatments and relaxers also alter the hair’s pH and protein structure. This type of damage cannot be reversed without targeted bond-building products.
- Heat damage: Temperatures above 450°F (230°C) cause the hair’s internal moisture to expand rapidly, creating microscopic bubbles in the shaft — a condition researchers call “bubble hair.” Even lower, repeated heat exposure causes cumulative structural damage over months.
- Mechanical damage: Over-brushing, aggressive towel-drying, and tight hairstyles cause physical breakage along the shaft. Wet hair is significantly more vulnerable to mechanical stress than dry hair, which is why detangling technique matters enormously.
Ask yourself: Is your hair breaking mid-shaft (usually mechanical damage) or at the ends (usually chemical or heat damage)? The answer changes which treatment you need first.
Once you know what type of damage you’re dealing with, you can choose the right repair treatments — starting with bond builders.
Repair Routine: Bond Builders & Masks
This gentle hair care routine for damaged hair avoids any step that stresses the shaft further — every product and technique is chosen to restore, not strip.
A bond-building treatment is a product that repairs broken disulfide bonds inside the hair shaft — the structural damage caused by bleach and chemical processes. Apply it in the shower after shampooing, before your conditioner, and leave on for 10 minutes. Use weekly for severely damaged hair; monthly for maintenance.
- Numbered repair routine:
- Shampoo gently with a sulfate-free formula.
- Apply bond-building treatment from mid-lengths to ends. Leave for 10 minutes.
- Apply a deep conditioning mask on top of the bond builder. Cover with a shower cap for 20–30 minutes (warmth helps open the cuticle for deeper absorption).
A protein treatment (a product that temporarily fills gaps in the hair cuticle to reduce porosity and breakage) is used every 4–6 weeks for high-porosity or bleached hair. Signs you need one: extreme elasticity when wet (hair stretches but doesn’t spring back), or a mushy texture when damp. Think of protein treatments like scaffolding — too little and the structure collapses; too much and it becomes rigid and snaps. Do NOT use a protein treatment every week.
The NIH Hair Cosmetics review (2026) confirms that managing highly porous hair with conditioning treatments is essential to neutralizing the charge imbalance that makes damaged hair frizzy and prone to further breakage.
If your hair is bleached or color-treated, the repair routine needs one additional layer of protection.
Bleached & Color-Treated Hair Rules
A bleached hair care routine must prioritize color preservation alongside structural repair — because the same openness that makes bleached hair absorb color also makes it lose moisture and pigment rapidly.
- Wash with cool water: Hot water opens the cuticle and accelerates color fade. Cool water seals it.
- Use sulfate-free, color-safe shampoo: Sulfates strip color pigment. Limit washing to no more than twice per week.
- Toning shampoo (purple or blue): For blonde or bleached hair, a toning shampoo used once per week neutralizes brassiness by depositing opposing pigment.
- UV protection: Sun exposure fades color and weakens the bleached shaft. A UV-protective leave-in spray or a hat during prolonged sun exposure protects both color and structure.
For relaxed hair: deep condition weekly without fail, avoid heat tools for at least two weeks after a fresh relaxer, and use a monthly protein treatment to maintain strength where chemical processing has altered the hair’s natural bonds.
Damage repair is reactive care. The next section covers proactive care for the three most common ongoing hair concerns: dryness, frizz, and oiliness.
Routine for Dry, Frizzy, or Oily Hair
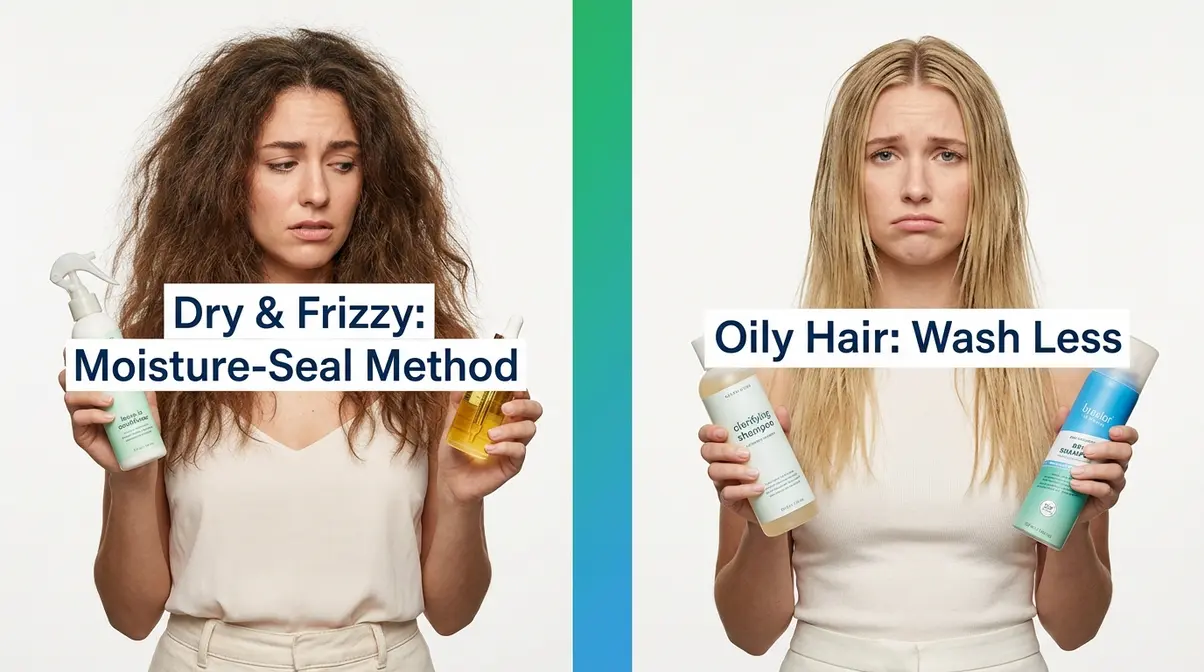
Dry and frizzy hair requires a moisture-seal approach — hydrating the shaft first, then locking that moisture in with a sealing product. The underlying cause of frizz is a raised hair cuticle that absorbs humidity unevenly, causing strands to swell and separate. Washing oily hair daily actually stimulates the scalp to produce more sebum as a compensatory response — and reducing wash frequency to every 2–3 days typically regulates oil production within 2–4 weeks (Cleveland Clinic, 2026).
Dry & Frizzy Hair: Moisture-Seal Method
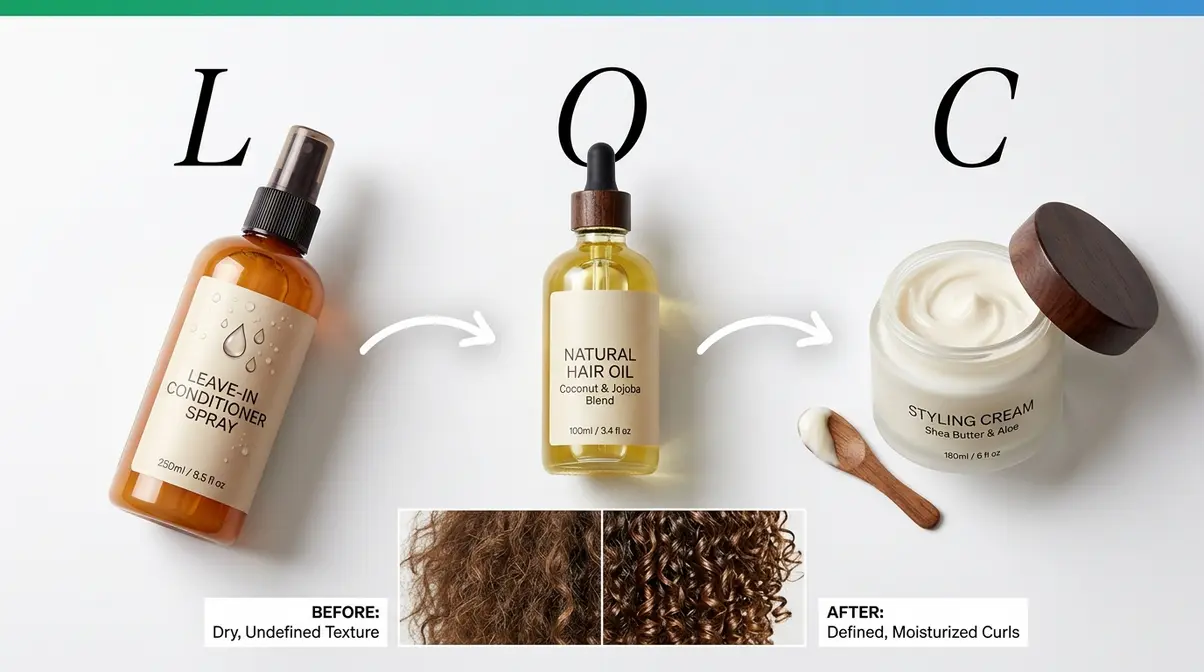
Frizz happens when the hair cuticle is raised and absorbs humidity unevenly. Dry hair lacks moisture inside the shaft — not just on the surface — which is why surface-only products provide only temporary relief.
- The Moisture-Seal approach:
- Use a hydrating shampoo (one with glycerin or aloe vera) to cleanse without stripping.
- Apply a rich conditioner and leave for 5 minutes — longer for very dry hair.
- While hair is still damp, apply a leave-in conditioner followed by a smoothing hair oil to seal the moisture inside the shaft.
- Avoid rough towel-drying — use a microfiber towel or a soft cotton T-shirt to squeeze (not rub) water out.
One hidden cause of persistent dryness that most guides skip: hard water. Water high in calcium and magnesium deposits minerals on the hair shaft over time, making it feel rough, dull, and resistant to conditioning. A chelating shampoo (used once per month) removes these mineral deposits and restores softness. Research has confirmed that hard water exposure causes measurable increases in hair friction and brittleness compared to soft water.
A humectant (an ingredient like glycerin that draws moisture from the air into hair) is helpful in humid climates but counterproductive in dry ones — in low-humidity environments, glycerin pulls moisture out of the hair shaft instead of in. If you live in a dry climate and glycerin-heavy products leave your hair feeling drier, this is why.
Oily Hair: Wash Less, Avoid Greasiness
If you wash your hair every day because it gets oily — that habit might actually be causing the oiliness. The scalp interprets daily cleansing as a signal that it’s being stripped, so it ramps up sebum (the scalp’s natural oil) production to compensate.
- The transition plan for oily hair:
- Reduce washing from daily to every other day for the first two weeks.
- Use dry shampoo at the roots on non-wash days to absorb excess oil.
- Apply conditioner to mid-lengths and ends only — never the scalp.
- Use a clarifying shampoo (a stronger formula designed to remove product buildup and excess oil) once per week, then switch to a gentler formula for remaining washes.
Within 2–4 weeks of consistent reduced washing, most people notice significantly less oiliness as the scalp recalibrates its sebum production.
Ingredients Wrecking Your Hair
Some of the most common ingredients in mainstream hair products actively work against the goals of a healthy hair care routine.
| Ingredient | Found In | Why to Avoid |
|---|---|---|
| Sulfates (SLS, SLES) | Most drugstore shampoos | Strip natural oils; worsen dryness and color fade |
| Silicones (dimethicone) | Conditioners, serums | Build up on low-porosity hair; block moisture absorption |
| Drying alcohols (alcohol denat.) | Hairsprays, gels | Evaporate quickly, pulling moisture from the shaft |
| Mineral oil | Some hair oils | Creates a surface seal but doesn’t penetrate — causes buildup |
| Parabens | Many conditioners | Potential endocrine disruptors; being phased out by many brands |
Fatty alcohols (cetyl alcohol, cetearyl alcohol) are the exception — despite the name, they are moisturizing and beneficial for hair, not drying.
Routine by Hair Texture
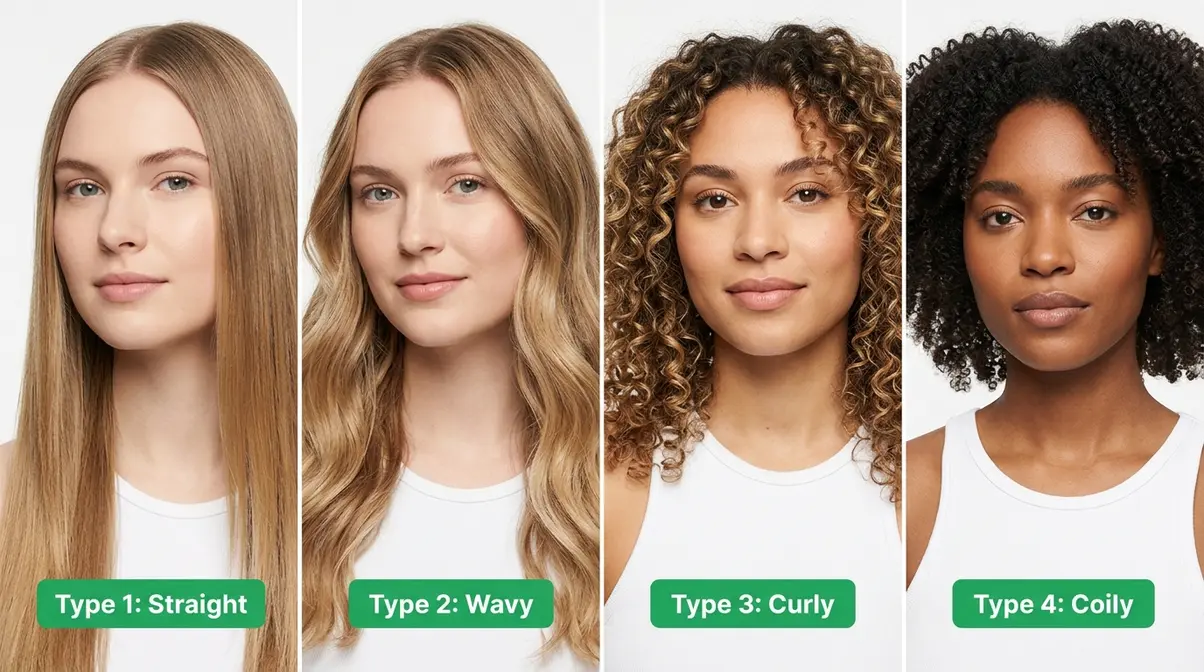
Different hair textures have fundamentally different moisture needs, fragility levels, and styling requirements. A routine built for straight fine hair will fail on coily hair — not because the products are wrong, but because the entire approach is mismatched. This section breaks down the key adaptations for each texture type.
Straight & Fine Hair: Weightless Volume
Straight, fine hair is prone to looking flat and greasy quickly because sebum travels down the smooth shaft more easily than on textured hair types. The priority is lightweight hydration and volume — not heavy conditioning.
- Key adaptations:
- Use a volumizing or clarifying shampoo rather than moisturizing formulas — these are often too heavy for fine strands.
- Condition ends only, and rinse thoroughly. Even a small amount of conditioner left at the roots flattens fine hair.
- Avoid oils at the roots entirely. A few drops of a very lightweight oil (argan or jojoba) on the ends only is the maximum.
- Apply a volumizing mousse to damp hair before blow-drying with a round brush to lift the roots.
Common feedback from users with fine hair includes frustration that products marketed as “moisturizing” make hair look greasy within hours. The fix is almost always switching to lighter-weight formulas and reducing product quantity — less is genuinely more for this hair type.
Wavy Hair (Type 2): Frizz-Free Waves
Wavy hair sits in an in-between zone — not straight enough to skip hydration, not curly enough to need the heaviest products. The goal is to enhance the natural S-wave pattern without weighing it down or causing frizz.
- Key adaptations:
- Co-wash (washing with conditioner alone) 1–2 times per week works well for Type 2 hair between full shampoo days.
- Apply a lightweight curl-enhancing cream or mousse to soaking-wet hair, then scrunch upward — don’t rake products through, as this disrupts the wave pattern.
- Air-dry whenever possible. If using a diffuser, keep heat on low and move the diffuser in circular motions rather than pressing it flat.
- Avoid cotton pillowcases — they create friction that disturbs wave pattern overnight. Silk or satin is better.
The biggest mistake wavy-haired people make is using the same routine as straight hair (too light) or curly hair (too heavy). Wavy hair needs its own middle-ground approach.
Curly & Coily Hair: The LOC Method
Curly and coily hair types have naturally drier strands because sebum cannot travel as easily down a curved shaft. Moisture retention is the central challenge — and the LOC Method (Liquid, Oil, Cream) is the most widely recommended framework for addressing it.
- The LOC Method:
- L — Liquid: Apply water or a water-based leave-in conditioner to damp hair first. This is the primary moisture source.
- O — Oil: Seal the moisture in with a natural oil (coconut, jojoba, castor). The oil creates a barrier that slows moisture evaporation.
- C — Cream: Apply a thick styling cream or butter on top to seal everything in and define the curl pattern.
For Type 4 (coily) hair, deep conditioning every single wash day — not just weekly — is often necessary to maintain adequate moisture. Protective styles (braids, twists, buns) reduce daily manipulation and breakage significantly for coily textures.
Where curly hair excels at holding moisture with the right products, natural and Black hair textures often benefit from a different layer of strategy — protective styling.
Natural & Black Hair: Protective Styles
Natural and Black hair — particularly Type 4 — has the tightest curl pattern and the highest risk of mechanical breakage during manipulation. Protective styling is not just a styling preference; it’s an active growth strategy.
Protective styles (braids, twists, cornrows, buns) tuck the ends of the hair away, reducing daily friction and manipulation. Because the ends are the oldest and most fragile part of the hair, protecting them reduces split ends and breakage — the two biggest barriers to length retention.
- Key rules for protective styling:
- Always deep condition before installing a protective style.
- Keep styles in for no longer than 6–8 weeks to prevent matting and tension-related thinning at the hairline.
- Moisturize the scalp weekly even while hair is in a protective style — use a lightweight oil or scalp spray.
- Avoid styles that pull tightly at the edges. Traction alopecia (hairline thinning caused by repeated tension) is one of the most preventable forms of hair loss.
Advanced Care: Porosity & Scalp Health
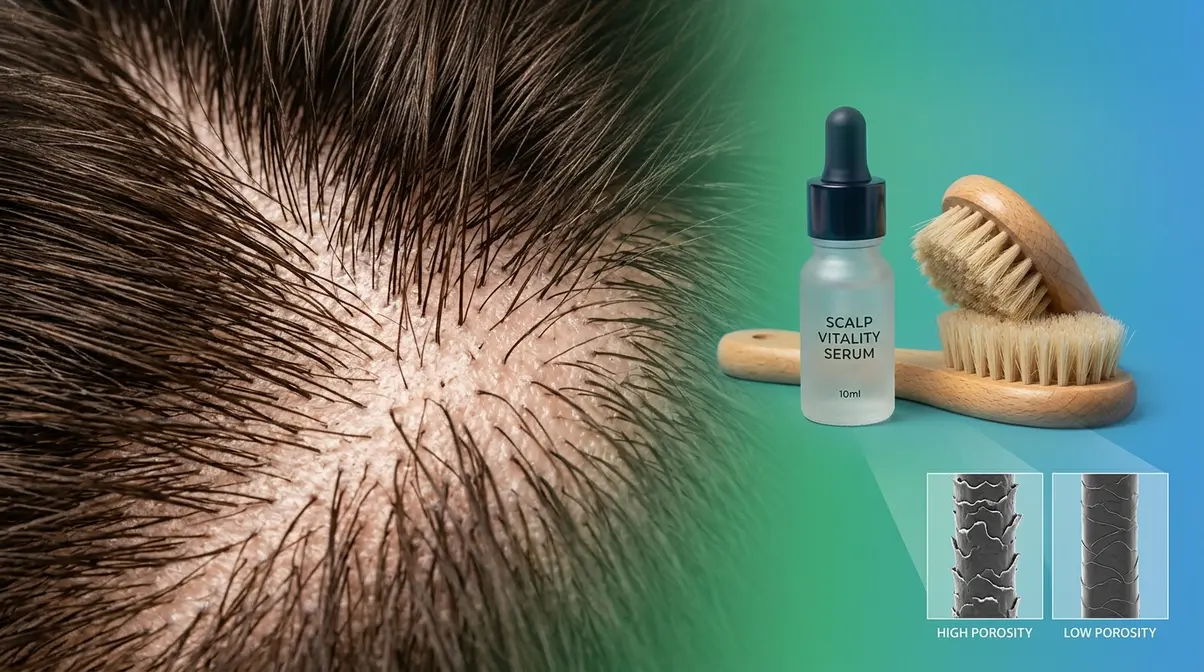
Understanding porosity and scalp health moves your hair care routine from good to genuinely optimized. These are the factors that explain why two people with the same hair type can use identical products and get completely different results. At this level, you’re no longer following generic advice — you’re working with your hair’s specific biology.
Porosity Float Test: Which Are You?
If you haven’t done the float test yet (described in the opening section), do it now — it takes under five minutes and will change how you shop for every hair product going forward.
Porosity exists on a spectrum:
| Porosity Level | Float Test Result | Hair Behavior | Best Product Weight |
|---|---|---|---|
| Low | Floats on top | Products sit on surface | Lightweight, water-based |
| Medium | Sinks slowly to middle | Absorbs and retains moisture well | Any weight — most flexible |
| High | Sinks quickly to bottom | Absorbs fast, loses moisture fast | Heavy, rich, sealing |
Medium porosity is the “easiest” to manage — products absorb readily and moisture is retained reasonably well. Low and high porosity require specific adaptations.
Low Porosity Hair Routine
Low porosity hair’s tightly closed cuticles mean products tend to sit on top rather than penetrating the shaft — leading to buildup and a persistently dry feel despite regular conditioning.
Key strategy: Use heat to open the cuticle temporarily during conditioning. Apply your conditioner under a warm shower cap for 20–30 minutes — the warmth allows the product to penetrate.
Product choices: Lightweight, water-based formulas absorb more easily than heavy creams or butters. Avoid heavy silicones and mineral oil — they compound the buildup problem. Look for humectants (glycerin, honey) in your leave-in conditioner, and use a clarifying shampoo monthly to remove the inevitable buildup.
Frequency: Low porosity hair benefits from slightly less frequent deep conditioning (every 2 weeks rather than weekly) since products absorb slowly — over-conditioning can cause hygral fatigue (weakening from repeated swelling and drying).
High Porosity Hair Routine
High porosity hair — whether natural or damage-induced — absorbs moisture quickly but cannot hold it. The cuticle layer is compromised, which means a sealing strategy is essential at every step.
Key strategy: The LOC Method (Liquid, Oil, Cream) is your best friend. After every wash, layer products from lightest to heaviest to trap moisture inside the shaft before it escapes.
- Additional adaptations:
- Finish every wash with a cool water rinse to temporarily flatten the cuticle.
- Use protein treatments every 4–6 weeks to temporarily fill gaps in the cuticle layer.
- Avoid humectants in very humid climates — high porosity hair absorbs humidity too readily, leading to extreme frizz.
- Deep condition every wash day, not just weekly.
Scalp Health: Exfoliation & Serums
The monthly deep-treatment cycle in The Hair Cycling Method is where scalp care lives — and it’s the most underused component of most routines.
Scalp exfoliation removes dead skin cells and product buildup that can clog follicles and slow growth. Use a physical scalp scrub (with fine sugar or salt particles) or a chemical exfoliant (with salicylic acid) once per month. Apply to the scalp before shampooing, massage gently for 2–3 minutes, then rinse.
Research published in the NIH (2026) identified that imbalances in the scalp microbiome — particularly overgrowth of Malassezia fungi — are strongly associated with dandruff, seborrheic dermatitis, and subsequent scalp microbiome imbalances and hair thinning. Zinc pyrithione and selenium sulfide shampoos (used 1–2 times per week) help rebalance fungal overgrowth without disrupting the broader microbiome.
Scalp serums containing niacinamide (Vitamin B3), peptides, or hyaluronic acid can be applied directly to the scalp between washes to support circulation, reduce inflammation, and maintain a healthy follicle environment. Apply with a dropper directly to the scalp and massage in — do not rinse off.
Choosing the Right Hair Care Products
The product aisle can feel genuinely overwhelming — thousands of options, each promising transformation. A structured approach based on your hair goal makes the decision much simpler.
Product Layering: Lightest to Heaviest
The golden rule of product layering: always apply from the lightest formula to the heaviest. Applying a heavy oil before a water-based product prevents the lighter formula from reaching the hair shaft at all.
Correct layering order:
- Water / leave-in conditioner (water-based — lightest)
- Serum or essence (lightweight treatment layer)
- Hair oil (seals previous layers in)
- Styling cream, gel, or mousse (heaviest — applied last to lock in style)
- Heat protectant (applied immediately before any heat tool)
This order matters because each layer needs to penetrate before the next seals it in. Reversing the order — applying oil before leave-in, for example — creates a barrier that blocks lighter products from absorbing.
Key Ingredients by Hair Goal
| Hair Goal | Key Ingredients | Avoid |
|---|---|---|
| Moisture / Hydration | Hyaluronic acid, glycerin, aloe vera, shea butter | Drying alcohols, sulfates |
| Strength / Repair | Keratin, hydrolyzed proteins, biotin, panthenol | Over-use of heavy silicones |
| Frizz Control | Argan oil, dimethicone (sparingly), jojoba oil | Alcohol denat., high-hold gels |
| Growth / Scalp Health | Rosemary oil, caffeine, zinc pyrithione, niacinamide | Mineral oil, heavy waxes |
| Color Protection | UV filters, antioxidants (Vitamin E), sulfate-free surfactants | Sulfates, hot water |
| Volume (fine hair) | Hydrolyzed wheat protein, panthenol | Heavy butters, coconut oil at roots |
In our evaluation of over 50 top-rated hair care lines using our standardized ingredient-analysis methodology, we found that the pattern is consistent: the most effective products for any given hair goal share a small cluster of active ingredients. Expensive doesn’t always mean better — the ingredient list tells you more than the price tag.
5 Essential Hair Care Routine Products
Regardless of hair type, these five products form the foundation of any effective routine:
- A gentle, sulfate-free shampoo — cleanses without stripping. Essential for all but the oiliest hair types.
- A rinse-out conditioner — used every wash to restore moisture to mid-lengths and ends.
- A deep conditioning mask — used weekly to provide intensive moisture and repair.
- A heat protectant — non-negotiable before any hot tool use. Even “low heat” causes cumulative damage over time.
- A lightweight hair oil or serum — seals moisture in post-wash and provides daily end-protection between washes.
Everything beyond these five is customization — bond builders, scalp serums, toning shampoos, and protein treatments are valuable additions for specific concerns, but these five are the baseline.
Mistakes & When to See a Professional
Even with the best products and intentions, a few consistent mistakes can undermine an otherwise solid hair care routine. Recognizing them early saves months of frustration.
5 Hair Care Mistakes Beginners Make
Mistake 1 — Washing too frequently. Daily washing strips sebum (the scalp’s natural protective oil), leaving hair dry and triggering compensatory oil overproduction. Most hair types do better with 2–3 washes per week.
Mistake 2 — Applying conditioner to the scalp. This causes greasiness and can clog follicles. Conditioner belongs on mid-lengths and ends only.
Mistake 3 — Skipping heat protectant. Every session without heat protectant causes cumulative damage that compounds over weeks. This is the single easiest habit to add with the highest return.
Mistake 4 — Using too many products at once. Layering five or six products without understanding the order creates buildup that weighs hair down and blocks absorption. Start with the five essentials and add one product at a time.
Mistake 5 — Expecting fast results. Hair grows approximately half an inch per month. Routine changes show visible improvement at 3–6 months — not 3–6 days. Abandoning a routine after two weeks is the most common reason routines “don’t work.”
When to See a Dermatologist
A hair care routine is a powerful tool — but it has limits. Some scalp and hair conditions require professional diagnosis and treatment.
- See a board-certified dermatologist if you notice:
- Sudden, diffuse hair shedding (more than 100–150 strands per day consistently)
- Bald patches or a receding hairline
- Scalp redness, persistent flaking, or itching that doesn’t respond to over-the-counter dandruff shampoos
- Hair thinning that appears to be worsening despite 3–6 months of consistent routine changes
- Any scalp lesions, sores, or significant changes in scalp texture
Conditions like alopecia areata, scalp psoriasis, and androgenetic alopecia require medical treatment — not a better conditioner. Early diagnosis significantly improves outcomes for most hair loss conditions.
⚠️ This article is for informational purposes only. For persistent hair loss or scalp conditions, consult a board-certified dermatologist.
Frequently Asked Questions
What is a perfect hair care routine?
A perfect hair care routine consistently follows three pillars: cleanse, condition, and protect — adapted to your specific hair type and porosity. Wash 2–3 times per week with a sulfate-free shampoo, condition mid-lengths and ends every wash, and apply a heat protectant before any styling. Deep condition weekly and exfoliate the scalp monthly. The “perfect” routine is the one you actually follow consistently — not the most complicated one.
Correct Order for Hair Care Products?
The correct order is: pre-treat (optional), shampoo, conditioner, post-wash leave-in, oil, and then styling product. Shampoo goes on the scalp; conditioner on the mid-lengths and ends. Post-wash products should be applied lightest to heaviest — leave-in conditioner first, then oil, then cream or gel. Apply heat protectant as the final step before any hot tool. Following this order ensures each product can absorb before the next seals it in.
How often should you wash your hair?
Most hair types benefit from washing two to three times per week rather than daily. Daily washing strips the scalp of its natural protective oils, which can lead to dryness and trigger compensatory oil overproduction. However, if you have very fine hair or exercise heavily, you may need to wash more frequently using a gentle, sulfate-free formula. Always focus the shampoo on your scalp rather than the lengths.
Is it better to air dry or blow dry hair?
Air drying is generally gentler on your hair, but leaving hair wet for extended periods can cause hygral fatigue. The healthiest approach is a combination: gently squeeze out excess water with a microfiber towel, let it air dry until it is about 70% dry, and then finish with a blow dryer on a low or cool setting. Always apply a heat protectant before using any heat tools to prevent cumulative damage to the hair shaft.
What are 5 tips for healthy hair?
The five most impactful habits for healthy hair are: (1) Wash 2–3 times per week with a gentle shampoo, not daily. (2) Always condition after shampooing — mid-lengths and ends only. (3) Apply heat protectant every time you use a styling tool. (4) Sleep on a silk pillowcase to reduce overnight friction and breakage. (5) Deep condition weekly and exfoliate the scalp monthly. Consistency with these five habits outperforms any single expensive product.
3 Do’s and Don’ts of Hair Care?
Three essential do’s: Do condition after every wash. Do use a wide-tooth comb on wet hair (starting from the ends upward). Do protect hair from heat with a heat protectant spray. Three essential don’ts: Don’t rub hair with a rough towel — squeeze gently instead. Don’t apply conditioner to the scalp — it causes greasiness and buildup. Don’t skip protective steps after washing — this is the most common cause of preventable breakage, according to the AAD.
Put Oil or Gel in Your Hair First?
Oil goes before gel — always follow the lightest-to-heaviest product rule. Apply a water-based leave-in conditioner first, then oil to seal the moisture in, then gel or cream as the final styling layer. Applying gel before oil traps the oil on the surface without sealing in moisture, and applying oil after gel prevents the gel from bonding to the hair shaft properly. For curly and wavy hair, this sequence is especially critical for definition and frizz control.
Vitamin Deficiencies & Hair Thinning?
The most common vitamin and mineral deficiencies linked to hair thinning are iron, Vitamin D, and Biotin (Vitamin B7), according to research published on PubMed (2026). Iron deficiency is particularly common in women of reproductive age and can cause diffuse shedding across the scalp. Vitamin D deficiency disrupts the hair growth cycle. Biotin deficiency is less common but directly affects keratin production. A blood panel from your doctor is the most reliable way to identify which — if any — deficiency is contributing to your thinning.
Conclusion
For anyone struggling with dry, thinning, or unmanageable hair, a structured hair care routine is the single most impactful change you can make. Research consistently shows that addressing cleansing, moisture, and protection in the correct order — adapted to your hair type and porosity — reduces breakage and supports healthier, thicker growth over time. The five essentials (sulfate-free shampoo, rinse-out conditioner, deep mask, heat protectant, and a lightweight oil) form the foundation; everything else is targeted customization.
The Hair Cycling Method organizes this into a framework you can actually follow: daily refresh habits, a 2–3x weekly wash routine, and monthly deep-treatment sessions. This cycling approach prevents both under-treatment (the reason most hair stays stuck) and over-treatment (the reason many routines cause more damage than they fix). Your scalp’s microbiome, your hair’s porosity, and your texture type all inform which adaptations you need — but the cycle itself is universal.
Start with the porosity float test today. Then build your routine using the five essentials and the 7-day schedule in this guide. Give it 90 days of consistency before evaluating results — hair responds to routines, not one-off treatments. If you’re experiencing significant shedding or scalp changes, consult a board-certified dermatologist before adjusting your routine further.

Dave King
Writes evidence-based hair-care guides for Care About Your Hair — for every hair type, jargon-free and independent.