 Dave King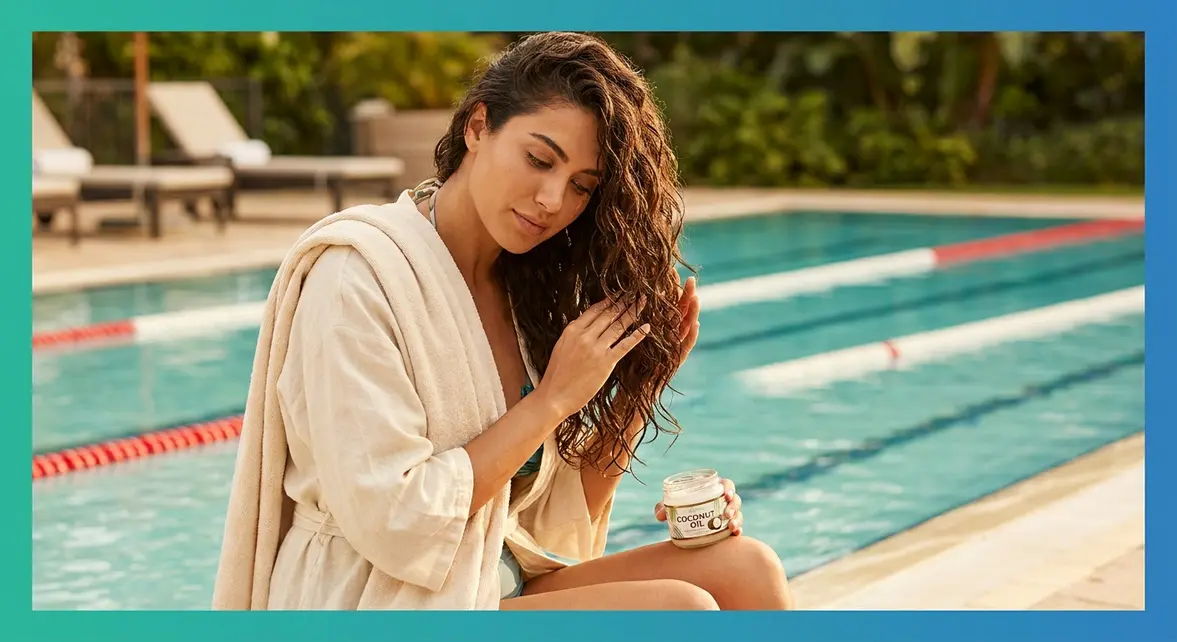
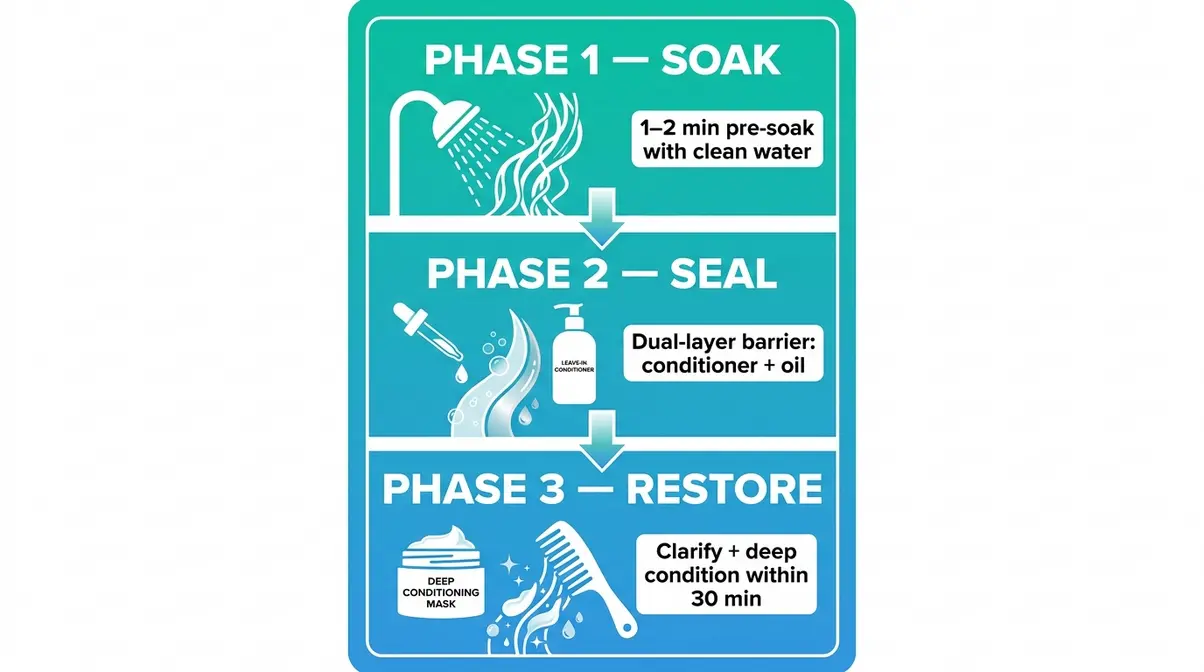
To protect wavy hair when swimming, follow the Soak-Seal-Restore Method: a 3-phase routine that takes less than 10 minutes before and after your swim. Wet your hair with clean water, apply a protective barrier of leave-in conditioner or oil, and secure it in a protective style. After swimming, follow up with an anti-chlorine rinse and deep conditioner within 30 minutes. This approach works for both pool and ocean swimming and takes under 10 minutes at each end of your session.
“I’d like to start going to the pool but the tangles afterwards are so bad and my hair is so dry from the chlorine …”
— r/Swimming community member
If this sounds familiar, you’re not imagining it. Chlorine (a chemical disinfectant used to keep pool water safe) and salt water actively damage wavy hair at the structural level — not just on the surface. Left unprotected, that damage builds up with every swim, making your waves progressively drier, weaker, and harder to manage.
The good news is that knowing how to protect wavy hair when swimming changes everything. In this guide, you’ll learn the complete Soak-Seal-Restore Method — a science-backed, 3-phase routine that shields your waves before, during, and after every swim. We’ll cover what you need, the seven concrete steps, how to troubleshoot common problems, and when to seek extra help.
To protect wavy hair when swimming, use the Soak-Seal-Restore Method — a 3-phase routine that prevents chlorine and salt water from stripping your waves, then restores moisture after. Research confirms chlorine oxidises keratin proteins, progressively weakening hair structure with each unprotected swim.
- Soak first: Learning how to protect wavy hair when swimming starts with wetting hair with clean water before entering the pool — saturated hair absorbs far less chlorine
- Seal the barrier: Apply leave-in conditioner or coconut oil to block chemical absorption
- Restore after: Use an anti-chlorine shampoo and deep conditioner within 30 minutes of swimming
- Silicone swim caps offer the strongest physical protection for regular swimmers
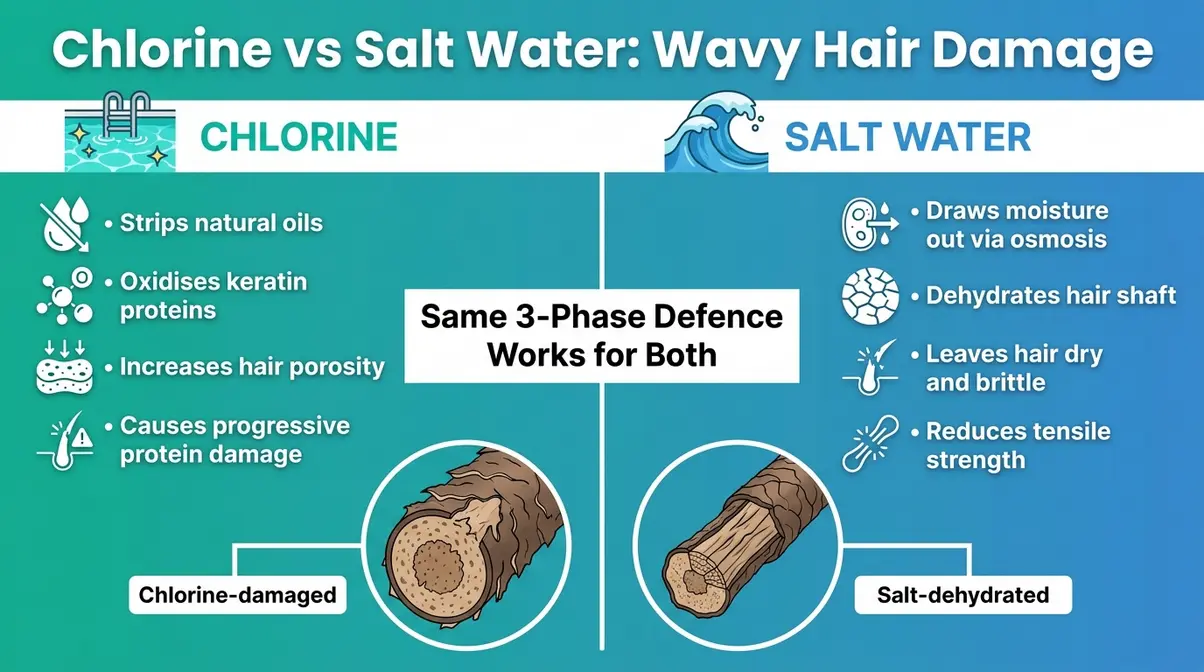
- Salt water dehydrates; chlorine strips — both environments require the same 3-phase defence
What You’ll Need Before You Start
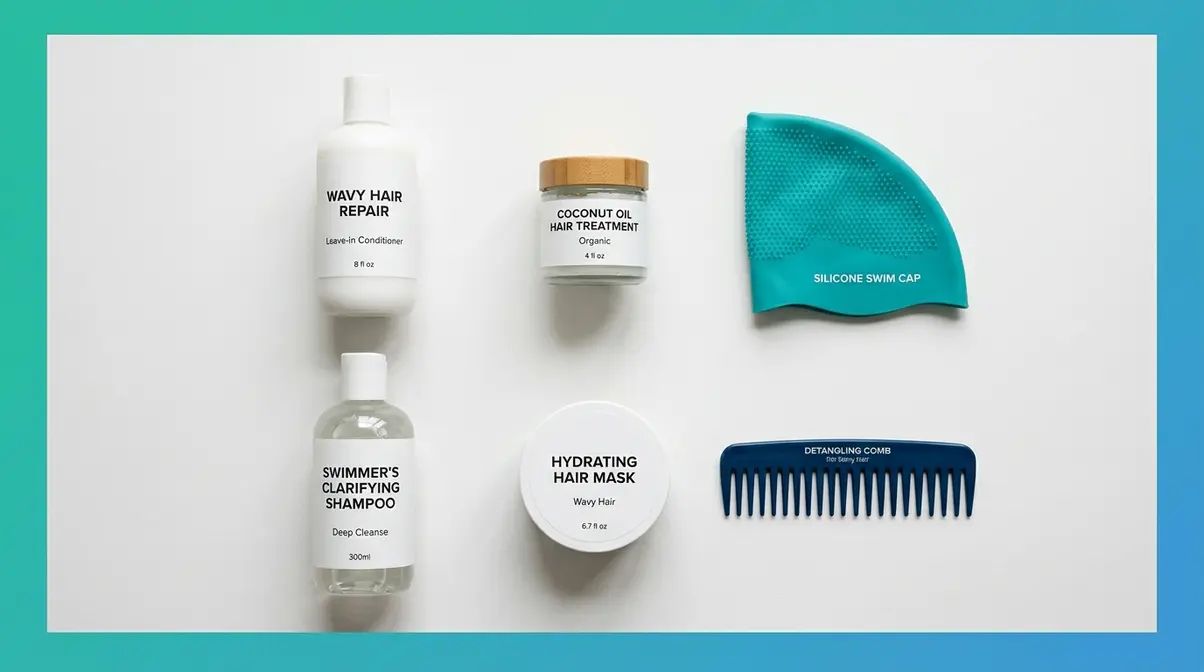
The Soak-Seal-Restore Method requires just a handful of affordable products — you may already have most of them at home. The entire routine takes under 10 minutes before and after your swim, and none of these items are expensive or hard to find.
Here’s everything to gather before your first swim session:
- Clean tap water — for pre-saturating your hair before you enter the pool or ocean; this is the single most important step
- Leave-in conditioner (a lightweight moisturising product you apply to damp hair without rinsing out) — creates the protective moisture barrier that locks out chlorine
- Natural oil such as coconut, jojoba, or argan oil — an alternative or addition to leave-in conditioner for an extra layer of protection; coconut oil is the most accessible option
- Silicone swim cap (optional but strongly recommended for regular swimmers) — provides the strongest physical barrier against chlorine and salt water
- Anti-chlorine or clarifying shampoo (a deep-cleansing formula designed to remove mineral and chemical buildup from hair) — essential for post-swim cleansing
- Deep conditioning hair mask or conditioner — restores the moisture and protein your hair loses during a swim
- Wide-tooth comb — for gentle, knot-free detangling on wet hair after swimming
The steps in this guide are based on recommendations from the American Academy of Dermatology (AAD) and United States Masters Swimming (USMS), combined with community-tested techniques from the r/Swimming community. Once you have these on hand, you’re ready to start. Let’s begin with Phase 1.
Step 1: Saturate & Seal Hair Before Swimming
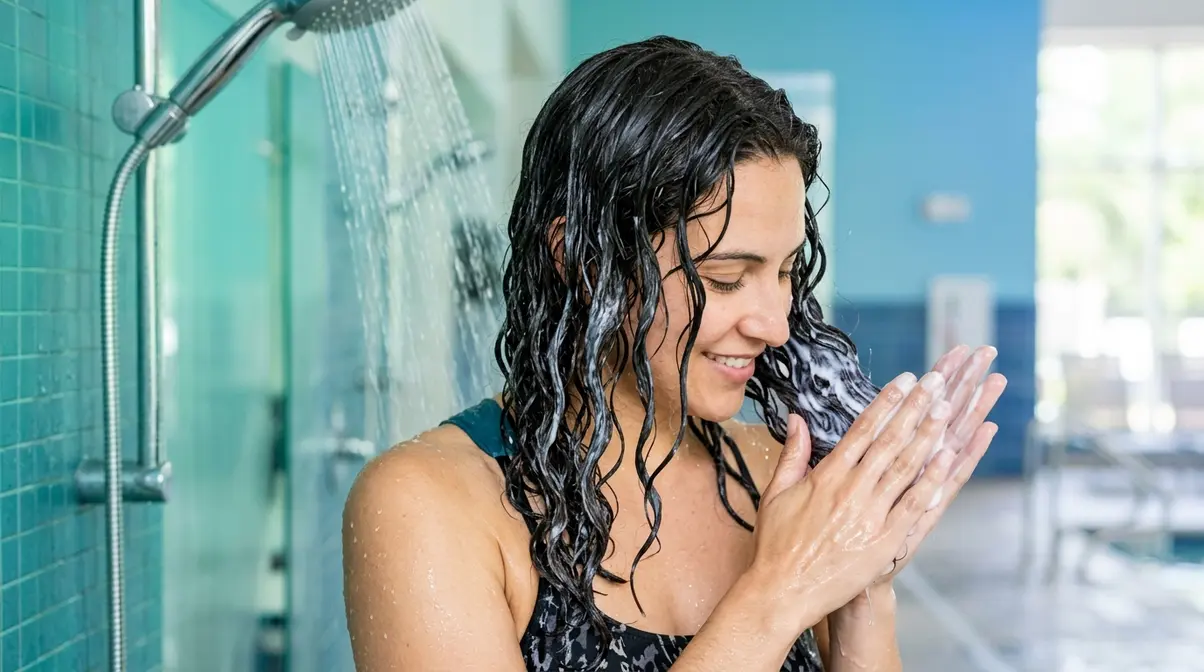
Chlorine causes progressive oxidation of the keratin proteins that give wavy hair its structure — meaning damage compounds with every unprotected swim. A trichology study on keratin oxidation from chlorine published in the International Journal of Trichology confirmed that chemical agents like chlorine increase hair porosity (how easily your hair absorbs and holds moisture) and accelerate dryness (2012). In plain terms: every time your unprotected waves meet pool water, chlorine attacks the proteins that give them their shape and bounce.
Phase 1 of the Soak-Seal-Restore Method stops this damage before it starts. This is where learning how to protect wavy hair when swimming actually begins — before you ever touch the water.
Step 1a: Soak Hair With Clean Water
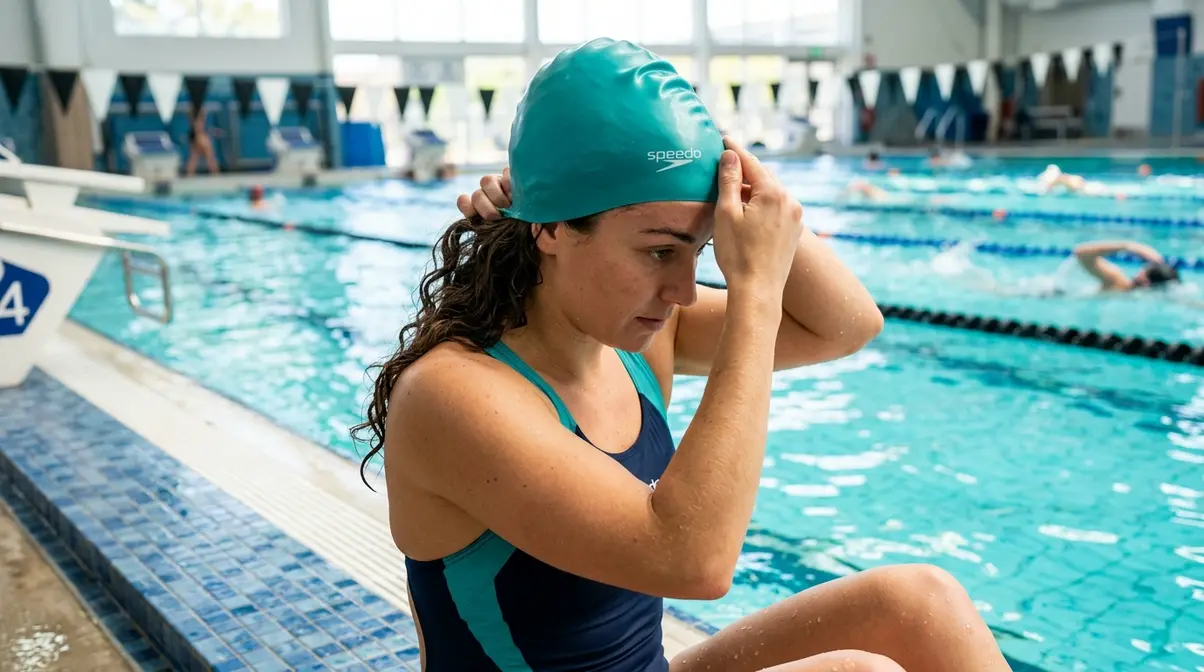
Think of your hair like a sponge. A dry sponge absorbs everything it touches the moment it makes contact. A wet sponge is already full — it simply can’t take on as much liquid. Your wavy hair works exactly the same way.
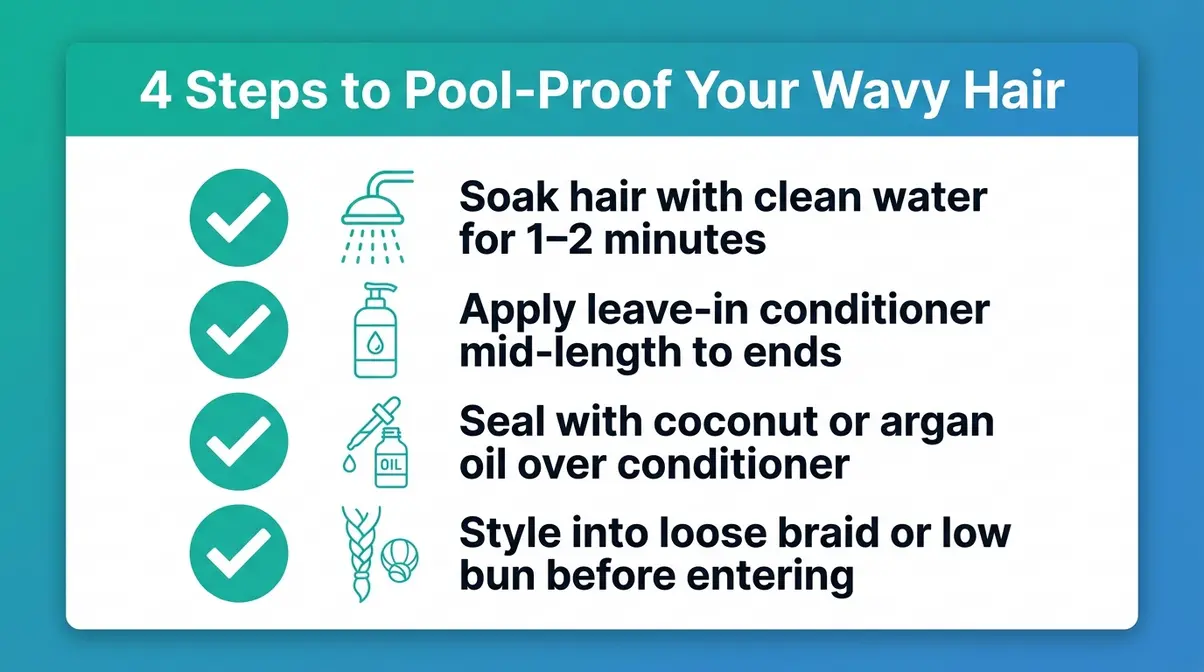
When you step into a pool without pre-wetting your hair, your dry strands greedily absorb chlorinated water right through the cuticle. But if you stand under a shower or tap for 1–2 minutes before entering the water, your hair shafts fill with clean, neutral water first — leaving far less room for chlorine to penetrate.
This matters even more for wavy hair. Wavy hair (patterns 2A through 2C) tends to have a naturally more open cuticle structure than straight hair, making it higher in hair porosity (which describes how easily your hair absorbs and holds moisture). Higher porosity means faster absorption — so the pre-soak step is especially important for your wave pattern. Make sure every strand is saturated, including the hair at the nape of your neck. Your hair should feel completely wet, with no dry sections, before you get in.
Checkpoint: Run your fingers through your hair. If any section still feels dry or straw-like, give it another 30 seconds under the tap.
Step 1b: Apply a Protective Barrier
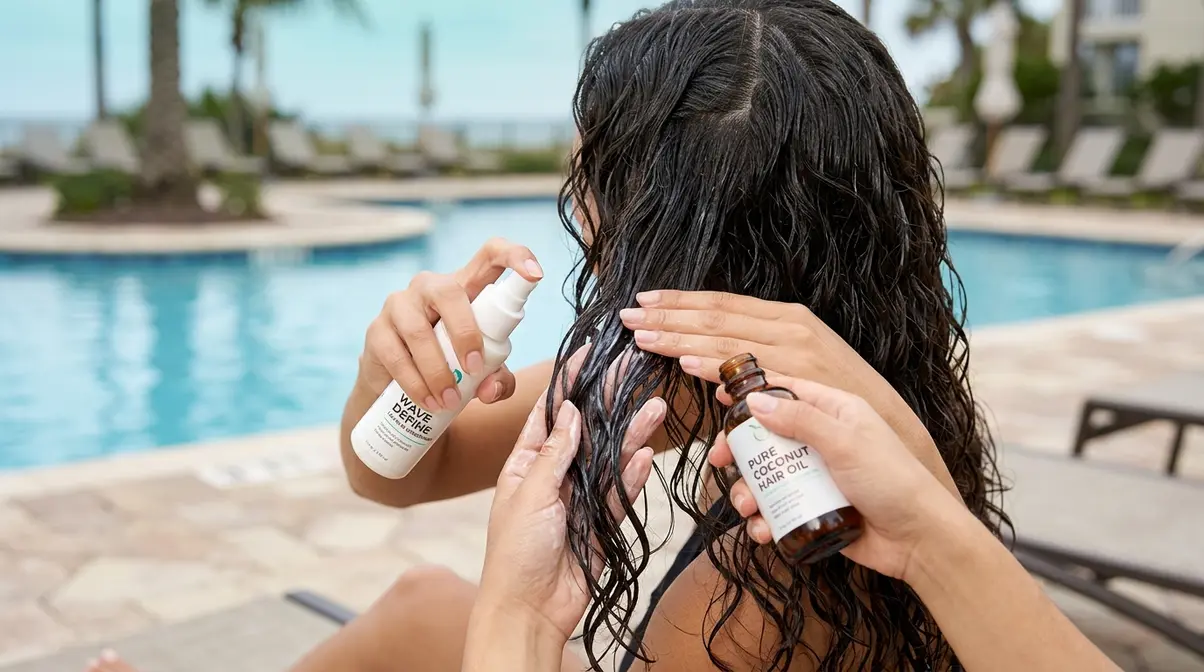
Once your hair is saturated, it’s time to seal it. This is where the protective barrier layer comes in — and it’s what separates the Soak-Seal-Restore Method from a basic rinse-and-hope approach.
Apply a generous amount of leave-in conditioner (a lightweight moisturising product applied to damp hair without rinsing out) to your wet hair, working it from mid-length to the ends. Then add a small amount of coconut or argan oil over the top. The combination is more effective than either product alone: the leave-in conditioner fills the hair shaft with moisture, while the oil physically coats the outer cuticle layer — creating two layers of defence against chlorine and salt.
Why the dual-layer approach works: The AAD recommends applying conditioner before swimming to reduce chemical absorption. The oil layer adds a hydrophobic (water-repelling) surface coating that makes it harder for chlorinated water to penetrate. No competitor routine explains this dual-layer mechanism — most suggest oil or conditioner, not both.
DIY Vitamin C Swim Spray (optional boost): Mix one teaspoon of ascorbic acid powder (Vitamin C) with 250ml of water in a small spray bottle. Spritz onto your hair before swimming. Ascorbic acid is a well-established chlorine-neutralising agent used in water treatment — it reacts with free chlorine to form a harmless compound, reducing the amount of active chlorine your hair is exposed to. Spray it over your protective barrier layer for added defence, particularly for pool swimming. You can find ascorbic acid powder inexpensively at pharmacies or health food stores.
Step 1c: Style to Minimise Tangles
The final pre-swim step is choosing a protective hair style that physically reduces the surface area of hair exposed to water and minimises mechanical friction (the rubbing and pulling that creates tangles while you swim).
Loose, flowing hair fans out in the water — every stroke creates drag and knots. Instead, try one of these options before you enter:
- A loose braid — keeps hair contained without pulling tight enough to cause breakage
- A low bun or twisted bun — wraps hair away from your face and reduces exposure
- Two braids or twists — distributes tension evenly and is particularly effective for longer wavy hair
Avoid tight ponytails, which create a stress point at the elastic and can snap already-fragile wet strands. A fabric scrunchie (a soft, fabric-covered hair tie) is gentler than a standard elastic. User consensus across r/Swimming and wavy hair communities consistently flags tight ponytails as one of the top causes of post-swim breakage — the mechanical stress combines with chemical weakening to cause snapping at the hairline.
Step 2: Protect Waves in the Water
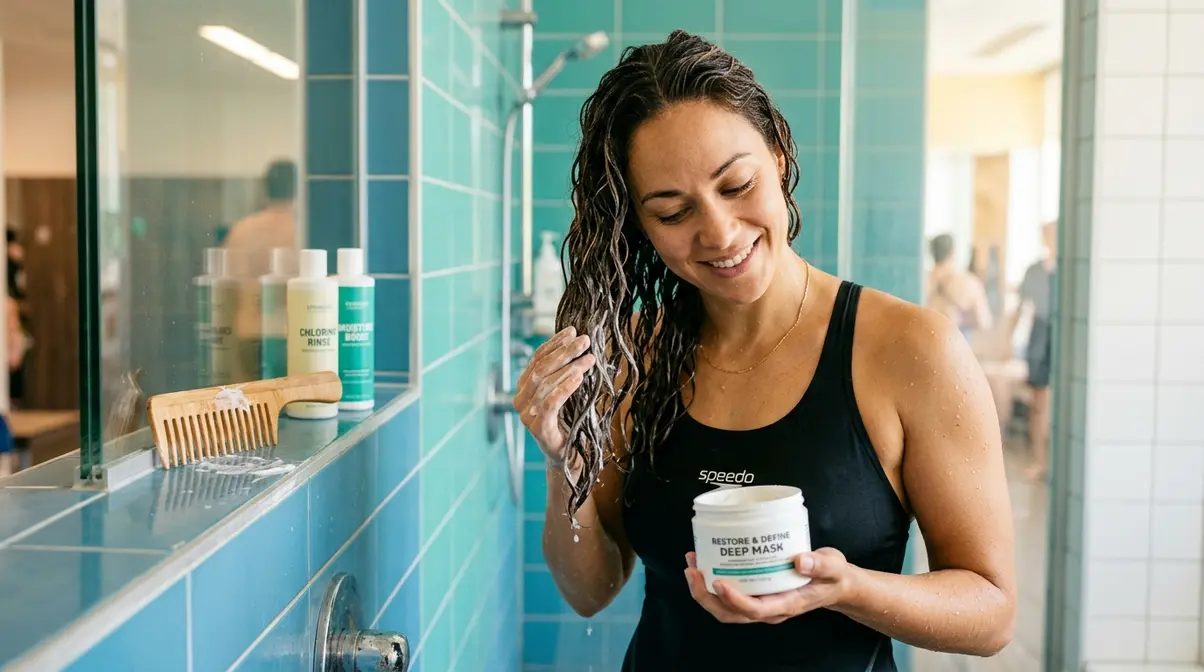
Even with a thorough pre-swim routine, some exposure is unavoidable once you’re in the water. Phase 2 of the Soak-Seal-Restore Method is about minimising that ongoing exposure while you swim.
Step 2a: Wear a Silicone Swim Cap
A silicone swim cap is the single most effective tool for protecting your wavy hair in the pool. It creates a physical seal between your hair and the water, dramatically reducing the amount of chlorine and salt water your strands are exposed to during your session.
Silicone vs. latex: Silicone caps are more durable, gentler on hair, and create a better seal than latex alternatives. They’re also easier to put on over thicker wavy hair. Look for a larger-sized silicone cap if standard caps feel tight — several brands offer “long hair” or “large dome” versions specifically designed for voluminous hair.
- How to put it on without damage:
- Wet your hair and gather it in a low bun at the nape of your neck
- Hold the cap open with both hands and stretch it over your forehead first
- Smooth it back over your hair toward the nape, tucking in any loose strands
- Check the seal around your hairline — no gaps means maximum protection
The cap won’t keep your hair completely dry (water always seeps in to some degree), but it significantly reduces the total volume of chlorinated water your hair contacts. For regular swimmers — anyone hitting the pool more than twice a week — a silicone cap is a non-negotiable investment in your hair’s long-term health.
Step 2b: Keep Exposure Minimal
Not everyone wants to wear a swim cap, and that’s a fair choice. If you’re swimming cap-free, a few habits can still reduce ongoing damage:
- Keep your head above water when possible — backstroke and breaststroke expose hair to less total immersion than freestyle
- Avoid rubbing your hair against pool edges or lane ropes, which strips the protective barrier layer you applied in Step 1
- Limit your session if you’re cap-free — the longer your hair sits in chlorinated water, the more the barrier layer degrades. A 30-minute cap-free swim causes noticeably less damage than a 90-minute one
- Re-apply your exit plan: Get to the post-swim steps as soon as you’re out of the water — don’t let chlorine sit on your hair while you chat poolside
Step 3: Rescue and Restore Waves
Phase 3 of the Soak-Seal-Restore Method is where most people fall short — and where the biggest difference in your hair’s long-term health is made. Rinsing quickly is not enough. Your waves need active restoration after every swim. For a deeper dive into this phase, check out our guide on post-swim wavy hair recovery and care.
Step 3a: Rinse Hair Immediately
The moment you get out of the pool or ocean, rinse your hair under clean, cool or lukewarm water. Do this within 5 minutes of finishing your swim — the longer chlorine or salt sits on your strands, the more time it has to continue oxidising your keratin proteins.
Rinse for a full 2–3 minutes, working the water through every section of hair. This step alone removes the majority of surface chlorine and salt before they can penetrate deeper into the hair shaft. Think of it as flushing out the damage before it sets.
Why temperature matters: Cool or lukewarm water is preferable to hot. Hot water forces the hair cuticle open wider, which can actually allow more chemical residue to penetrate rather than rinse away. Keep the temperature comfortable but not steaming.
For an extra edge, apply your DIY Vitamin C spray directly to your hair before this rinse. The ascorbic acid will neutralise any remaining active chlorine on contact, making your rinse even more effective. Check out this wavy hair swimming tutorial for a visual demonstration of the rinse and neutralise technique.
Step 3b: Use Clarifying Shampoo
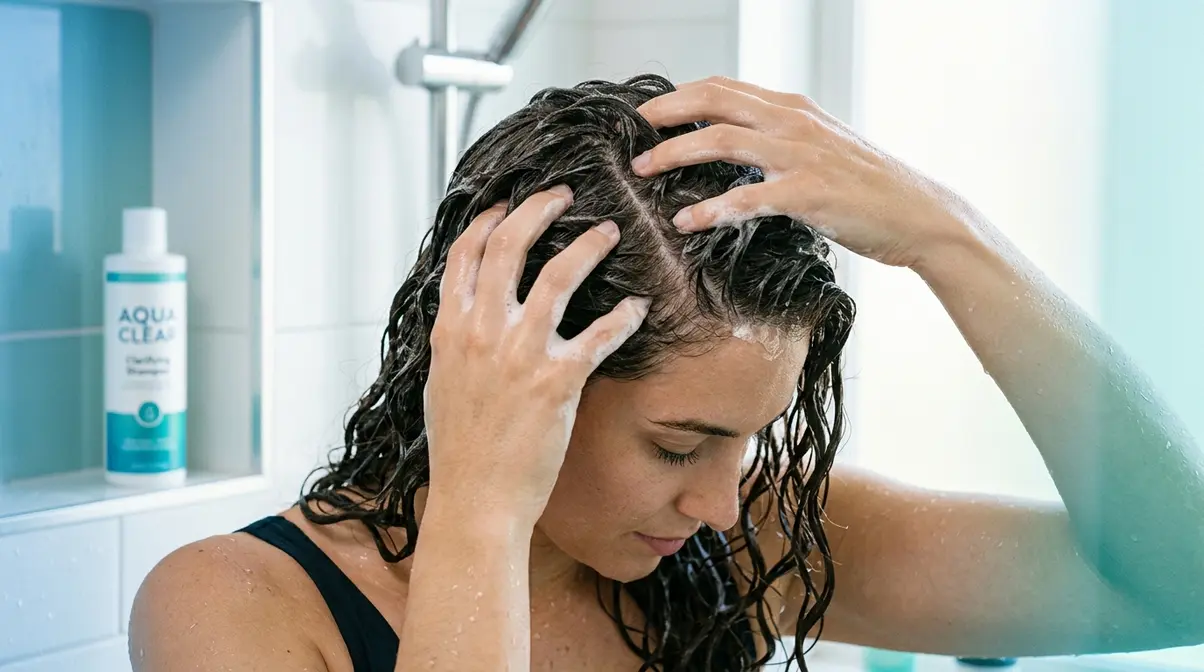
A regular shampoo won’t cut it after swimming. You need a clarifying shampoo (a deep-cleansing formula specifically designed to remove mineral deposits, chlorine, and chemical buildup from hair) or a dedicated anti-chlorine shampoo. This is the “post swim anti-chlorine scrub” step that wavy-haired swimmers consistently identify as a game-changer for their hair’s condition.
Apply the clarifying shampoo to your wet hair, focusing on the scalp and roots. Work it gently through the lengths with your fingers — no vigorous scrubbing, which creates mechanical friction on already-weakened strands. Leave it on for 2–3 minutes before rinsing thoroughly.
How often to clarify: Use a clarifying shampoo after every pool swim. After ocean swimming, a regular sulphate-free or gentle shampoo is often sufficient — salt rinses away more easily than chlorine. However, if you’ve been in the ocean for more than an hour, or if your hair feels particularly stiff or tacky afterwards, use the clarifying shampoo regardless.
Important note: Clarifying shampoos are more stripping than regular shampoos, which is exactly why they work for chlorine removal — but always follow immediately with deep conditioning (Sub-Step 3c) to replace the moisture removed. Never skip the conditioning step after clarifying.
For additional DIY recipe ideas for a homemade anti-chlorine rinse, this wavy hair swimming resource includes a practical apple cider vinegar rinse formula that many wavy-haired swimmers find effective.
Step 3c: Deep Condition for Moisture
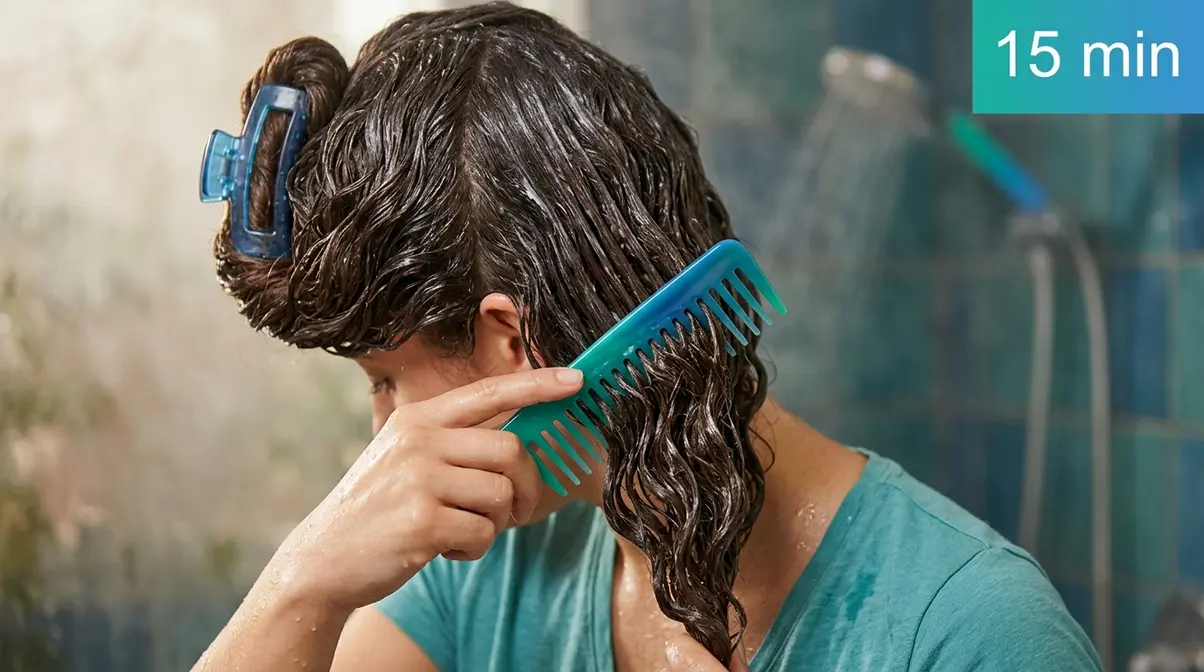
This is the most important step in the entire Soak-Seal-Restore Method — and the one most swimmers skip. Deep conditioning is not the same as regular conditioning. A deep conditioning mask or treatment is a richer, more concentrated formula that penetrates the hair shaft to replace lost moisture and temporarily repair protein bonds that chlorine has damaged.
Apply a generous amount of deep conditioner from the mid-lengths to the ends of your hair (avoid the scalp, which produces its own natural oils). Then:
- Comb through gently with your wide-tooth comb to distribute evenly
- Twist or clip your hair up and leave the conditioner on for 10–20 minutes (or as directed on the product)
- Rinse with cool water — cool water closes the hair cuticle, sealing in the moisture you’ve just restored
Why this restores your waves: Wavy hair (2A–2C) gets its shape from the slightly irregular structure of the hair shaft. When chlorine strips moisture and oxidises keratin, the shaft loses its natural flexibility and your waves can fall limp or frizzy. Deep conditioner replenishes the moisture that gives those shafts their elasticity, helping your wave pattern bounce back.
Frequency guidance: Deep condition after every pool swim. After ocean swims, every 1–2 sessions is typically sufficient unless your hair feels particularly dry. If you swim daily, consider alternating between a protein-based deep conditioner (which repairs structural damage) and a moisture-based one (which hydrates) to avoid over-loading hair with protein, which can cause brittleness.
Common pain points reported by wavy-haired swimmers include neglecting this step due to time pressure — but even a 5-minute deep conditioner applied in the shower immediately after rinsing is significantly better than skipping it entirely.
Troubleshooting Common Swim Hair Problems
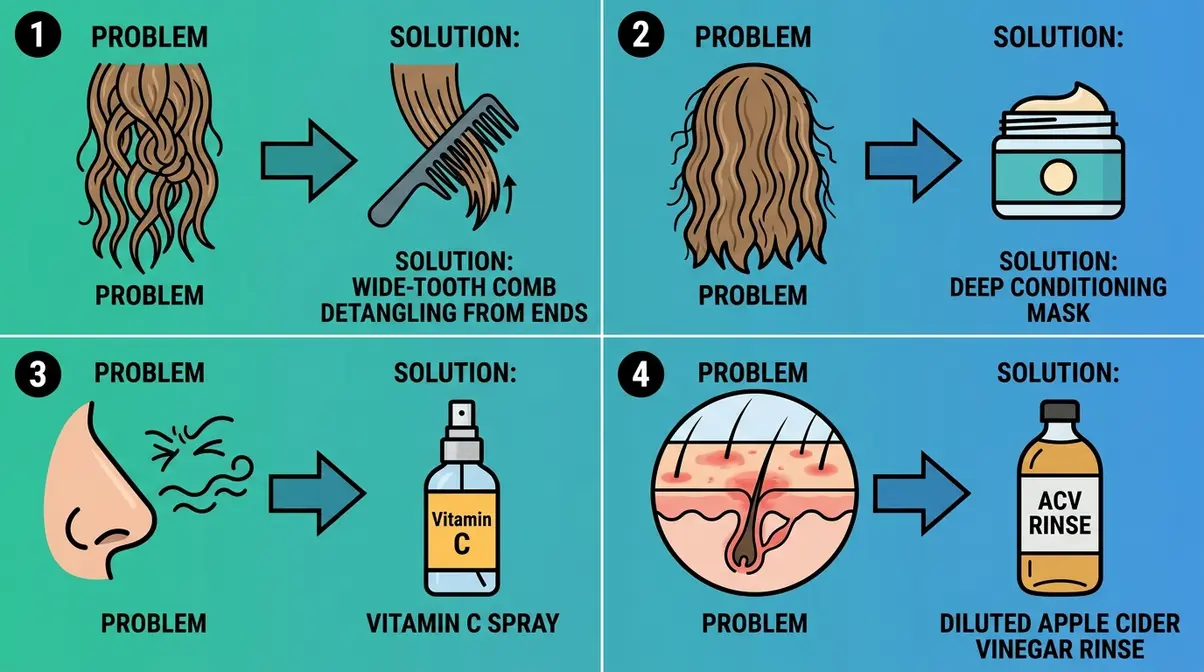
Even with a solid routine in place, issues can still come up — especially when you’re just starting out. Here are the most frequent problems wavy-haired swimmers encounter and how to address them.
Problem: Severe tangles and knots after swimming
This usually means one of two things: either your hair wasn’t fully saturated before swimming, or you’re attempting to detangle dry hair. Always detangle on wet, conditioned hair using a wide-tooth comb — start from the ends and work upward toward the roots. Never pull through a knot from root to tip; this snaps the strand. Applying a detangling spray or extra conditioner before combing reduces friction significantly. User consensus across the r/Swimming community confirms that attempting to comb dry post-swim hair is the single most common cause of breakage.
Problem: Hair still smells of chlorine after washing
If the chlorine scent persists after your clarifying shampoo, your shampoo may not be removing all the bound chlorine. Try the DIY Vitamin C rinse (one teaspoon of ascorbic acid powder dissolved in 250ml water) applied directly to your scalp and hair before shampooing. Leave it for 2 minutes, then shampoo as normal. This pre-treatment neutralises the chlorine chemically before the shampoo attempts to rinse it away mechanically — the combination is far more effective than shampoo alone.
Problem: Waves are limp or undefined after swimming
This is a sign of moisture loss and protein damage building up over multiple sessions. Increase the frequency of your deep conditioning to after every single swim, and consider adding a protein treatment (a conditioner specifically formulated to strengthen hair structure) once every two weeks. Also check that your clarifying shampoo isn’t stripping too aggressively — some formulas are very harsh and can over-strip even with deep conditioning follow-up. Switch to a gentler anti-chlorine shampoo if this is a recurring issue.
Problem: Scalp feels itchy or irritated after pool swimming
Chlorine sensitivity is common. Ensure you’re rinsing your scalp thoroughly for the full 2–3 minutes immediately after swimming. A diluted apple cider vinegar rinse (1 part vinegar to 3 parts water) can help restore the scalp’s natural pH balance after chlorine exposure. If irritation persists beyond 48 hours, consult a dermatologist — persistent scalp irritation may indicate a contact sensitivity that warrants professional assessment.
Can chlorine ruin wavy hair permanently?
Chronic, unprotected exposure to chlorine can cause cumulative damage — including persistent dryness, increased breakage, and loss of wave definition — that becomes harder to reverse over time. However, most chlorine-related damage is not truly permanent if caught early. Consistent use of the Soak-Seal-Restore Method, combined with regular deep conditioning and protein treatments, can restore most wavy hair to healthy condition within 4–8 weeks of starting a protective routine.
Limitations and When This Routine Needs Adjusting
The Soak-Seal-Restore Method is effective for the vast majority of wavy-haired swimmers — but it’s not a universal solution for every situation. Here’s when you may need to adjust your approach.
Common Pitfalls
Skipping the pre-soak because you’re in a hurry is the single most common mistake. Even 60 seconds under a tap is dramatically better than nothing — the sponge effect works even with partial saturation. Build the pre-soak into your poolside routine before your cap goes on.
Using the wrong shampoo type. Some swimmers reach for a moisturising or hydrating shampoo after swimming, thinking it will help with dryness. It won’t remove chlorine. You need a clarifying or anti-chlorine formula for this step — then follow with your moisturising deep conditioner. The two products serve different functions.
Over-applying protein treatments is a less obvious but real problem. If your hair feels stiff, crunchy, or snaps easily, you may have too much protein — a condition called protein overload. Balance protein treatments with moisture-focused conditioning to avoid this.
When to Choose Alternatives
If you swim daily or twice daily (competitive or fitness swimmers), the routine above may not be sufficient on its own. Daily clarifying shampoo use will eventually over-strip even with deep conditioning. In this case, consider: rinsing with plain water after every session and only clarifying 3–4 times per week, while wearing a silicone cap for every swim to reduce exposure. USMS recommends that competitive swimmers treat hair protection as part of their training kit — not an afterthought.
If your hair is chemically treated (colour, bleach, relaxer, or keratin treatment), it starts from a higher baseline of damage and porosity. The same routine applies, but you’ll need to deep condition more frequently and consider a leave-in protein treatment as part of your regular routine. Chemically treated hair is significantly more vulnerable to chlorine damage — the protective barrier step is especially critical.
When to Seek Expert Help
If your hair continues to break, feel brittle, or lose significant wave definition despite following this routine consistently for 6–8 weeks, it’s worth booking a consultation with a trichologist (a specialist in hair and scalp health) or a dermatologist. Persistent damage despite a solid protective routine may indicate an underlying scalp condition, nutritional deficiency, or a level of structural damage that requires professional treatment — such as a keratin bond repair treatment administered in a salon.
Frequently Asked Questions
Does chlorine permanently damage waves?
Chlorine can cause long-term damage to wavy hair if your hair is left unprotected over many sessions. Research published in the International Journal of Trichology shows that chlorine oxidises keratin proteins (the structural building blocks of your hair), progressively increasing porosity and reducing the hair’s ability to retain moisture. However, most chlorine damage is reversible with consistent deep conditioning and protective routines — permanent damage typically only occurs after years of unprotected, high-frequency swimming.
Must I wet my hair before swimming?
Yes — pre-wetting is one of the most evidence-backed steps in swim hair care. The AAD recommends applying conditioner and rinsing hair before swimming to reduce chemical absorption. The mechanism is straightforward: dry hair is highly porous and will absorb pool water rapidly; hair that’s already saturated with clean water has far less capacity to absorb chlorinated water. Studies on hair porosity confirm that absorption happens quickly on contact — a 1–2 minute pre-soak makes a measurable difference.
Is salt water worse than chlorine?
Salt water and chlorine damage hair through different mechanisms — neither is definitively “worse,” but they require the same protective approach. Chlorine strips your hair’s natural oils and oxidises its protein structure. Salt water draws moisture out of the hair shaft through osmosis (a process where water moves from a lower-concentration area to a higher-concentration one), leaving hair dry, brittle, and rough. Trichology research indicates that both cause increased porosity and reduced tensile strength. The Soak-Seal-Restore Method works for both environments.
How often should I deep condition?
Deep condition after every pool swim and after every 1–2 ocean sessions. If you swim more than three times per week, alternate between a moisture-focused deep conditioner and a protein-strengthening treatment to address both hydration loss and structural protein damage. Overusing protein treatments without moisture balance can cause protein overload — making hair feel stiff and prone to snapping. A weekly deep conditioning mask takes only 10–15 extra minutes and produces a noticeable improvement in wave definition and softness within two to three weeks.
Should I use a cap with short hair?
Yes — a silicone swim cap benefits wavy hair of all lengths, including short styles. Even a few centimetres of wavy hair is vulnerable to chlorine damage and post-swim tangles. A silicone cap (rather than latex, which can snag shorter hair) reduces total chlorine exposure regardless of hair length. For very short wavy hair, a standard-size silicone cap will fit well; for medium-to-long wavy hair, look for a “long hair” or “large dome” version. The cap won’t keep your hair completely dry, but it significantly reduces the volume of chlorinated water your strands contact per session.
Protect Your Waves – Starting With Your Next Swim
For wavy-haired swimmers, the Soak-Seal-Restore Method delivers a clear, science-backed answer to the frustration of dry, tangled post-swim hair. Research confirms that chlorine oxidises keratin proteins and increases hair porosity with every unprotected swim (International Journal of Trichology, 2012) — but a consistent 3-phase routine reduces that damage to a manageable level. The three phases — saturate with clean water, seal with a protective barrier, and restore with deep conditioning — work together to protect your waves before, during, and after every session.
The Soak-Seal-Restore Method is worth remembering because it addresses the root cause of swim hair damage, not just the symptoms. Most swimmers try to fix dryness and tangles after the fact; knowing how to protect wavy hair when swimming prevents the majority of damage from occurring in the first place. That’s the difference between reacting to damage and proactively protecting your wave pattern.
Start with your next swim. Pre-soak for two minutes, apply a leave-in conditioner and a small amount of coconut oil, and have your clarifying shampoo and deep conditioner ready for when you get out. Within two to four weeks of consistent practice, most wavy-haired swimmers notice a real improvement in softness, wave definition, and manageability. Your waves are worth protecting — and now you have exactly what you need to do it.

Dave King
Writes evidence-based hair-care guides for Care About Your Hair — for every hair type, jargon-free and independent.