 Dave King
You wash your hair, you condition it, and you still walk out the door looking like you lost a fight with a storm cloud. Sound familiar? If you’ve been searching for a real answer on how to get rid of frizzy hair — not just “use more conditioner” — you’re in exactly the right place.
Here’s the short answer: frizz has three root causes — dehydration, cuticle damage, and humidity. Fix even two of the three, and you get control. This guide gives you a step-by-step plan to do exactly that, from a 5-minute emergency fix you can use right now to permanent salon treatments that last up to six months.
We evaluated techniques across professional hair care communities, cross-referenced dermatological guidance from the AAD and Cleveland Clinic, and structured every step around the questions real people ask. Whether your hair is curly, wavy, straight, fine, or bleach-damaged — there’s a section here built specifically for you.
Learning how to get rid of frizzy hair starts with identifying your root cause first. Frizzy hair is caused by dehydration, cuticle damage, or humidity — most guides only address one. Fix any two and you’ll see a measurable difference.
- The Frizz Triangle: Identify your root cause first — the fix depends entirely on whether your hair is dry, damaged, or humidity-reactive.
- Quick wins exist: The water-and-smooth method and a serum tap technique can tame frizz in under 5 minutes, no products required.
- Long-term options: Keratin treatments, bond-building products, and daily habit changes can reduce frizz permanently — not just today.
- Hair type matters: Curly, wavy, and straight hair need different products and techniques — one-size advice usually fails beginners.
- Nutrition counts: Omega-3 and biotin deficiencies are a frequently missed cause of chronic frizz that no shampoo can fix.
What Causes Frizzy Hair?
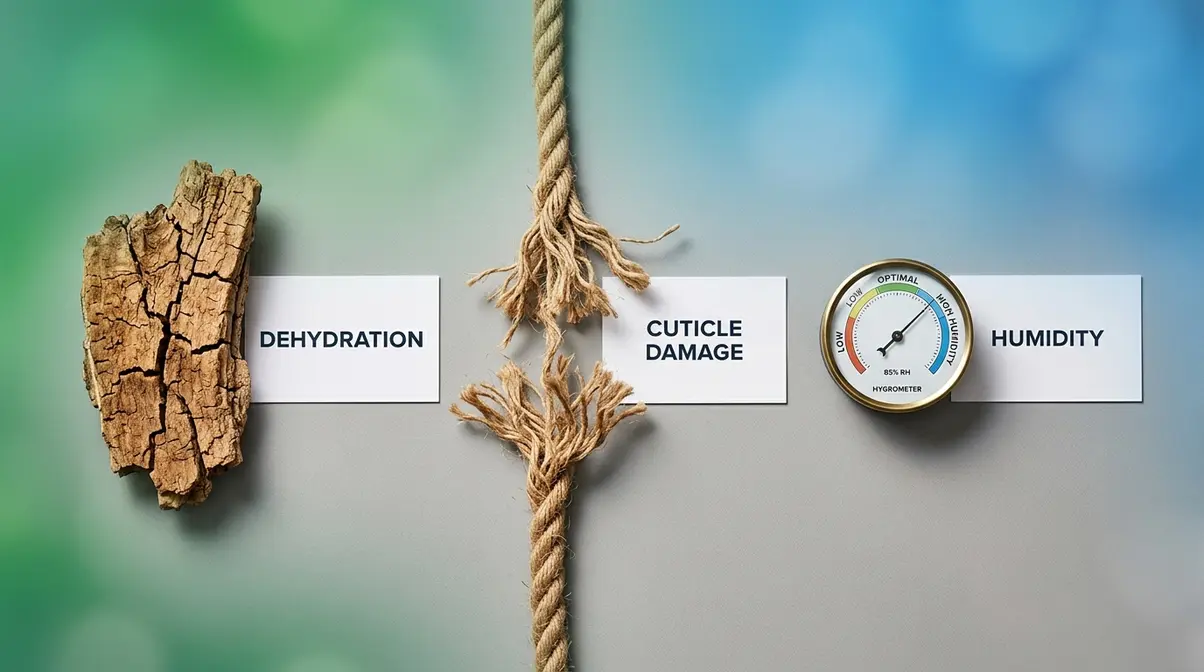
Frizz doesn’t just happen randomly. Before you spend money on products, you must understand the root causes of frizzy hair to know why your hair behaves this way — because the fix for dry, dehydrated hair is completely different from the fix for humidity-swollen strands.
Three Root Causes of Frizz
The Frizz Triangle is a framework for understanding why frizz happens — and why most people never fully solve it. There are exactly three root causes, and most hair care advice only addresses one at a time.
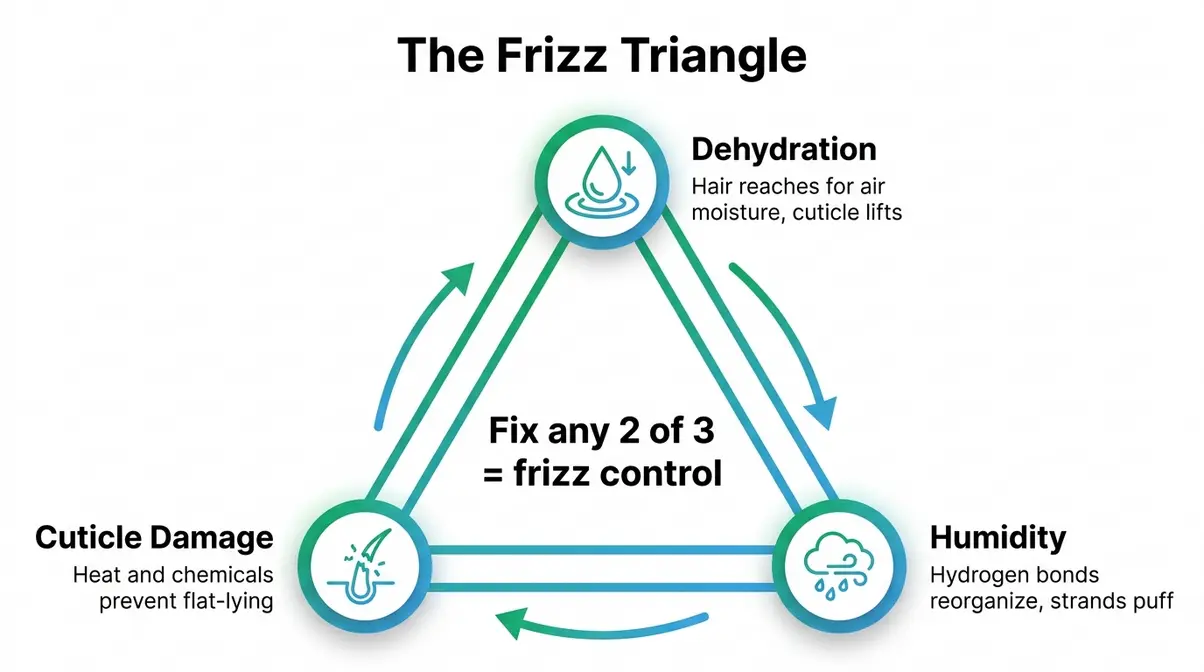
1. Dehydration — Your hair strands are porous, and when they lack moisture, they reach out to absorb water from the surrounding air. This causes the outer layer (the hair cuticle, which is the protective scale-like layer wrapping each strand) to lift and swell unevenly, creating visible frizz. Dehydrated hair often feels rough, tangles easily, and looks dull.
2. Cuticle Damage — Heat styling, bleaching, chemical coloring, and even aggressive towel-drying physically break down the cuticle. Once the cuticle is damaged, it can no longer lie flat — so no amount of moisture will make it smooth. Damaged hair often has split ends, feels rough even after conditioning, and breaks easily.
3. Humidity — Even well-moisturized, healthy hair can frizz in humid conditions. When the air is damp, hair absorbs atmospheric moisture and the hydrogen bonds (the chemical links that determine your hair’s shape) reorganize temporarily, causing strands to puff and separate. Research on hair chemistry from Emory University confirms that hydrogen bond disruption is the primary mechanism behind humidity-triggered frizz.
How to identify your type: If your hair is frizzy even in dry weather → dehydration. If it’s frizzy only after heat styling or coloring → damage. If it’s mostly frizzy on rainy or humid days → humidity.
Signs Your Routine Is Backfiring
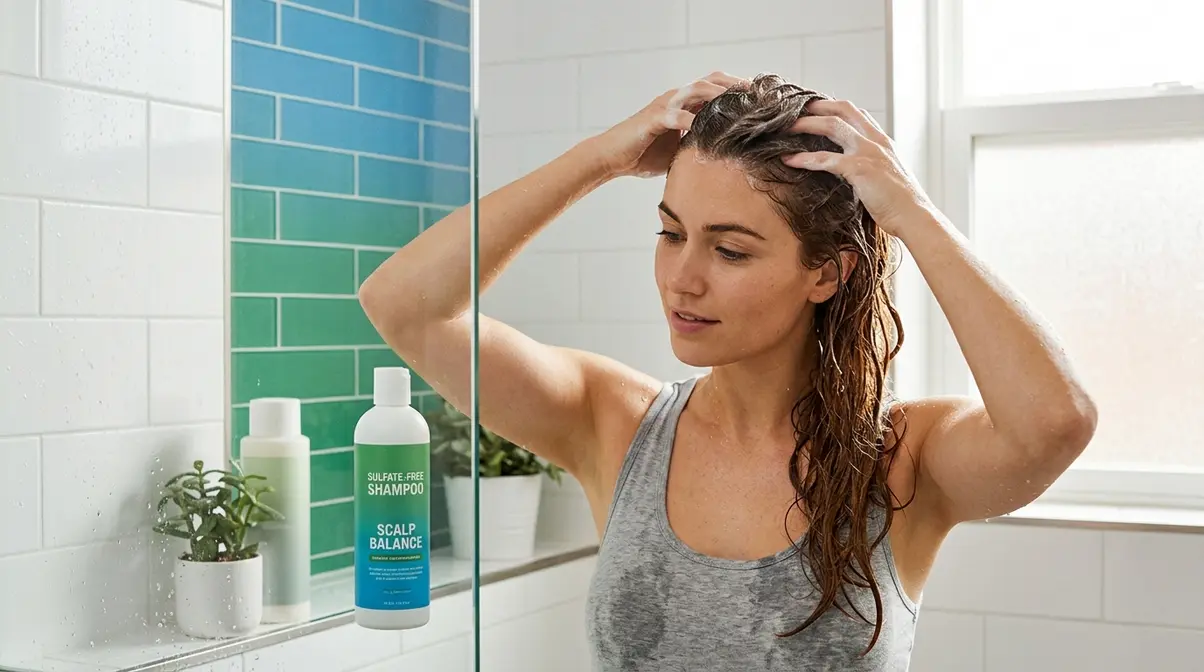
Sometimes the products and habits you think are helping are actively making frizz worse. These are the clearest red flags to watch for:
- Your hair feels dry 24 hours after washing — a sign your shampoo is stripping natural oils.
- Frizz gets worse after towel-drying — regular cotton towels create friction that roughs up the cuticle. The American Academy of Dermatology (AAD) specifically advises against rubbing hair dry with a standard towel.
- You use heat every day without a heat protectant — cumulative cuticle damage builds over weeks, not days.
- Your conditioner stays on for less than 2 minutes — most rinse-out conditioners need 3–5 minutes to penetrate the hair shaft and deliver any real moisture.
- You brush curly or wavy hair when it’s dry — this physically separates clumped strands and creates instant frizz.
Deficiencies Causing Frizz
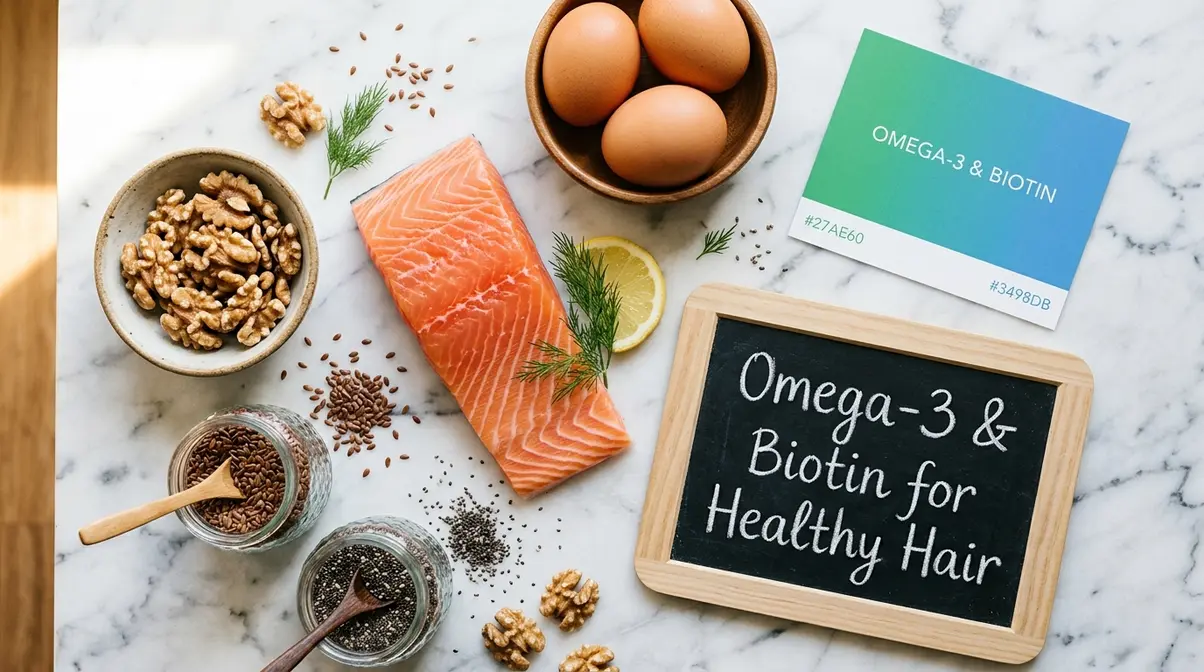
This is one of the most searched questions about frizz — and one that almost no hair care guide addresses. If your hair has been frizzy for months despite a solid routine, nutrition may be the missing piece.
Omega-3 fatty acid deficiency is one of the most well-documented nutritional causes of dry, frizzy hair. Omega-3s help regulate sebum (your scalp’s natural oil) production and maintain the lipid layer that keeps the cuticle sealed. Research published in the National Institutes of Health (NIH) database links low omega-3 intake to dry scalp, brittle strands, and increased hair breakage. Good dietary sources include salmon, walnuts, flaxseed, and chia seeds.
Biotin (Vitamin B7) deficiency can also contribute to frizz by weakening the hair’s protein structure. Biotin supports keratin (the primary structural protein in hair) synthesis. While true biotin deficiency is rare, it does occur in people with restrictive diets or certain medical conditions. A dermatologist can test for both deficiencies with a simple blood panel.
Zinc and iron deficiencies are additional contributors — both affect the hair growth cycle and can result in thin, dry, frizz-prone strands. If you’ve ruled out product and technique issues, a blood test with your doctor is a worthwhile next step.
Step 1: Fix Your Wash Routine
The way you wash your hair sets the foundation for everything else. Many people with chronic frizz are unknowingly creating the problem at the sink before they’ve even started styling. This is especially important if you are following essential summer hair care tips to combat humidity.
Sulfate-Free Shampoo
Sulfates (specifically sodium lauryl sulfate and sodium laureth sulfate) are the foaming agents in most mainstream shampoos. They’re excellent at removing dirt and oil — so effective, in fact, that they strip the natural oils your hair needs to stay moisturized. For frizz-prone hair, this creates a cycle: the shampoo removes protective oils, the hair dries out, and the cuticle lifts to seek moisture from the air.
A sulfate-free shampoo cleans your hair without stripping its protective lipid layer. Look for shampoos that list glycerin (a humectant that draws moisture into the hair shaft), shea butter, or argan oil in the first five ingredients. These ingredients actively contribute to frizz control rather than just cleaning passively.
Brands like Garnier Fructis and Aunt Jackie’s are well-regarded in the frizz-control space for their moisturizing formulas.
How to Apply Shampoo
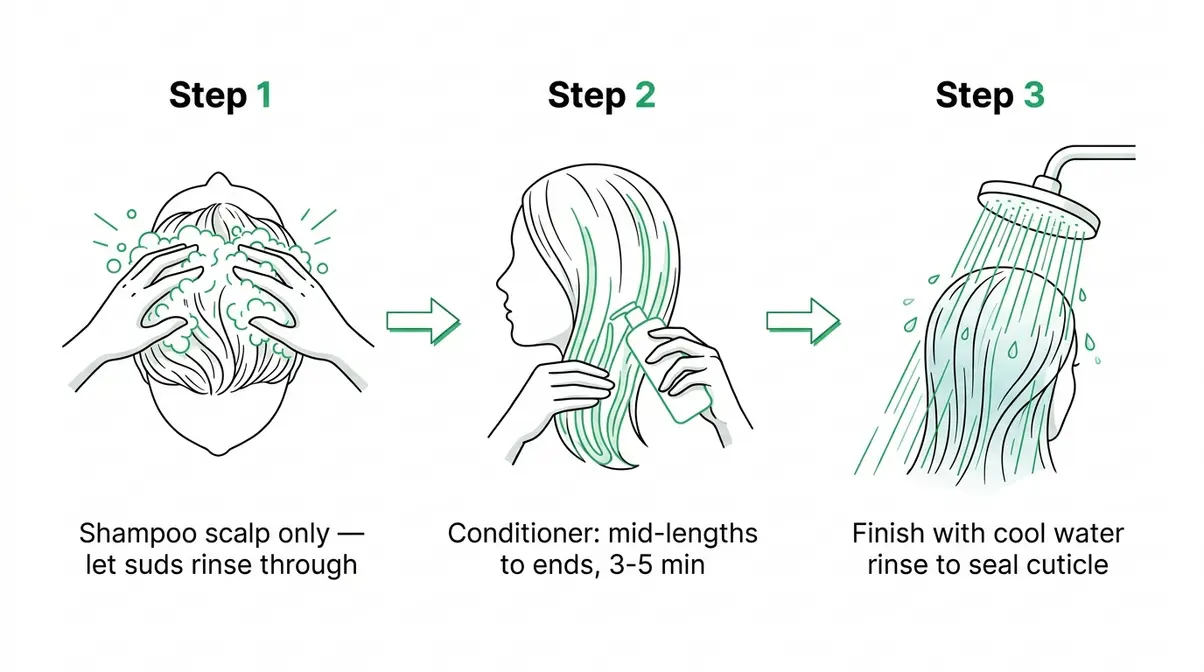
Most people apply shampoo the wrong way for frizzy hair. Rubbing shampoo into the full length of your hair — from roots to ends — creates friction that roughs up the cuticle and tangles strands. The AAD recommends applying shampoo only to the scalp and letting the lather rinse through the lengths naturally as you wash it out.
- Here’s the correct technique:
- Wet hair thoroughly with lukewarm water (not hot — hot water opens the cuticle aggressively).
- Apply a quarter-sized amount of sulfate-free shampoo to your scalp only.
- Massage gently with your fingertips in small circular motions — not your nails, which scratch the scalp.
- Let the suds run down the lengths as you rinse. Do not rub the mid-lengths or ends.
- Finish the rinse with a 10-second burst of cool water to begin closing the cuticle.
The Crucial Conditioning Step
Conditioner is not optional for frizzy hair — it’s the primary moisture delivery system. But the application technique matters as much as the product itself. Hairstylists consistently recommend applying conditioner from the mid-lengths to the ends (not the scalp, which can cause buildup and weigh hair down), squeezing it in gently, and leaving it on for a minimum of 3–5 minutes before rinsing.
For significantly frizzy or dry hair, a deep conditioning mask used once per week is one of the most impactful changes you can make. Deep masks contain higher concentrations of moisturizing and smoothing ingredients than regular conditioner, and they have time to penetrate the cortex (the inner layer of the hair shaft) rather than just coating the surface.
You should now have a wash routine that moisturizes instead of strips. Your hair should feel softer and more manageable immediately after rinsing.
Step 2: Master Your Drying Technique
What you do in the 10 minutes after washing has an outsized effect on frizz. Wet hair is at its most vulnerable — the cuticle is open, strands are fragile, and every decision you make right now is setting the shape for the rest of the day.
Towel Drying Mistakes
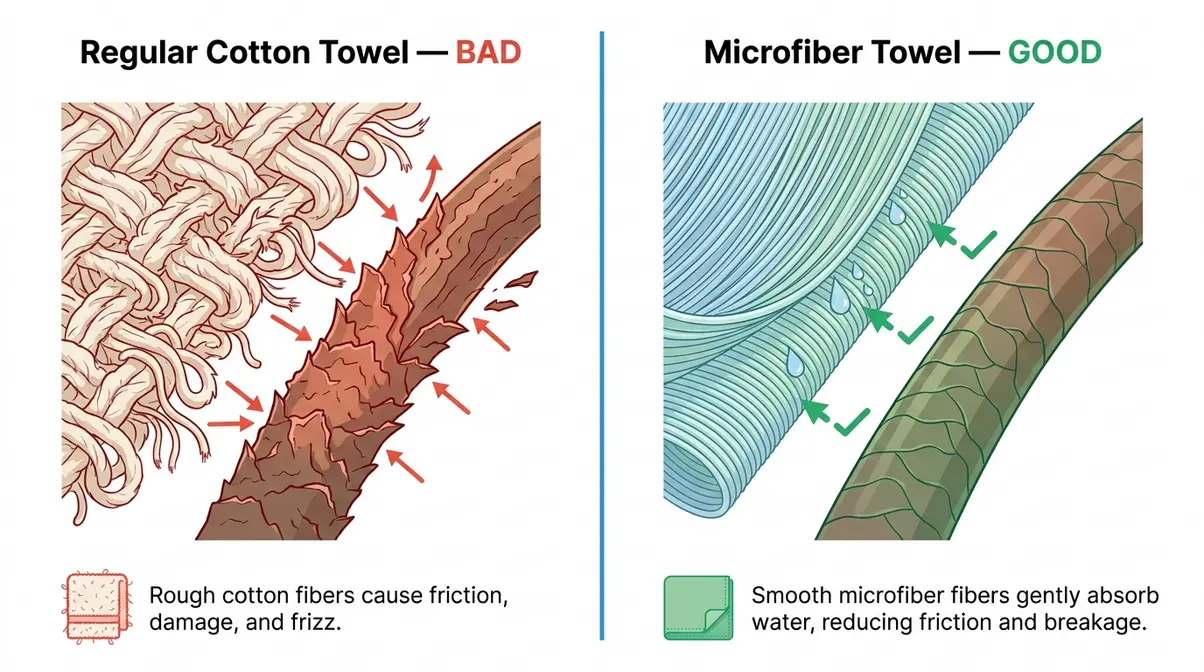
This is one of the most overlooked causes of frizz — and one of the easiest to fix. A standard cotton bath towel has a rough, looped texture. When you rub it over wet hair, it creates significant friction against the open cuticle, physically roughing up the surface and tangling strands. The result is immediate frizz that sets in as hair dries.
The Cleveland Clinic recommends switching to a microfiber towel or an old cotton T-shirt for drying. Microfiber has a much finer weave that absorbs water without creating friction. The correct technique is to scrunch (press and release) rather than rub — work from the ends upward toward the roots, and never scrub side to side. This one swap alone can noticeably reduce post-wash frizz within the first use.
Using a Diffuser Properly
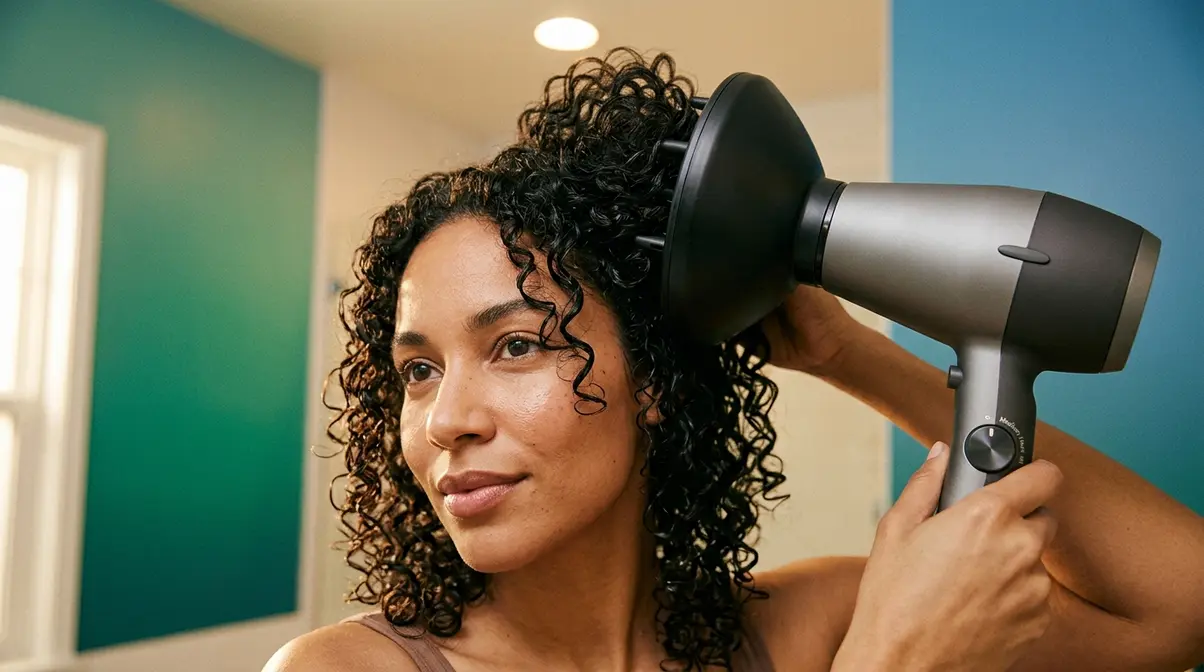
A diffuser is a bowl-shaped attachment for your hair dryer that disperses airflow broadly instead of blasting it at a concentrated point. For curly and wavy hair especially, a diffuser is one of the most effective tools for reducing frizz while drying — it dries hair without disrupting the natural curl pattern or causing flyaways.
- How to diffuse correctly:
- Attach the diffuser to your dryer and set it to medium heat, low speed.
- Flip your head forward and place sections of hair into the diffuser bowl.
- Hold each section against your scalp for 20–30 seconds before moving to the next.
- Finish with a blast of cool air to close the cuticle.
For straight or fine hair, air drying is often the better option — it creates less heat damage and allows smoothing products to set properly. If you must use a regular dryer, always use a heat protectant spray and keep the nozzle moving.
Applying Products to Wet Hair
Timing is everything when it comes to anti-frizz products. Leave-in conditioners, serums, and curl creams all work best when applied to hair that is still wet — not damp, not towel-dried to near-dry, but genuinely wet. This is because wet hair is open and porous, allowing product molecules to penetrate rather than just sitting on the surface.
Apply products in this order: leave-in conditioner first (to seal in moisture), then serum or oil (to smooth the cuticle and add shine), then any styling product like gel or mousse last (to hold the shape). Applying them in reverse order locks in product residue and prevents moisture from reaching the hair shaft.
You should now be drying your hair in a way that protects rather than disrupts the cuticle. Notice less frizz appearing as your hair dries.
Step 3: Pick the Right Products for Your Hair Type
Generic anti-frizz advice fails beginners because it treats all frizzy hair as identical. The products and techniques that work for tight coils will actively make fine straight hair look greasy and limp. This section matches you to the right approach.
Best Anti-Frizz Ingredients
Not all moisturizing ingredients are equal. Here’s what the research and professional hair communities consistently identify as the most effective for frizz control:
| Ingredient | What It Does | Best For | Avoid If |
|---|---|---|---|
| Glycerin | Draws moisture from air into hair shaft | All types in moderate humidity | High humidity (can cause extra swelling) |
| Argan Oil | Smooths cuticle, adds shine, reduces static | Fine to medium hair | Very thick or coarse hair (may not penetrate) |
| Shea Butter | Deep moisturizes, seals cuticle | Thick, coarse, or curly hair | Fine hair (can weigh down) |
| Keratin | Fills in damaged cuticle gaps, strengthens | Bleached, heat-damaged, or color-treated | Healthy hair (unnecessary) |
| Coconut Oil | Penetrates shaft, reduces protein loss | Dry, porous hair | Low-porosity hair (sits on surface) |
| Silicones | Instant smoothing, humidity barrier | All types for short-term smoothness | Daily use without clarifying (builds up) |
Solutions for Curly Hair
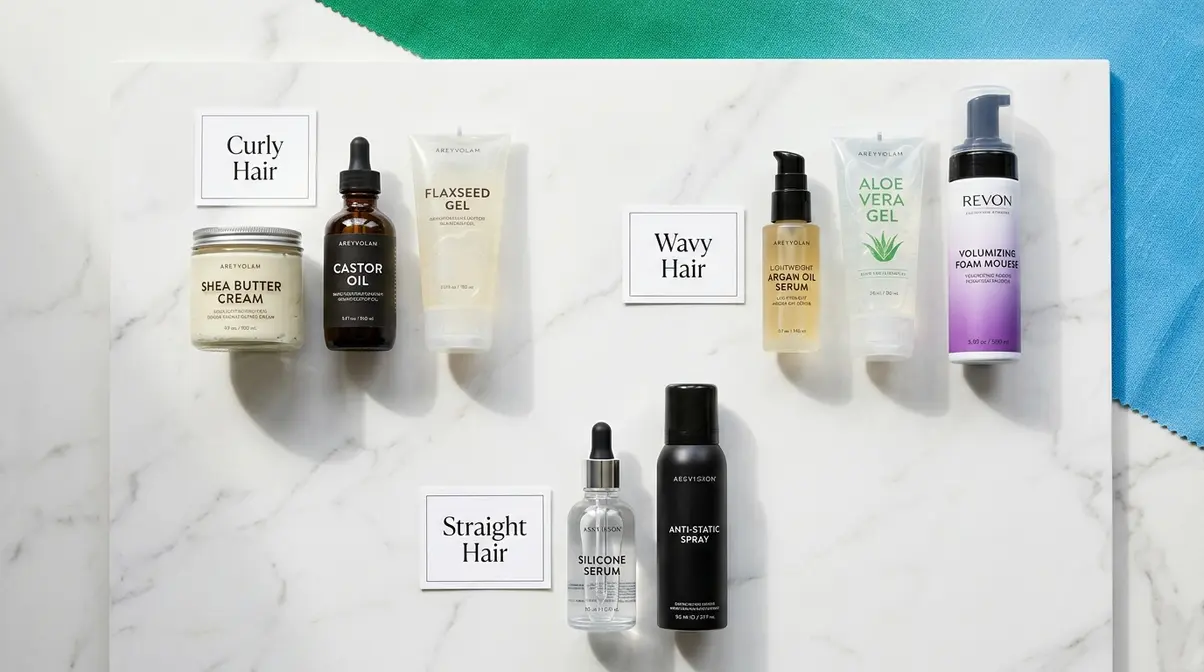
Curly hair (Type 3a–4c) is naturally drier than straight hair because the twists and bends of each strand make it harder for scalp oils to travel down the shaft. The best approach combines moisture-first products with curl-definition techniques.
Look for products with shea butter, castor oil, or flaxseed gel — these provide both moisture and hold without stiffening curls. The Curly Girl Method (CGM) — avoiding sulfates, silicones, and heat — has strong community support across professional curl communities and works particularly well for Type 3–4 hair. Apply a leave-in conditioner to soaking-wet hair, scrunch in a curl cream, and diffuse on low heat for best results.
Explore our curly hair styling guide for a full deep-dive on curl typing and product layering.
Solutions for Wavy Hair
Wavy hair (Type 2a–2c) sits between straight and curly, and it’s the most prone to being weighed down by heavy products. The goal is moisture without heaviness — lightweight serums and mousses outperform thick creams and butters for most wavy hair types.
Look for lightweight argan oil serums, aloe vera gels, and foam mousses that enhance wave definition without flattening. Apply products in sections to soaking-wet hair, scrunch upward to encourage wave formation, and air dry whenever possible. If you want to care for your waves properly, avoid brushing wavy hair when dry — this separates waves into frizz instantly.
Solutions for Straight Hair
Straight, fine hair has the least natural texture to work with, and most frizz advice ignores it entirely. Fine hair frizzies because of flyaways (short, broken strands that stand away from the main hair), static, and humidity-induced swelling.
The most effective tools for fine straight hair are lightweight silicone-based serums (used sparingly — one or two drops), ionic hair dryers (which reduce static by neutralizing the positive charge in dry hair), and anti-static finishing sprays. Avoid heavy oils and butters — even a small amount will make fine hair look greasy rather than smooth.
You should now have a clear product strategy matched to your hair type. Pick one product from your category and test it for two full weeks before judging results.
Step 4: How to Get Rid of Frizzy Hair in 5 Minutes
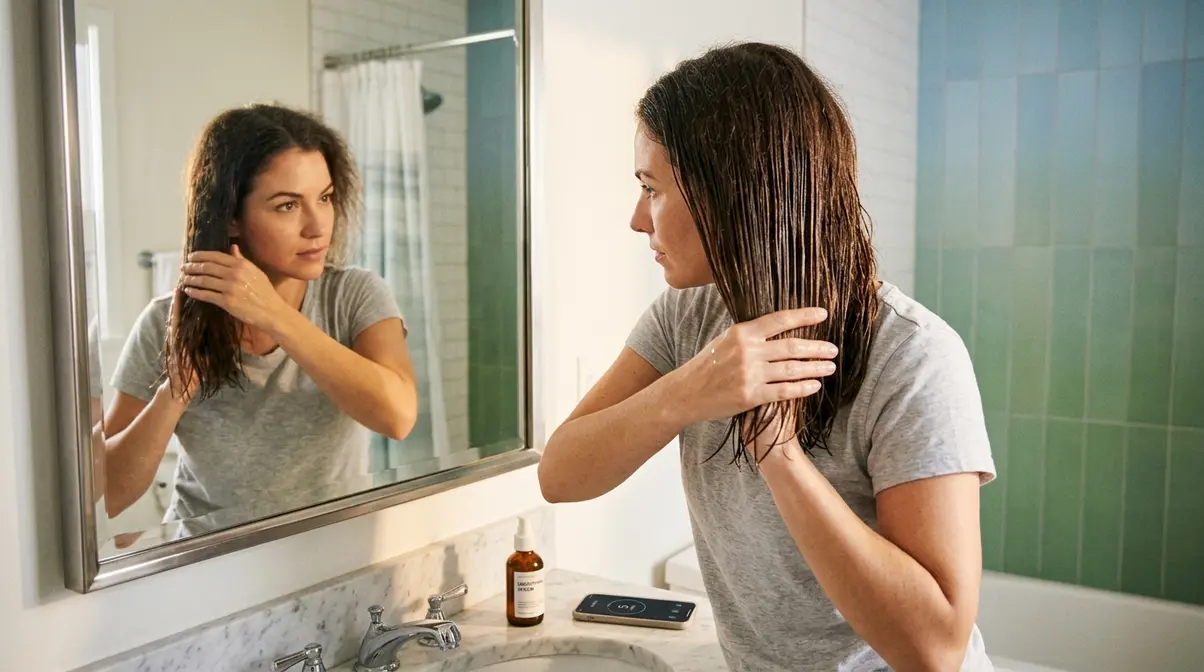
Sometimes you don’t have time for a full routine. These three techniques address immediate frizz emergencies — the kind that happen when you’re already dressed and about to walk out the door.
Water-and-Smooth Method
This technique requires nothing but water and your hands — making it the fastest possible frizz fix. It works best for surface frizz and flyaways on straight and wavy hair.
- Wet your palms under the tap — not dripping, just damp.
- Press your palms flat against the top of your head where frizz is concentrated.
- Smooth firmly downward from roots to ends in one continuous motion.
- Repeat 2–3 times, re-wetting your palms each time.
- Finish by pressing flyaways flat with your fingertips.
Why it works: the small amount of water temporarily re-moisturizes the lifted cuticle and smooths it flat. The effect lasts 1–3 hours, making this ideal for a quick fix before a meeting or event.
Quick-Fix Serum Technique
If you are debating hair oil vs serum, a frizz serum (a lightweight, silicone-based liquid designed to coat and smooth the hair cuticle) is the fastest product-based fix available. The technique matters as much as the product:
- Dispense 1–2 drops into your palm — resist the urge to use more, especially on fine hair.
- Rub both palms together briskly for 3 seconds to warm the serum (this makes it spread more evenly).
- Glide your palms over the mid-lengths and ends of your hair — avoid the roots.
- Use your fingertips to press individual flyaways flat against your head.
- Do not comb or brush after applying — this redistributes the product unevenly and creates new frizz.
Wella Professionals and other salon brands note that the warming step is the most commonly skipped — and the most important for even distribution.
Taming Halo Frizz
Halo frizz — the crown of fine, lifted strands that creates a fuzzy halo around the top of your head — is one of the most common and frustrating specific complaints. It’s caused by a combination of shorter broken strands at the crown (from hair ties, friction with pillowcases, or breakage) and dryness at the roots.
“I always have this frizz at the top of my head and roots. This is my hair freshly washed and air dried. What can I do to stop this?”
This is one of the most common questions we hear — and it has a specific answer. For halo frizz:
- Use a soft-bristle toothbrush or dedicated edge brush lightly spritzed with hairspray to smooth the crown hairs flat.
- Apply a small amount of a light pomade or wax to your fingertips and press the crown hairs down gently.
- Switch to a silk or satin pillowcase — cotton pillowcases create friction that breaks the fine hairs at the crown overnight, producing new halo frizz every morning.
- Avoid pulling hair into tight ponytails at the crown — this stresses and breaks the shorter hairs that become the halo.
You should now have at least one reliable 5-minute fix in your toolkit. Test the water-and-smooth method today — it works immediately.
Step 5: Natural and At-Home Frizz Remedies
If you prefer to avoid heavy chemical products, several natural remedies have solid evidence behind them. These work best as part of a routine rather than as one-time fixes.
Coconut Oil Pre-Wash
Coconut oil is one of the few natural oils that actually penetrates the hair shaft rather than just coating the surface. A study published in the Journal of Cosmetic Science (cited in PubMed) found that coconut oil significantly reduces protein loss in both undamaged and damaged hair — making it particularly useful for frizz caused by dehydration and mild damage.
- How to apply:
- Warm 1–2 tablespoons of virgin coconut oil in your palms until liquid.
- Apply to dry hair, focusing on the mid-lengths and ends (avoid the scalp if you’re acne-prone).
- Cover with a shower cap and leave for 30–60 minutes (or overnight for very dry hair).
- Wash out with your sulfate-free shampoo — you may need two shampoo cycles to remove it fully.
- Condition as normal afterward.
Use this treatment 1–2 times per week. Results are cumulative — expect to see noticeable improvement after 3–4 treatments.
Apple Cider Vinegar Rinse
An apple cider vinegar (ACV) rinse works through a simple chemistry principle: hair and scalp have a naturally acidic pH (around 4.5–5.5), and many shampoos and hard water deposits leave an alkaline residue that lifts the cuticle. An ACV rinse rebalances the pH, causing the cuticle to lie flatter and reflect more light — producing smoother, shinier hair.
- How to use:
- Mix 1 tablespoon of ACV with 1 cup of water.
- After shampooing and conditioning, pour the mixture over your hair.
- Leave it on for 1–2 minutes (the smell dissipates completely when dry).
- Rinse thoroughly with cool water.
Use once per week. This works especially well in areas with hard tap water, which is a surprisingly common cause of persistent frizz and dullness.
DIY Hydrating Hair Masks
Homemade hair masks can deliver serious moisture when used consistently. You can also explore an aloe vera hair care guide for more plant-based hydration options. These three combinations are the most evidence-supported for frizz reduction:
- Avocado + honey mask: Avocado provides fatty acids that mimic the hair’s natural lipid layer; honey is a natural humectant. Blend half an avocado with 2 tablespoons of honey, apply to damp hair, leave for 20 minutes, rinse thoroughly.
- Egg + olive oil mask: Eggs provide protein that temporarily fills cuticle gaps; olive oil seals moisture in. Mix 1 egg with 2 tablespoons of olive oil, apply to dry hair, leave for 15–20 minutes, rinse with cool water (hot water cooks the egg).
- Yogurt + coconut oil mask: Yogurt contains lactic acid that gently smooths the cuticle; combined with coconut oil’s penetrating moisture, this is excellent for color-treated frizzy hair. Mix 3 tablespoons of plain yogurt with 1 tablespoon of coconut oil, apply to damp hair, leave for 20 minutes, rinse.
You should now have at least one natural remedy to try this week. The coconut oil pre-wash is the most evidence-backed starting point.
Step 6: How to Repair Damaged, Frizzy Hair
If your frizz is caused by damage — from bleaching, heat styling, chemical processing, or even aggressive brushing — moisturizing products alone won’t fully fix it. Learning how to care for damaged hair means prioritizing structural repair, not just surface conditioning.
Protein Treatments
Bleaching and heat styling break down the disulfide bonds (the chemical links that give hair its strength and shape) within the hair cortex. When these bonds are weakened, the hair shaft becomes porous, uneven, and prone to absorbing atmospheric moisture — creating frizz that no amount of conditioner can smooth.
Protein treatments work by temporarily filling in the gaps in the damaged cuticle with hydrolyzed proteins (proteins broken into small enough molecules to enter the hair shaft). Look for products containing hydrolyzed keratin, wheat protein, or rice protein.
Apply protein treatments once every 4–6 weeks — not more frequently. Over-proteinating hair (too many protein treatments) causes a different problem: brittleness and breakage. The goal is balance between protein and moisture.
Handling Frizzy Split Ends
Split ends cannot be repaired — the hair structure at a split end is permanently separated, and no product can fuse it back together. What products can do is temporarily seal the split, reducing frizz and preventing the split from traveling further up the shaft until your next cut.
Products marketed as “split end serums” or “bond repair treatments” use silicones and bonding agents to coat and seal the frayed ends temporarily. They’re worth using between cuts, but the only permanent solution is a trim. Dermatologists and hairstylists consistently recommend trimming ½ inch every 6–8 weeks for frizz-prone, damaged hair to prevent split ends from worsening.
Bond-Building Products
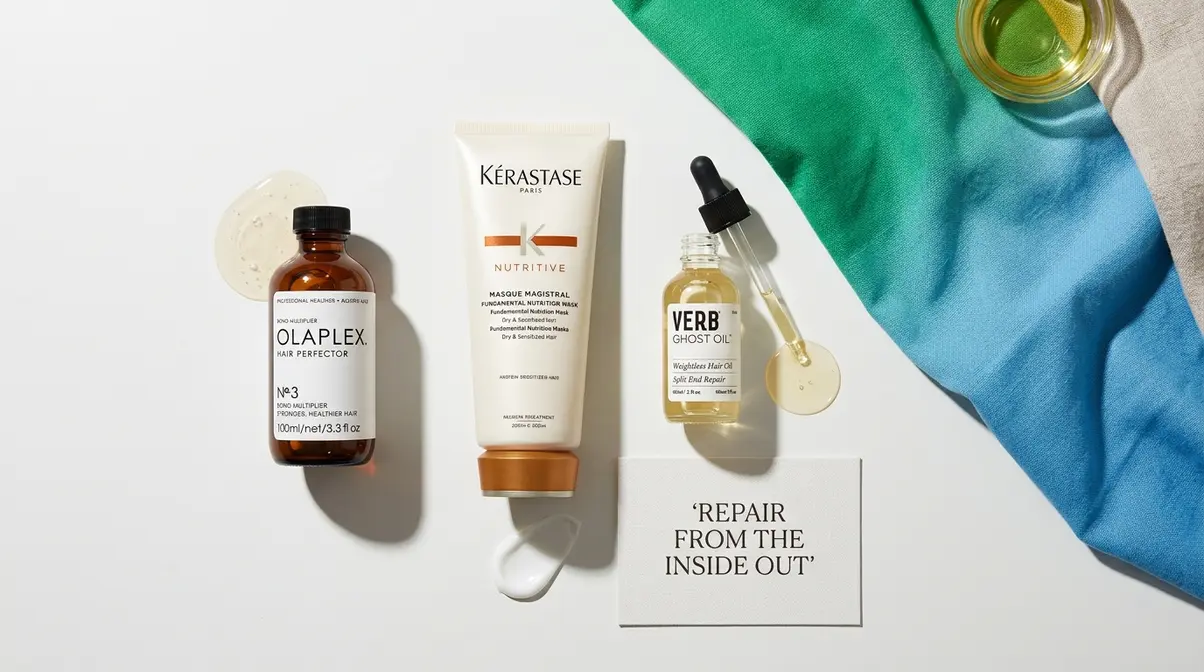
Bond-building treatments (the most well-known brand being Olaplex, though several alternatives exist) work at the molecular level to repair the broken disulfide bonds inside the hair shaft — not just coat the surface. This makes them fundamentally different from standard conditioners and protein treatments.
- When to use bond builders:
- After bleaching or lightening services
- After a relaxer or chemical perm
- When hair feels gummy, stretchy, or elastic when wet (a sign of severe bond damage)
- As a preventative treatment before any chemical service
Bond builders are available in professional salon versions (applied during chemical services) and at-home maintenance versions (used weekly in the shower). They’re more expensive than standard treatments, but for genuinely damaged hair, they address a cause that nothing else reaches.
You should now understand whether your frizz is surface-level or structural. If your hair feels rough even after deep conditioning, protein or bond repair is likely the missing step.
Step 7: Long-Term and Permanent Frizz Solutions
For people who are exhausted by daily frizz management, longer-lasting solutions exist — ranging from professional salon treatments to lifestyle habit changes that reduce frizz at the source.
Comparing Salon Treatments
When exploring professional hair treatments, hairstylists frequently recommend one of these three options, but rarely explain the differences clearly. Here’s what you need to know:
| Treatment | How It Works | Cost (US) | Longevity | Damage Risk | Best For |
|---|---|---|---|---|---|
| Keratin Treatment (Brazilian Blowout) | Coats hair with liquid keratin, sealed with heat; reduces frizz and adds smoothness | $150–$450 | 3–6 months | Low–Medium | Frizzy, wavy, or curly hair wanting smoothness without full straightening |
| Hair Botox | Deep conditioning treatment with proteins, hyaluronic acid, and vitamins; no formaldehyde | $100–$300 | 2–4 months | Very Low | Dry, frizzy, or damaged hair; safe for color-treated and fragile hair |
| Japanese Straightening (Thermal Reconditioning) | Permanently restructures hair bonds using chemicals + heat; results are irreversible until new growth | $450–$1,000+ | Permanent (until new growth) | High | Naturally curly or wavy hair wanting permanent straightening; not for bleached hair |
Important FDA note: Some keratin treatments contain formaldehyde or formaldehyde-releasing chemicals. The FDA has flagged these as a health concern, particularly for salon workers with repeated exposure. Always ask your stylist specifically whether the formula is formaldehyde-free before booking.
At-Home Keratin Kits
At-home keratin kits are available at drugstores and online, typically ranging from $20–$80. They use a milder version of the salon formula and are applied with a flat iron at home. Results are noticeably less dramatic and last approximately 4–6 weeks rather than months.
- Before you try one, be aware:
- Read the ingredient list carefully — some at-home kits still contain formaldehyde-releasing agents (look for “methylene glycol” on the label, which converts to formaldehyde when heated).
- Do a strand test first — apply the product to a small hidden section and follow the instructions fully before doing your whole head.
- Do not use on bleached or heavily processed hair without a professional consultation — the combination of chemicals can cause severe breakage.
Daily Habits to Reduce Frizz
These habits won’t produce overnight results, but consistently applied over 4–8 weeks, they create a measurable baseline reduction in frizz:
- Sleep on a silk or satin pillowcase — reduces friction and mechanical breakage overnight, which is a primary cause of halo frizz and flyaways.
- Detangle with a wide-tooth comb on wet hair only — dry detangling causes breakage that contributes to long-term frizz.
- Avoid heat styling more than 2–3 times per week — cumulative heat damage is one of the most common causes of chronic frizz.
- Use a leave-in conditioner daily — even on non-wash days, a small amount on the ends prevents moisture loss.
- Drink adequate water — chronic mild dehydration affects scalp oil production and hair moisture levels from the inside.
You should now have a long-term plan beyond your daily routine. Even one of these habit changes, applied consistently, will produce visible results within a month.
Frizz Control for Men
Most frizz advice is written for long hair and ignores men entirely. But men’s hair has its own specific frizz patterns — and the fixes are slightly different.
Men’s Frizz Differences
Men’s hair tends to be cut shorter and washed more frequently than women’s — both of which affect frizz patterns. Shorter hair is more susceptible to static frizz (especially in dry climates) and cowlick-driven frizz (where hair grows in conflicting directions). Frequent washing strips natural oils more aggressively, increasing dryness.
Men with curly or wavy hair face the same cuticle and humidity challenges as anyone else, but often lack the product knowledge to address them because most product marketing targets women. According to Healthline’s hair care guidance, men with naturally curly or coily hair benefit most from the same sulfate-free, moisture-first approach — just with lighter-weight products suited to shorter lengths.
3-Step Routine for Men
Finding the best hair care products for men often means looking for lighter-weight formulas. This routine takes under 5 minutes and works for all men’s hair types:
Step 1: Wash with a moisturizing, sulfate-free shampoo — even if your hair is short, sulfate-based shampoos strip natural oils and create the dryness that causes frizz. Wash 3–4 times per week maximum (daily washing is a primary cause of chronic dryness in men’s hair).
Step 2: Dry gently — use a microfiber towel or press dry with a regular towel rather than rubbing. For curly or wavy men’s hair, scrunch rather than towel-rub.
Step 3: Apply a pea-sized amount of product — for short straight hair, a light pomade or styling cream works best. For curly or wavy men’s hair, a small amount of curl cream or light serum applied to damp hair defines texture and reduces frizz simultaneously.
You should now have a men’s-specific routine that fits into a normal morning. Start with just the shampoo swap — that alone will reduce dryness within two weeks.
Common Mistakes and When to Get Help
Even with the right products and intentions, certain habits consistently undermine frizz control. Recognizing these mistakes is as important as learning the correct techniques.
5 Anti-Frizz Mistakes
1. Applying anti-frizz serum to dry hair — Serums are designed to seal moisture into the hair shaft. Applied to dry hair, they have no moisture to seal and simply sit on the surface, adding greasiness without smoothing frizz.
2. Using too much product — More product does not mean less frizz. Overloading causes buildup that weighs hair down, dulls shine, and paradoxically increases frizz over time by blocking moisture penetration.
3. Skipping heat protectant before styling — A single blow-dry session at high heat can raise the cuticle enough to cause frizz for days afterward. Heat protectant sprays form a thermal barrier that prevents this.
4. Washing hair with hot water — Hot water aggressively opens the cuticle. Washing in lukewarm water and finishing with a cool rinse is one of the simplest and most effective frizz-control habits you can build.
5. Using a clarifying shampoo too frequently — Clarifying shampoos are designed to remove product buildup, but they’re very stripping. Using one more than once every 2–3 weeks removes the natural oils that protect against frizz.
When to See a Professional
Most frizz responds to the techniques in this guide within 4–8 weeks. However, some situations warrant professional evaluation:
- Sudden onset frizz — If your hair has become dramatically frizzy over a short period without a change in routine, this can indicate a medical condition affecting hair texture, including thyroid disorders or hormonal changes. A dermatologist can rule these out with a blood panel.
- Significant hair loss alongside frizz — This combination is a red flag for nutritional deficiency, alopecia, or scalp conditions that need medical treatment, not just better products.
- Hair that feels gummy, stretchy, or breaks constantly when wet — This indicates severe bond damage. A professional stylist should assess whether at-home repair is sufficient or whether a professional bond-building treatment is needed before further styling.
- Scalp issues (persistent flaking, itching, or redness) — These are scalp health issues that affect hair quality and need dermatological treatment.
Frequently Asked Questions
Main Causes of Frizzy Hair
Frizzy hair has three main causes: dehydration, cuticle damage, and humidity. Dehydrated strands reach for moisture from the surrounding air, causing the outer cuticle layer to lift and swell. Cuticle damage from heat, bleaching, or chemical processing prevents the hair from lying flat even when moisturized. Humidity causes hydrogen bonds in the hair shaft to reorganize, making strands puff and separate. Most people deal with a combination of two or three of these simultaneously.
5-Minute Frizz Fixes
The fastest frizz fix requires nothing but water: dampen your palms and smooth them firmly from roots to ends, repeating 2–3 times. This temporarily re-seals the lifted cuticle. For a product-based fix, dispense 1–2 drops of frizz serum onto your palms, rub them together to warm the product, and glide over mid-lengths and ends — avoid roots. Both methods work within 60–90 seconds and last 1–3 hours. The serum method provides longer-lasting results.
Natural Frizz Removal
Natural frizz remedies work best as weekly treatments rather than instant fixes. Coconut oil, applied as a pre-wash treatment for 30–60 minutes, penetrates the hair shaft and reduces protein loss — research published in PubMed confirms its effectiveness compared to mineral and sunflower oils. An apple cider vinegar rinse (1 tablespoon in 1 cup of water) rebalances hair’s pH and smooths the cuticle. DIY masks using avocado, honey, or egg provide deep moisture and temporary protein repair.
Hairstylist Recommendations
Professional hairstylists most commonly recommend three things: switching to a sulfate-free shampoo, using a deep conditioning mask weekly, and applying products to wet (not damp) hair. For clients wanting longer-lasting results, keratin treatments are the most frequently recommended salon service — they reduce frizz for 3–6 months (according to FDA guidelines on smoothing treatments) and work on all hair types. For severely damaged frizzy hair, stylists increasingly recommend bond-building treatments (such as Olaplex) used regularly between salon visits.
Deficiencies and Frizz
Omega-3 fatty acid and biotin (Vitamin B7) deficiencies are the two most commonly linked nutritional causes of frizzy hair. Omega-3s regulate scalp oil production and maintain the lipid layer that keeps the hair cuticle sealed — deficiency leads to dry, frizzy strands. Biotin supports keratin synthesis, and insufficient levels weaken hair’s protein structure. Zinc and iron deficiencies can also contribute. If your frizz persists despite a solid hair care routine, ask your doctor for a blood panel to check these levels.
Quickest Frizz Fixes
The quickest fixes for frizzy hair are the water-and-smooth method (no products, 60 seconds), a frizz serum applied to warm palms (60–90 seconds), and pressing halo frizz flat with a soft-bristle brush lightly spritzed with hairspray. For overnight improvement, sleeping on a silk or satin pillowcase prevents the friction-based breakage that creates new frizz every morning. Anti-static finishing sprays work instantly for flyaways caused by static electricity, which is especially common in dry winter air.
Immediate Defrizzing
To immediately defrizz hair, apply 1–2 drops of a silicone-based serum to warm palms and smooth over the mid-lengths and ends — this takes under 90 seconds and works on all hair types. For curly hair, scrunch a small amount of curl cream into already-styled hair to reactivate and smooth the curl pattern. A light mist of water followed by gentle palm-smoothing works for any hair type when no product is available. Avoid combing or brushing after applying any of these — it redistributes the product and reintroduces frizz.
Can Frizzy Hair Become Silky?
Frizzy hair can become significantly smoother and more manageable, but whether it becomes “silky” depends on the underlying cause. Hair that is frizzy primarily due to dehydration responds dramatically to consistent moisturizing routines — many people achieve near-silky results within 4–8 weeks. Hair that is frizzy due to damage can improve substantially with bond-building treatments and protein repair, but permanently damaged sections will not fully recover until they grow out. For the most dramatic transformation, professional keratin treatments or Japanese straightening can produce silky results that last months.
Your Frizz-Free Hair Plan Starts Here
Understanding how to get rid of frizzy hair is one of the most frustrating hair challenges precisely because it feels unpredictable — but it isn’t. The Frizz Triangle makes it predictable: identify whether your frizz is driven by dehydration, cuticle damage, or humidity, and you know exactly which steps to prioritize.
For most beginners, the highest-impact starting point is the wash routine — switching to a sulfate-free shampoo and using a weekly deep conditioning mask will address the dehydration corner of The Frizz Triangle within weeks. Add a microfiber towel, apply products to wet hair, and you’ve addressed the technique side of cuticle damage in a single afternoon.
Start with one change today. The water-and-smooth method costs nothing and works in 60 seconds — try it this morning. Then build toward a full routine over the next two weeks, one step at a time. For more targeted guidance on your specific hair texture, explore our comprehensive hair care guides for step-by-step instructions tailored to your hair type.

Dave King
Writes evidence-based hair-care guides for Care About Your Hair — for every hair type, jargon-free and independent.